Component testing is relatively new and marked as an experimental feature of Playwright, implemented in 2022 with the release of version 1.22.0. Before this, testers had to use other frameworks to test components of their web applications.
Now, Playwright component testing is available for front-end software frameworks like React, Vue, Solid, and Svelte. This function allows creating test cases to test components of the user interface without the need to navigate through the entire page.
At first, let’s provide an explanation:
What is the component?
Components are independent and reusable bits of code. They serve the same purpose as Javascript functions but work in isolation and return HTML via a render() function.
Components come in two types:
- class components
- function components
Preparation for Component Testing with Playwright
A few words about the Playwright test framework itself. Playwright is an open-source tool used for cross-platform and cross-browser testing of web applications using a single API. It emerged in 2020 but has already gained a large target audience.
👉 Click the link to read our other article: Playwright VS Selenium: The Evolution of Dominance Can Selenium Make a Comeback?
Until recently, it was mainly used for running end-to-end tests, but now QA Automation teams actively use this framework for testing components of React, Svelte, Solid, and Vue applications.
What is component testing?
Component testing is a type of software testing that focuses on verifying autonomous units of a software product – components. What is the components, hope you have read above ⬆️
This QA process should not be confused with unit tests, which also aim to test individual parts of code (modules) in isolation. However, unlike unit tests, component tests verify larger parts of an application, which often consist of multiple modules.
Prerequisites
Before starting with component testing, make sure all the prerequisites are met. These include:
- Node.js v16
- npm package manager (comes with Node.js) or yarn. You can check the version before
- a development environment or IDE with JavaScript support – for example, Visual Studio Code
npx create-react-app component-first-appIf you do not have a JavaScript application, you can easily create a React basic App to see how everything works 👀
npm start
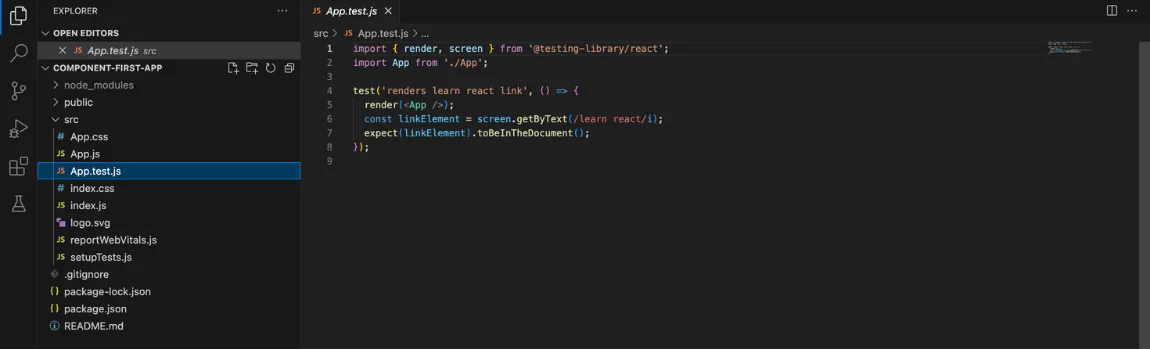
By default, our basic test application works with the React testing-library, you can see it if open App.test.js file in the React project tree.
But below we consider the Playwright Component testing option step by step.
Steps to Work with Playwright
To start with Playwright component testing, you need to perform several actions. Let’s go through them using a React project as an example:
#1. Install Playwright
Install Playwright Test in an existing project on the appropriate platform – in our case, React.
To do this, enter the following command in the terminal:
npm init playwright@latest -- --ctYou will also need to answer questions about the platform and programming language you are using.
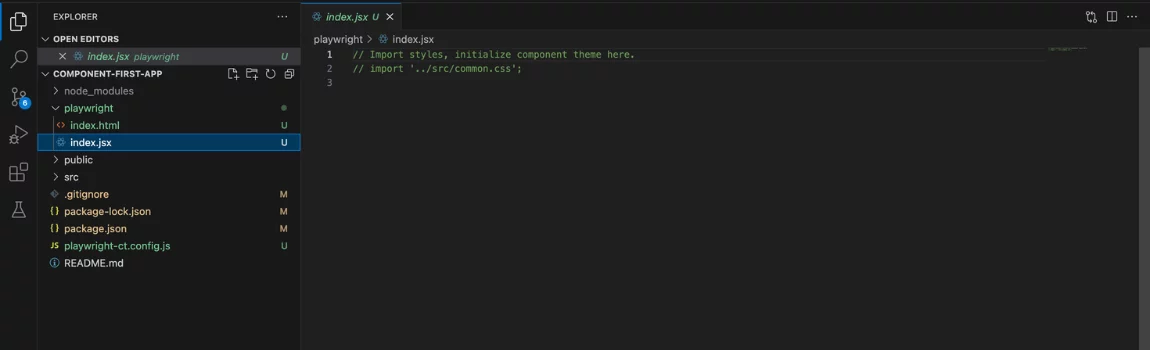
After this, several files will be created in your workspace:
- index.html – a file that the test framework will use for rendering and mounting components;
<html lang="en"> <body> <div id="root"></div> <script type="module" src="./index.js"></script> </body> </html> - index.js – a file that allows you to include styles, apply themes, or inject code into the page where the component will be mounted.
- playwright-ct.config.js – a configuration file used for setting up timeouts, reports, browser, etc.
#2. Create Test File
To do this, open the “src” folder and create a spec JSX file in it. Note that the extension should be.jsx, not .js This is because React components use JSX syntax – JavaScript XML, and this extension allows test files to support it.
To change the extension, you will need to navigate to the config file and add the following line to the compiler options:
"react -jsx"After this, the configuration file will look like this:
{
    "compilerOptions": {
        "jsx": "react-jsx",
        "target": "ESNext",
        "module": "commonjs",
        "moduleResolution": "Node",
        "sourceMap": true,
        "outDir": "../tests-out",
    }
 }
#3. Write the First Component Test
Below you will find an example of a typical component test:
import { test, expect } from '@playwright/experimental-ct-react';
import App from './App';

test('First Test of the component', async({mount}) => {

  const component = await mount(<App/>);
  await expect(component).toContainText("Learn React");
});
Let’s analyze what we see. Instead of traditional fixtures like “page” or “request,” the test uses the “mount” parameter. The term “mounting” refers to the process of adding a component to the DOM for subsequent rendering. This could be any component – for example, a login component, settings or profile component, and so on.
#4. Run the Test
To run the component test, you can open the Visual Studio Code extension or use the command line in the terminal:
npm run test-ctIt’s worth noting that the test execution happens so quickly that it’s practically impossible to observe how the React application renders.
#5. Check results
To open last HTML report run:
npx playwright show-report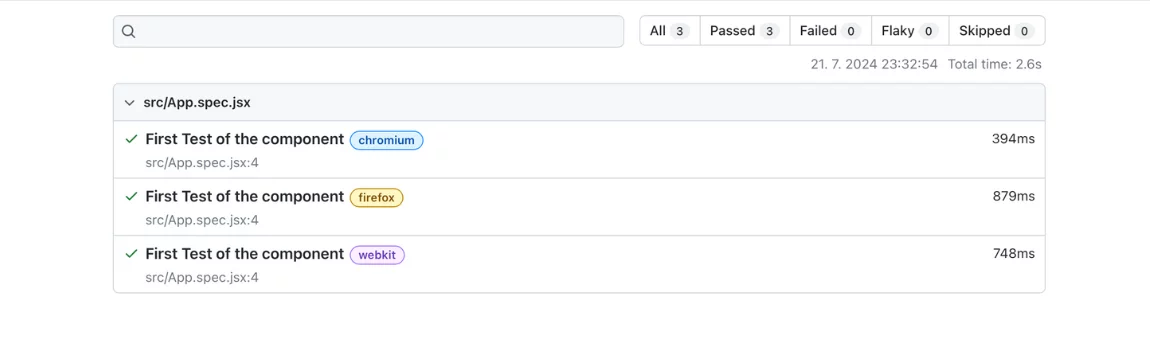
#6. Add New Components
Once testing is complete, you can add a new React component and Playwright component test for it and rerun the tests. Let’s consider this process with an example of adding the app Header component. Here’s what you need to do:
Create a file named header.js in the src folder. Insert the following code into the file:
function Header () {
    return (
        <header>
            <h1>Header Testing Component</h1>
            </header>
    )
}
export default Header
Include the header as part of App.js – the main component of the application. To do this, open the file and add the command:
import Header from './header'Add the header node below the first in the application. The updated code will look like this:
import logo from './logo.svg';
import './App.css';
import Header from './header';

function App() {
  return (
    <div className="App">
    <Header/>
      <header className="App-header">
        <img src={logo} className="App-logo" alt="logo" />
        <p>
          Edit <code>src/App.js</code> and save to reload.
        </p>
        <a
          className="App-link"
          href="https://reactjs.org"
          target="_blank"
          rel="noopener noreferrer"
        >
          Learn React
        </a>
      </header>
    </div>
  );
}

export default App;
The title should then appear as part of your software product. To check if the application is working correctly, repeat running the component test using the same command
npm run test-ct#7. Test the new component in isolation from the entire application
Once you’ve added a new component to your test, the next step is to ensure that you can test it independently of the entire application. To do this, open the App.spec.jsx file and make the following change:
As you can see, we changed the import – instead of importing the application, we specified the added header component. The next step is to modify the test itself.
If previously it looked like:
test('should work', async ({
    mount,
    page
}) => {
    const component = await mount();
    await expect(component).toContainText('Learn React');
    await expect(page.locator("[qa-id='Header']")).toHaveText("Header Testing Component")
    page.close()
});
then now you need to replace with:
test('should work', async ({
    mount,
    page
}) => {
    const component = await mount(

    );
    await expect(page.locator("[qa-id='Header']")).toHaveText("Header Testing Component")
    page.close()
});
Passed test will confirm that the new component can be tested in isolation.
8. Perform visual testing
Playwright supports the function of taking screenshots during the execution of component tests. To capture a screenshot, use the command:
await expect(page.locator("header>h1")).toHaveScreenshot()Why is this function useful?
Firstly, testers can visually see what happens during the testing process. Secondly, the tool uses the generated images during subsequent test runs – it compares new screenshots with baseline or reference screenshots.
Here’s how it works:
- During the first run of the component test, the framework generates baseline screenshots, which it will use to compare against all subsequent screenshots.
- Once created, the screenshot is ready to be added to the repository. It will be named something like example-test-1-chromium-darwin.png, which consists of two parts:
→ example-test-1.png – automatically generated file name;
→ chromium-darwin – the name of the browser and platform used.
The platform designation is necessary because screenshots can vary depending on the testing environment. - You can customize the screenshot name and its path using the snapshotPathTemplate parameter in the
playwright.config.jsconfiguration file. Here are the parameters and examples of code. - If the page has changed, you may need to update the screenshot. This can be done using the following command:
npx playwright test --update-snapshots
Some restrictions of Playwright component testing
A distinctive feature of component testing with Playwright is that tests are executed in a server environment using Node.js, while components run in a real browser. This approach combines the advantages of testing in a real environment with the capabilities of Node.js, but it also presents certain challenges:
- Testing components can only handle simple JS objects; complex live objects cannot be passed:
- There is no capability for synchronous data transfer in Playwright component testing during callbacks.
The advantage of Playwright is that it allows users to mitigate these limitations. This can be achieved by writing test stories that transform complex objects into simpler ones that are suitable for testing.
In addition to bypassing limitations, this approach diversifies various aspects of component invocation, such as defining themes, environments, and so on. For instance, for such specific needs you can use Portable stories for Playwright Component Tests
Advantages of component tests with Playwright
Despite the fact that the ability to test components appeared relatively recently in this framework and is still considered experimental, the tool has already established itself well in this field.
Users highlight the following benefits of using the Playwright automation framework for component testing:
- Isolation testing of components. There’s no need to wait for other modules to be completed to test the current one. This allows for early detection of errors in the SDLC and reduces the cost of fixing them.
- Cross-browser testing support. Playwright allows running component tests in three browsers – Chrome, Firefox, and WebKit. This ensures that your application components will function properly in different environments.
- Flexibility in operation. The framework can operate in both Headless and Headful modes, giving testers the freedom to choose based on project needs. For example, if you need to speed up testing, you can run in Headless mode and avoid loading unnecessary resources such as images and fonts.
- Automation of user interaction. The platform can simulate any way users interact with the application, such as mouse clicks, text input, form filling, and submission. This automates the verification of component functionality.
- Visual testing support. Playwright allows users to take screenshots and record videos during test execution. This visually demonstrates existing issues to testers for timely resolution.
- Performance assessment of components. With this test framework, you can track performance metrics of components such as page load times, rendering speed, and more.
- Integration with CI\CD services. You can automate test execution as part of the build process, ensuring that changes to components do not lead to regressions.
In summary, using Playwright for component testing enables teams to increase test coverage, accelerate development through automation of repetitive tasks, and enhance the reliability and efficiency of testing.