I’m very keen on programming, especially in Python and now I would like to show you its tool like Tkinter widely used for building Python Apps. I hope you like my tutorial very much.Let’s take a closer look at this combination below!
Of course, you might think 🤔 Why not utilise all-in-one solutions? I chose ✅ it for API testing using the Newman command instead of HTML reports because it can be very useful for short APIs or only to make sure that some microservices are working properly without requiring long reports and generating many files. Usually, I use it for microservice testing on my project App.
Before starting this guide, it would be a good idea if you had a look at some articles related to API tests with Postman and Newman, plus making your Python APPs with Tkinter:
Namely, they are:
And please make sure to pay attention to the article on this blog. Opting testomat.io testing tool also could serve as an alternative to get informative Python test reporting swiftly.
Pre Requirements:
- Install python3 and pip3 in your system
- Then, install the following Tkinter packages:
sudo apt-get install python3-tk - This project was created in an OS Ubuntu 20.04
- Install Newman in your system.
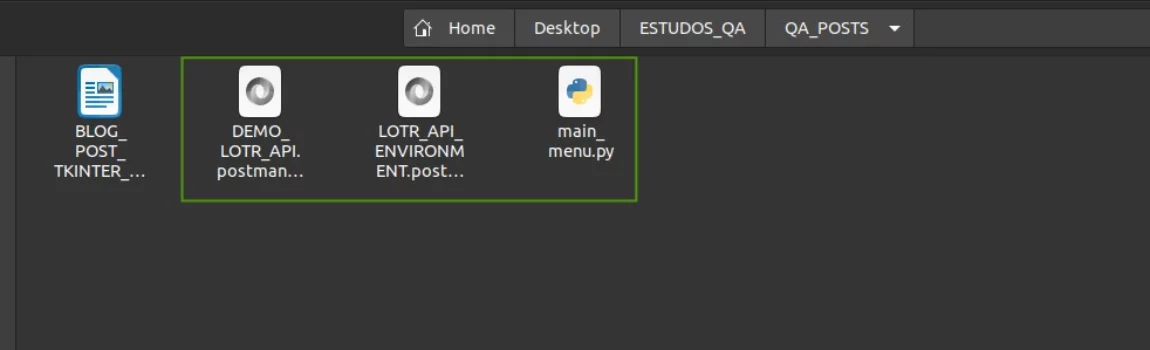
- Create a folder for saving the files of your Tkinter App.
- Export your Postman collection and Environment to the repository of your Tkinter App.
👉 Let’s start the creation of our Tkinter testing App. The full code you can find in my GitHub repository.
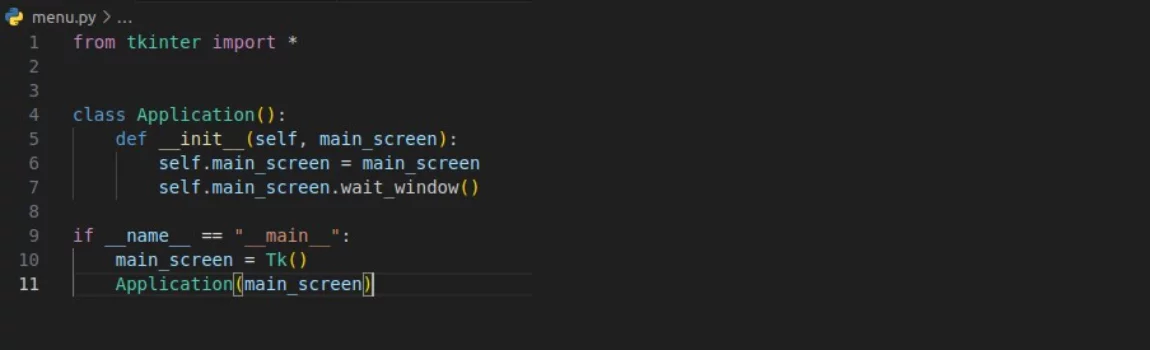
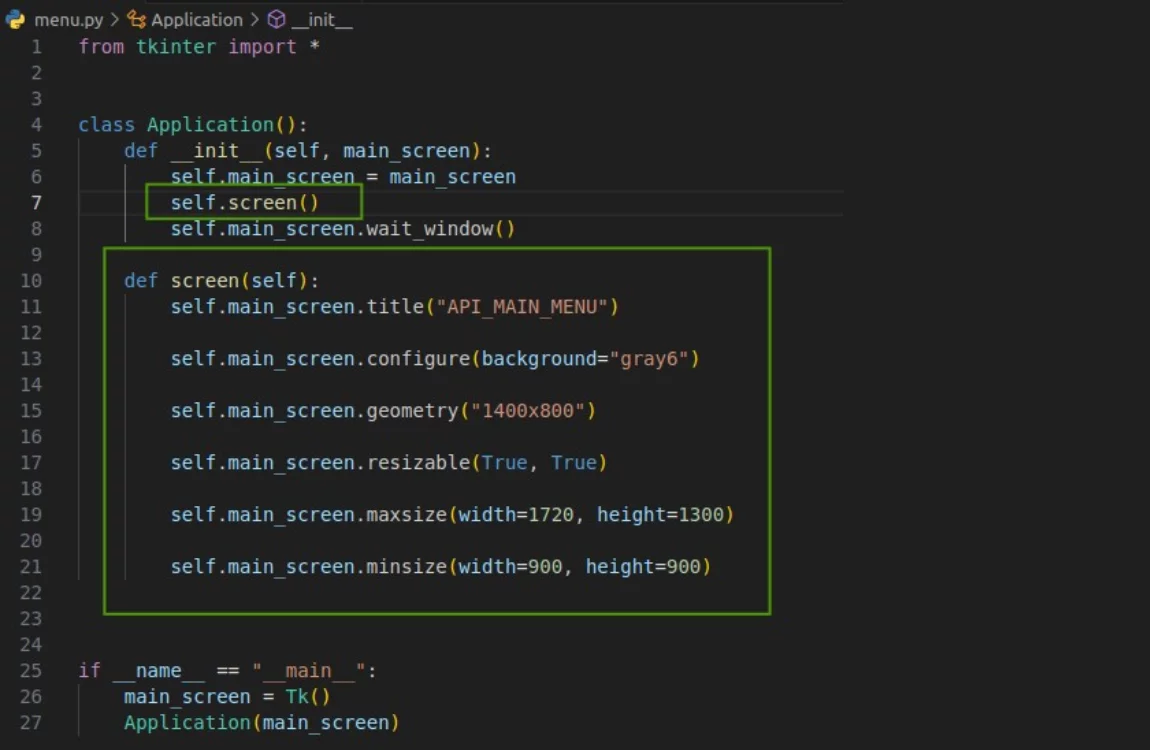
First of all, create a Python file called menu.py Next, import the tkinter lib and create a class called Application which will contain all the elements of the main menu. Then, call the screen by adding the if __name__ == "__main__": instructions:
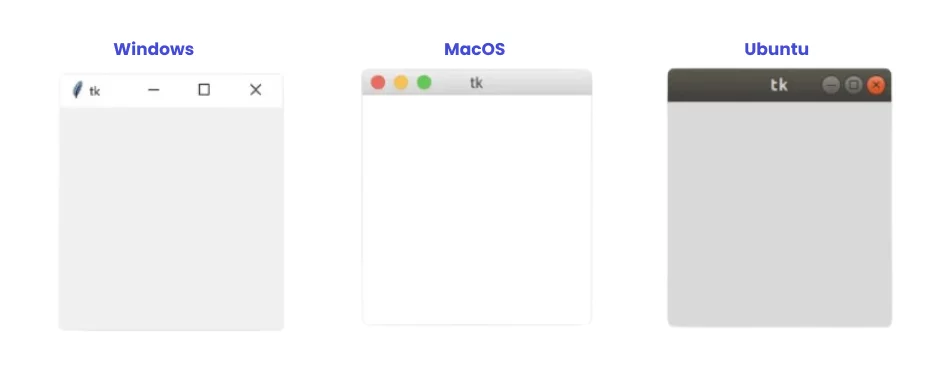
As a result, if you run your Python file, you should see the Thinker GUI window.
Create a new method within the class Application called screen with some information of the main menu and call this method when initializing the class:
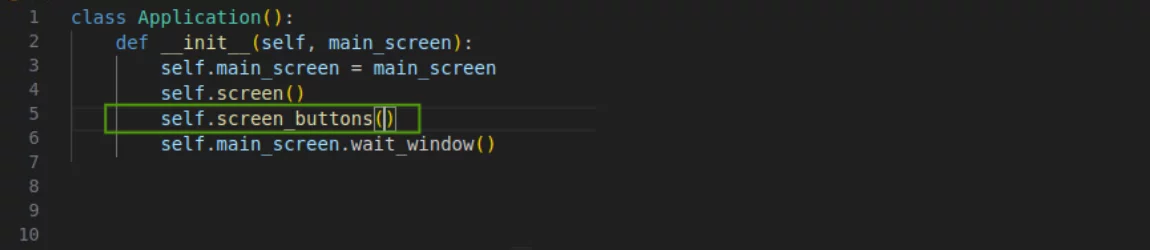
Create a new method within the class Application called screen_buttons including the information of the Python Tkinter style buttons in the main menu and call the method in the class initialization:
Here are the button styles; You will see how they work in the following section of our Python Tkinter testing tutorial. The full code of our testing App is here
def screen_buttons(self):
    self.bt_execute_api_tests = Button(self.main_screen,

            text="Execute API Tests",
            border=2,
            bg="#9ac7d2",
            font=('verdana',10, 'bold'),
            activebackground='#108ecb',
            activeforeground='white',
    command=self.openExecuteAPI
        )

    self.bt_execute_api_tests.place(
            relx=0.11,
            rely=0.22,
            relwidth=0.2,
            relheight-0.06
        )

    self.bt_quit = Button(self.main_screen,

            text="Quit Menu",
            border=2, bg="#9ac7d2",
            font=('verdana',10,'bold'),
            activebackground='#108ecb',
            activeforeground='white',

    command=self.main_screen.destroy
        )

    self.bt_quit.place(
            relx=0.11,
            rely=0.52,
            relwidth=0.2,
            relheight=0.0
        )
Right after creating the method screen_buttons, create a new class called ScreenFunctions(), in which you put all the methods to redirect to the API tests page when we click on the button self.execute_api_tests.
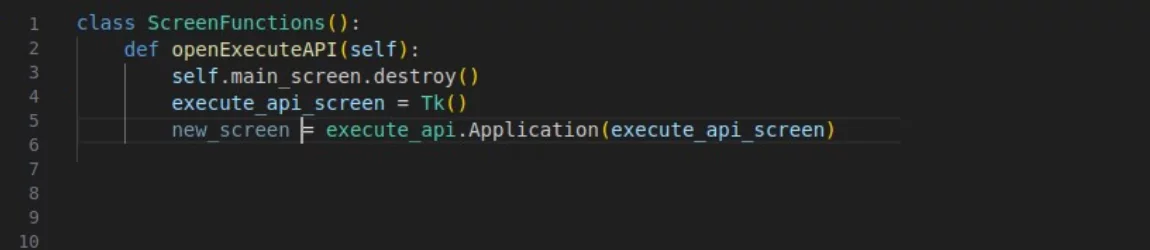
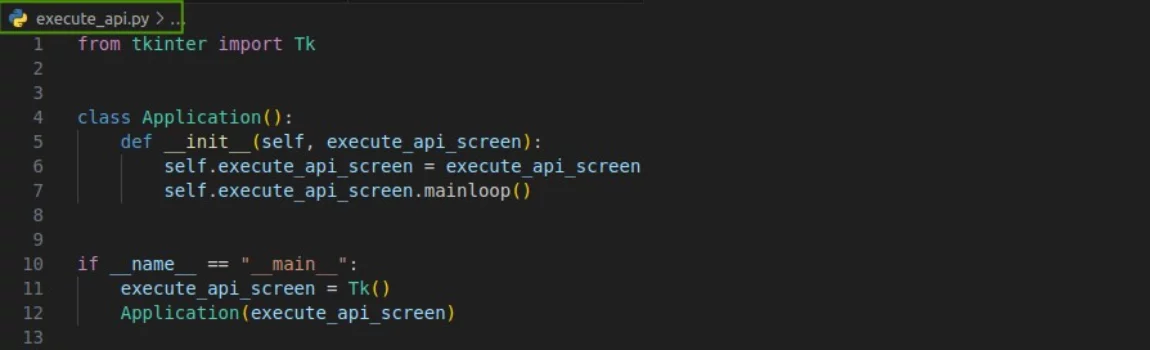
Now, create a new file under the APP folder called execute_api.py. Under this file (execute_api.py), import the lib Tk and then create a class also called as Application in which you should write the following code:
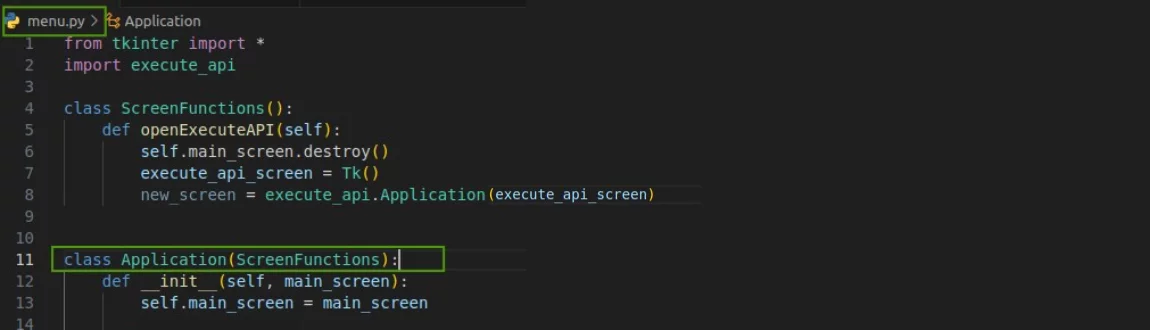
Come back to the file menu.py, and import the execute_api file by writing the following line:

Include the class ScreenFunctions within the Application class as Application(ScreenFunctions) in the file menu.py
Execute the main menu again by opening the menu.py file. You should get the following screen:

If you click on the Execute API Tests, you should be brought to the screen initialized in the execute_api.py file. In the case you click on Quit Menu, the app will be closed.
Now, please open the file execute_api.py and let’s create the screen for executing our Newman tests through the methods attached to the buttons of the page by importing the Tkinter library in the execute_api.py file.
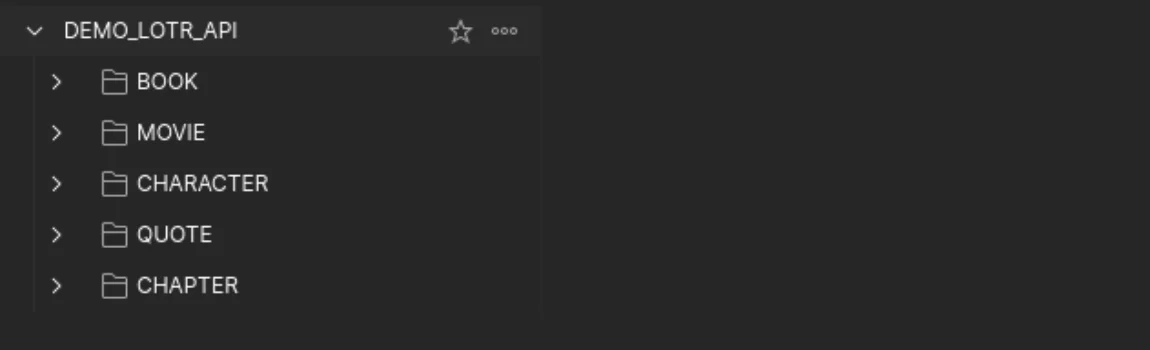
Our following step is to create some global variables identifying our folders and the Newman commands to execute each folder separately. In our example, our Postman collection has the following structure:
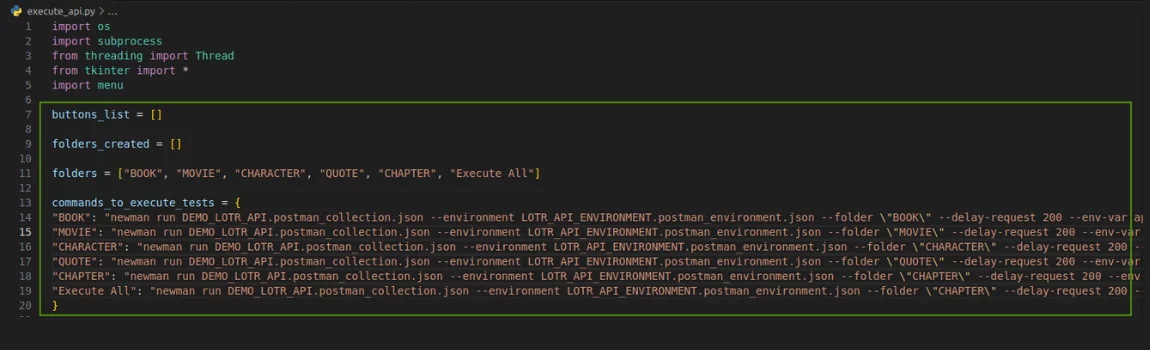
Considering that, create the following variables.
🔴 Note: The Execution of all folder indicates that you want to execute the collection as a whole, not only one specific folder.
Variable commands_to_execute_tests indicates each Newman command to execute the tests for each collection folder.
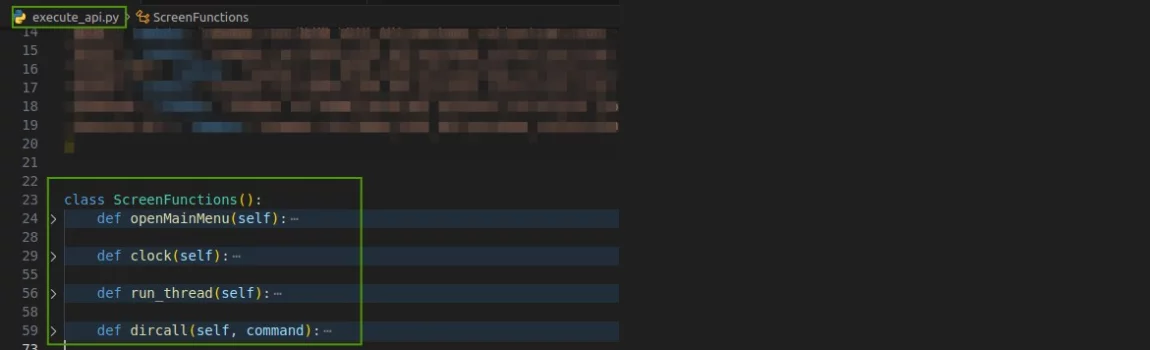
As in the menu.py file, create the ScreenFunctions class and create a function for returning to the main menu. Include class ScreenFunction in the Application class (same as did for the menu.py file).
Create a method called screen under the class Application and call it in the initialization to set up the screen.
🔴 Obs: Import the menu file to make sure it will be called!
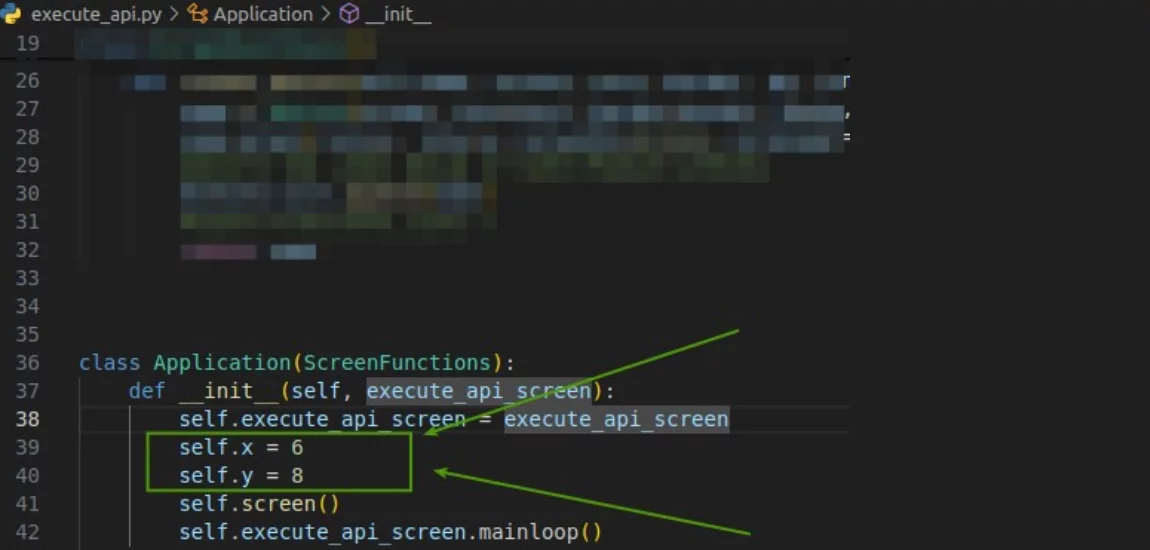
Also, create two variables called x and y that will be used to place some buttons with the name of each folder and execute all options as well.
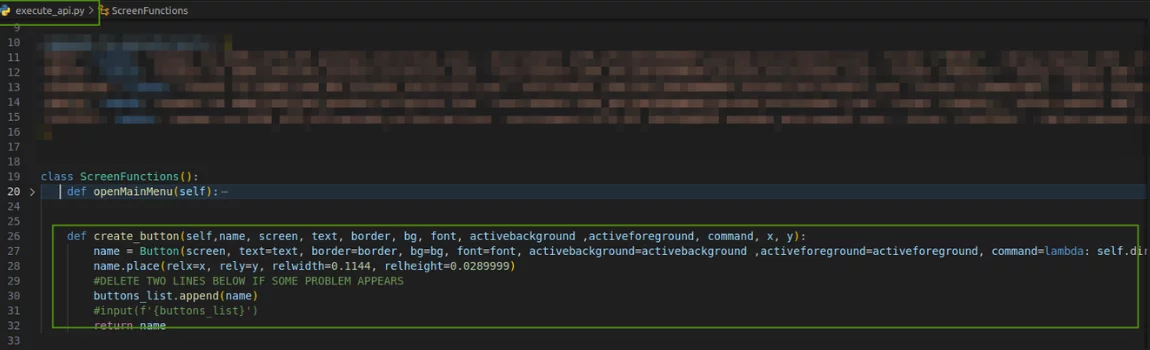
Under the ScreenFunctions class, create a function called create_button as the following code:
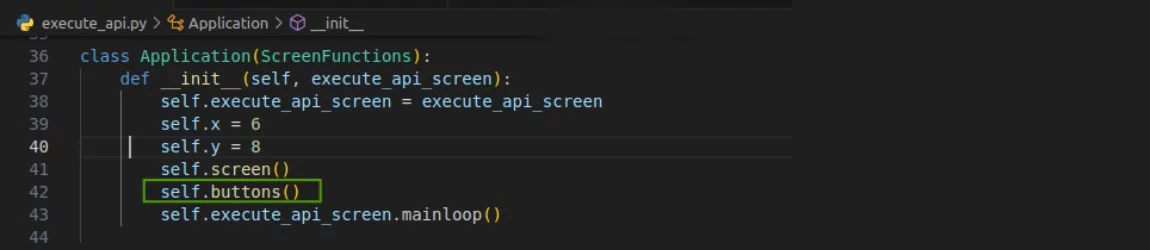
Now, within the Application class, create a method called buttons which will be in charge of the creation of the buttons displayed on the screen.
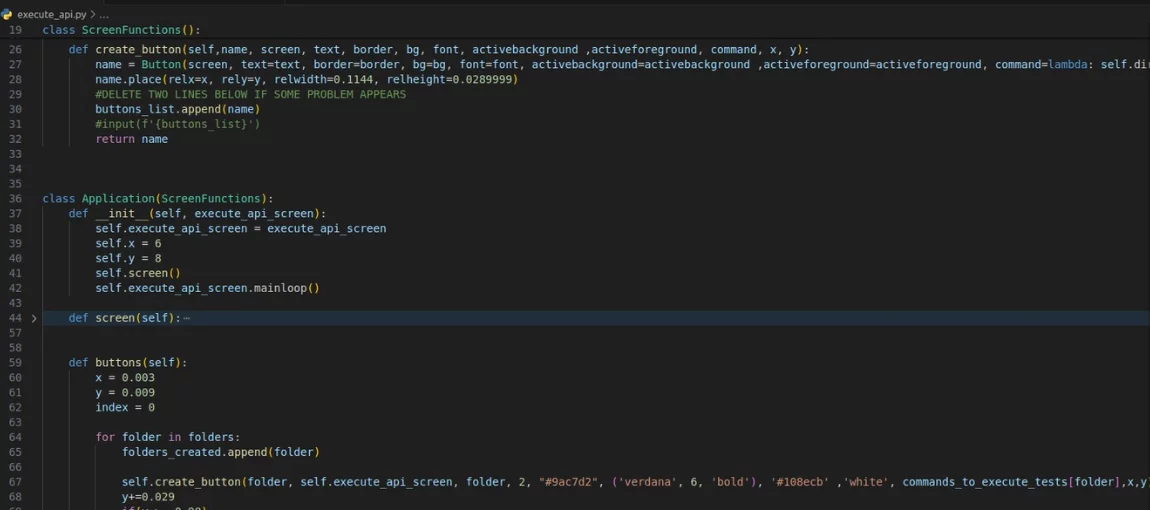
Call this function in the initialization of the class Application
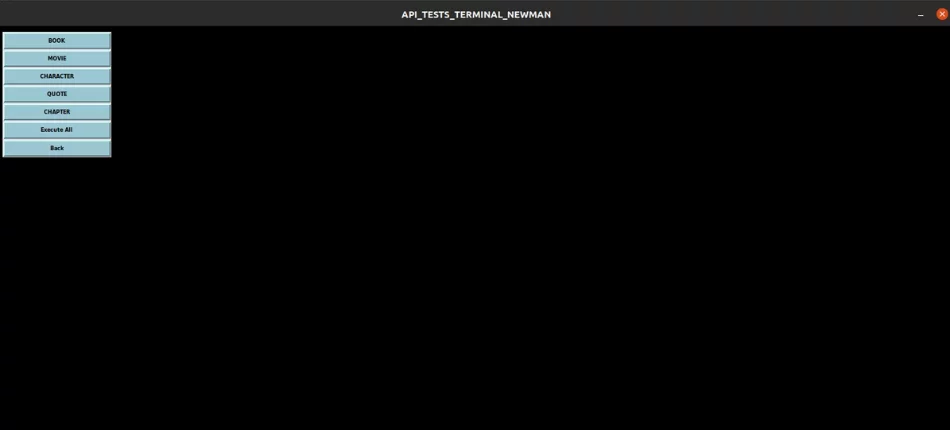
If you open your Python file execute_api.py, you should have the following result:
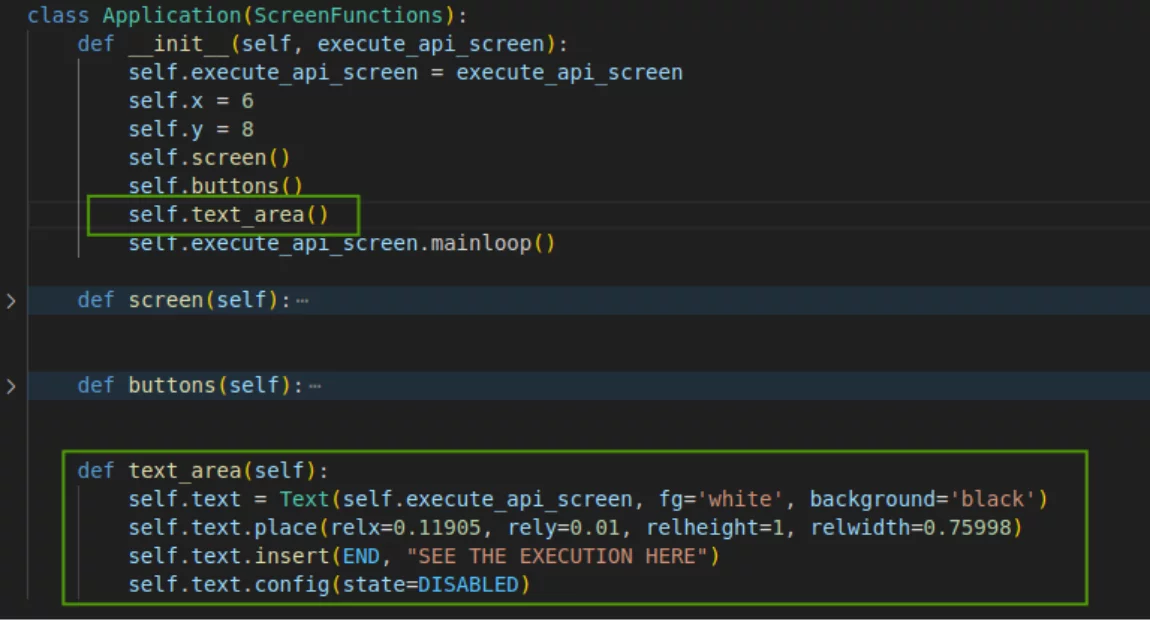
Under the class Application, create a method called text_area which will send the terminal output generated from the Newman command execution. Call this method in the initialization:
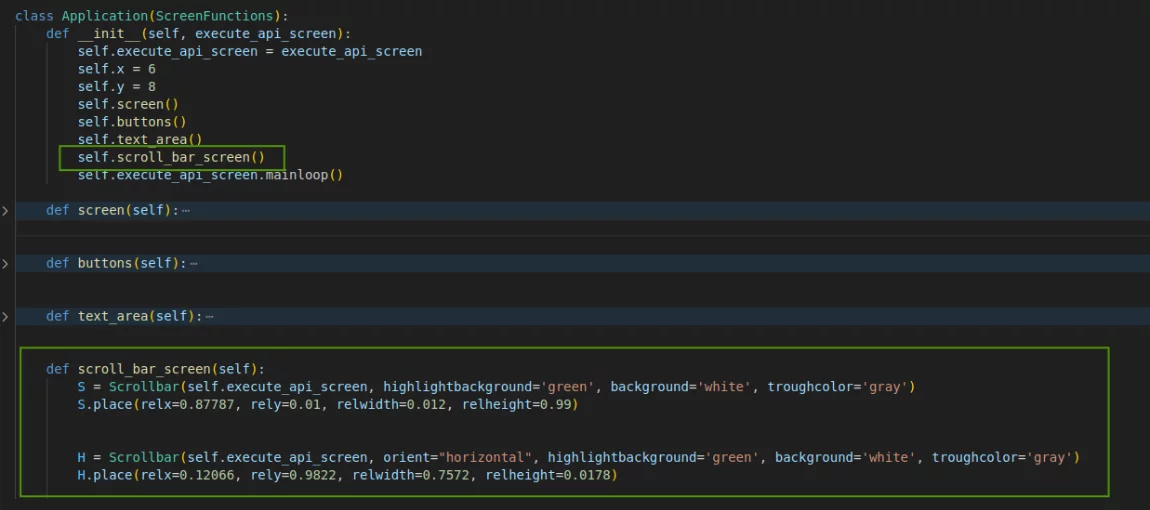
The last method within the class Application is called scroll_bar_screen, it will be used to scroll up and down the text area for looking at the output information from Newman execution (also call it in the initialization of the class Application):
Import the following libraries in the file execute_api.py before starting the final steps. Also, create two more global variables called stop_thread and call it.
Let’s do the final steps to show the results of the Newman command in our screen in the file execute_api.py. Under the class ScreenFunctions, create the following methods as shown below clock method.
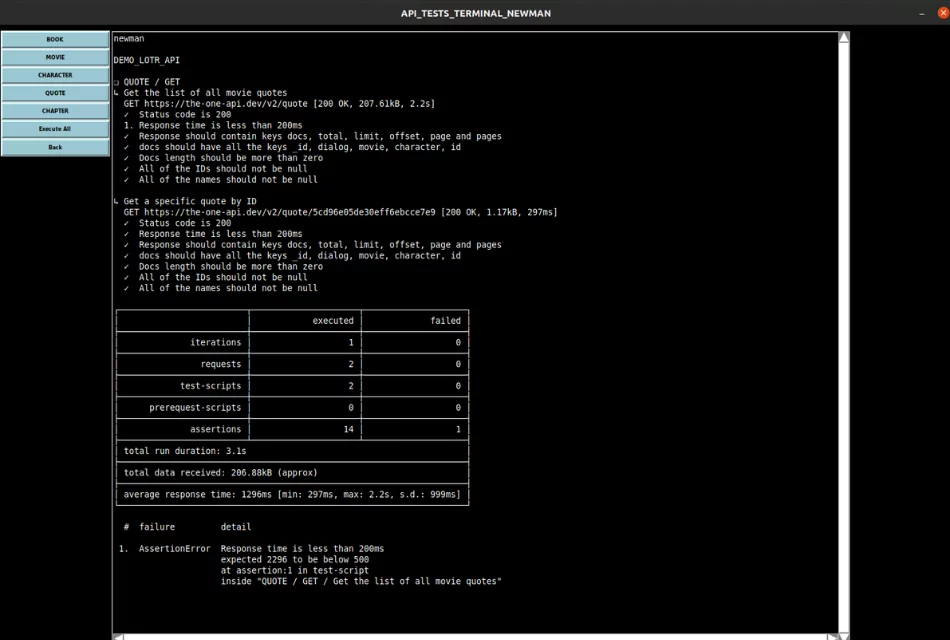
Now, enjoy your own Python Tkinter testing App 🙂 and execute your Newman tests in a friendly and easy way by clicking on the folder or executing everything, as you prefer. Hope you revolutionize your approach to API testing!
👉 Please let me know if you have any questions, reach out to me at my LinkedIn profile Pedro Carvalho. Once again I provide a Github repo of this project with full code. It will help you understand how the code works and how you can customize my experience for your test projects.