
Playwright commonly uses with the Page Object Model, which is one of the approaches to structuring tests to optimize their speed and efficiency. In the framework under consideration, fixtures simplify grouping tests and are considered a way manage them as the page object method.
In detail, it is considered in the following article:
Now let’s delve into the concept of fixtures ⬇️
What Are Fixtures?
Test fixtures are preliminary conditions or steps that are executed before running a test. The testing concept of fixtures is based on their use – existing fixtures create a precise environment for each test, avoiding anything unnecessary.
What Is the Use of Fixtures in Playwright?
In Playwright, test fixtures allow you to reuse code for different test cases. In essence, a fixture is a function that wraps the inheritance of classes. It’s a convenient way to encapsulate your testing functionality and its data in separate blocks and call it when needed.
If you have dealt with writing tests in this framework – even if you have only written your first test – you have probably already used built-in fixtures, an example from official Playwright Documentation:
import { test, expect } from '@playwright/test';

test('basic test', async ({ page }) => {
  await page.goto('https://playwright.dev/');

  await expect(page).toHaveTitle(/Playwright/);
});
In this example, the test function argument { page } indicates the need to configure the page fixture.
Below, we present a list of fixtures used when writing a base test in Playwright:
| Fixture | Type | Description |
| page fixture | Page | Instances of pages isolated between tests |
| context | BrowserContext | Context, isolated for a specific test run |
| browser | Browser | Browser instances that can be used for all tests in a worker process |
| browserName | String (textual data) | Mention of the browser name in which to run test files |
| request | APIRequestContext | APIRequestContext instance, isolated for this test run |
✅ Note
In addition to using built-in fixtures, as discussed earlier, you can also write your own test fixtures in Playwright. To create your own fixture, you need to create a new test object that includes it. To do this, use the command test.extend() An example of Javascript code with a created fixture todoPage .spec.js file:
const base = require('@playwright/test');
const { TodoPage } = require('./todo-page');

// Extend basic test by providing a "todoPage" fixture.
const test = base.test.extend({
  todoPage: async ({ page }, use) => {
    const todoPage = new TodoPage(page);
    await todoPage.goto();
    await todoPage.addToDo('item1');
    await todoPage.addToDo('item2');
    await use(todoPage);
    await todoPage.removeAll();
  },
});

test('should add an item', async ({ todoPage }) => {
  await todoPage.addToDo('my item');
  // ...
});

test('should remove an item', async ({ todoPage }) => {
  await todoPage.remove('item1');
  // ...
});
You also have the option to override fixtures according to the unique needs of your project. For example, in the example below, the page fixture is overridden when navigating to a specified address – baseURL:
import { test as base } from '@playwright/test';

export const test = base.extend({
  page: async ({ baseURL, page }, use) => {
    await page.goto(baseURL);
    await use(page);
  },
});
In this case, the page fixture depends on the built-in fixture baseURL. This allows Playwright users to override the baseURL in the .spec file used by the page fixture using the statement test.use:
test.use({ baseURL: 'https://playwright.dev' });You also have the option to completely replace the base fixture with another, which will also be a kind of fixture override. In the example below, you can override the storageState fixture by providing your data:
import { test as base } from '@playwright/test';
export const test = base.extend({
storageState: async ({}, use) => {
const cookie = await getAuthCookie();
await use({ cookies: [cookie] });
},
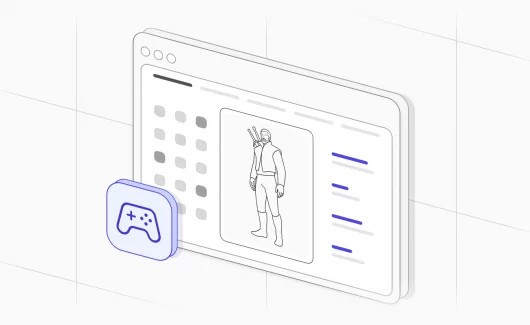
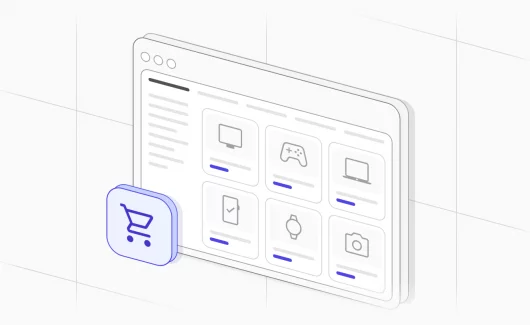
});The best way to understand how fixtures work is to implement one of the Playwright fixtures yourself. 👀 Let’s say we have a Playwright base test that will test a Product table list web app functionality!
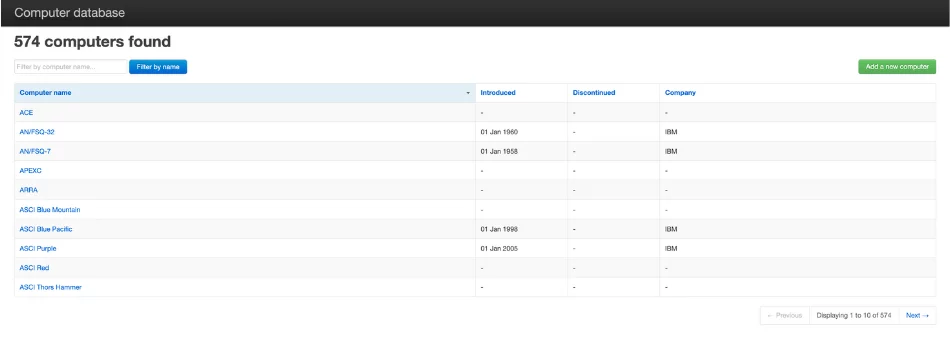
By launching a quick debugging session, we can see what this script does:
- Navigates to the required site
- Add new computer
- Fills the form
- Create new instances
Now, imagine that we need to add another test case to this test file and test the same functionality. This would be an ideal use case for test fixtures. To implement them, you can extend the test object obtained from the framework. Here is a quote of the code source that we will take into account.
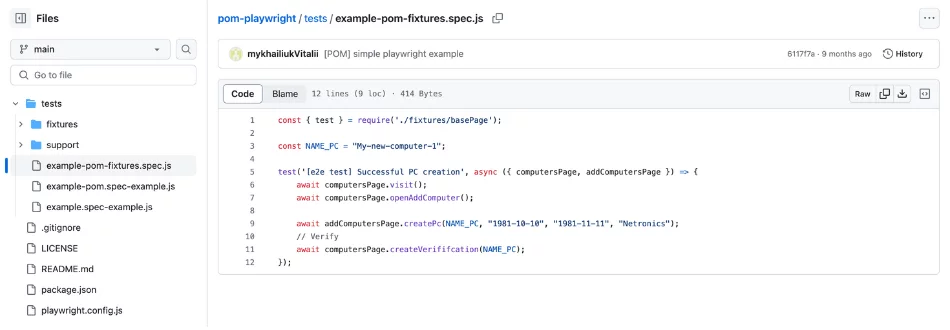
To do this, initialize a new variables, execute test.extend give it an object, and define your own test fixture. In our example, this will be the basePage.js fixture. Then, we pass an await function, which currently has an object and a use function.

Playwright will check if we want to use our fixture, run the code, execute use – what is in our test example, and then execute everything after use. The framework gains access to the site, followed immediately by a call. All of this is perfect for moving login logic into our fixtures.
It’s worth noting that in Playwright, there is a clear order of execution for fixtures. All setup and phases are separated by calling await use(), and configuration is performed before the fixture is used. The general rules for the order of execution of fixtures are as follows:
- If fixture X depends on fixture Y, Y is always set up before X and torn down after X.
- Non-automatic fixtures are executed only if there is a need for them.
- Test fixtures are removed after each test in which they are used.
- Worker fixtures are removed only after the complete termination of the worker process.
Playwright Test Automation Framework Using Fixtures
The method of using Playwright fixtures can be found in the official documentation on the framework’s website: playwright.dev To use fixtures in the Playwright test automation framework, you simply need to load them into the test runner and mention them in the test function argument.
Below is an example of using created own fixtures, todoPage, and settingsPage, for the JavaScript language from Playwright Docs:
const { test, expect } = require('./my-test');

test.beforeEach(async ({ settingsPage }) => {
  await settingsPage.switchToDarkMode();
});

test('basic test', async ({ todoPage, page }) => {
  await todoPage.addToDo('something nice');
  await expect(page.getByTestId('todo-title')).toContainText(['something nice']);
});
As a result, you will be able to:
- Create new pages by simply modifying them, not the entire test file.
- Pass the necessary fixture to the corresponding test function.
- Add a new page object or page fixture without initializing page objects in every test.
This approach to writing test cases is particularly relevant when your repository expands, and you need to write more and more automated tests. It will help facilitate code-base modification.
Another aspect worth mentioning in using Playwright fixtures is the fixtures supported by the framework. In Playwright, two types of fixtures are distinguished:
- Test fixtures – those that are configured for individual test runs.
- Worker fixtures – fixtures configured for a specific worker process.
Since we previously discussed the first type of fixtures, let’s now focus on applying worker fixtures. They provide the opportunity to:
→ Configure services.
→ Run servers, etc.
The essence of their use is that the framework will use an existing worker process similar to how test fixtures are set up for individual test runs. It provides executions for the maximum possible number of test files if the following conditions are met:
→ Worker fixtures match.
→ As a result of the previous point, the environments are the same.
A JavaScript test written using worker fixtures would look like this:
// express.spec.js
const test = require('./express-test');
const fetch = require('node-fetch');

test('fetch 1', async ({ port }) => {
  const result = await fetch(`http://localhost:${port}/1`);
  test.expect(await result.text()).toBe('Hello World 1!');
});

test('fetch 2', async ({ port }) => {
  const result = await fetch(`http://localhost:${port}/2`);
  test.expect(await result.text()).toBe('Hello World 2!');
});
And here is how fixtures are declared and defined:
// express-test.js
const base = require('@playwright/test');
const express = require('express');

// Define "port" and "express" worker fixtures.
module.exports = base.test.extend({

  // We pass a tuple to specify fixtures options.
  // In this case, we mark this fixture as worker-scoped.
  port: [ async ({}, use, workerInfo) => {
    // "port" fixture uses a unique value of the worker process index.
    await use(3000 + workerInfo.workerIndex);
  }, { scope: 'worker' } ],

  // "express" fixture starts automatically for every worker - we pass "auto" for that.
  express: [ async ({ port }, use) => {
    // Setup express app.
    const app = express();
    app.get('/1', (req, res) => {
      res.send('Hello World 1!')
    });
    app.get('/2', (req, res) => {
      res.send('Hello World 2!')
    });

    // Start the server.
    let server;
    console.log('Starting server...');
    await new Promise(f => {
      server = app.listen(port, f);
    });
    console.log('Server ready');

    // Use the server in the tests.
    await use(server);

    // Cleanup.
    console.log('Stopping server...');
    await new Promise(f => server.close(f));
    console.log('Server stopped');
  }, { scope: 'worker', auto: true } ],
});
Applying Fixtures
For each test or worker process, automatic fixtures can be applied. This approach is used when they are not listed directly. In this case, { auto: true } should be used. As an example, consider a test in which automatic fixtures are applied to attach debug logs in case of a failed test:
const debug = require('debug');
const fs = require('fs');
const base = require('@playwright/test');

exports.test = base.test.extend({
  saveLogs: [async ({}, use, testInfo) => {
    // Collecting logs during the test.
    const logs = [];
    debug.log = (...args) => logs.push(args.map(String).join(''));
    debug.enable('myserver');

    await use();

    // After the test we can check whether the test passed or failed.
    if (testInfo.status !== testInfo.expectedStatus) {
      // outputPath() API guarantees a unique file name.
      const logFile = testInfo.outputPath('logs.txt');
      await fs.promises.writeFile(logFile, logs.join('\n'), 'utf8');
      testInfo.attachments.push({ name: 'logs', contentType: 'text/plain', path: logFile });
    }
  }, { auto: true }],
});
Another possibility provided by Playwright is setting a separate timeout. This is especially relevant for slow fixtures. An example of JavaScript:
const { test: base, expect } = require('@playwright/test');

const test = base.extend({
  slowFixture: [async ({}, use) => {
    // ... perform a slow operation ...
    await use('hello');
  }, { timeout: 60000 }]
});

test('example test', async ({ slowFixture }) => {
  // ...
});
Sum Up: Pros and Cons
Before listing the numerous advantages of using Playwright fixtures, let’s take a look at a typical test environment setup without their use one more time from Playwright Documentation.
For interacting with the “to-do list” page of any web program, the TodoPage class is used:
const { test } = require('@playwright/test');
const { TodoPage } = require('./todo-page');

test.describe('todo tests', () => {
  let todoPage;

  test.beforeEach(async ({ page }) => {
    todoPage = new TodoPage(page);
    await todoPage.goto();
    await todoPage.addToDo('item1');
    await todoPage.addToDo('item2');
  });

  test.afterEach(async () => {
    await todoPage.removeAll();
  });

  test('should add an item', async () => {
    await todoPage.addToDo('my item');
    // ...
  });

  test('should remove an item', async () => {
    await todoPage.remove('item1');
    // ...
  });
});
As you may have noticed, in this example, there is a description – test.describe – and after each hook beforeEach and afterEach, separate instances of TodoPage are created. It is also necessary to establish certain preliminary conditions, in other words, configure each test.
After completing the test, it is necessary to remove all actions using await todoPage.removeAll()to establish an environment for the next iteration.
This approach can be considered acceptable if you need to test a digital solution with a small number of pages. But if it is a multi-page application, with this approach, you will end up with long, duplicated, and therefore unclear code. To simplify this process, fixtures are used.
Fixtures provide the following advantages:
- Simplified Test Writing: This is possible because fixtures encapsulate setup and teardown in one place. As a result, you will have a more understandable test with fewer lines of code.
- Accelerated Testing Process: All test fixtures in Playwright are reusable, meaning you can define the necessary fixture once and use it in your other tests.
- Automatic Detection of Required Fixtures: All fixtures are provided on demand, meaning you can define any number of them, and Playwright setup those that your test needs and nothing else.
- Flexibility in Creating Test File: All Playwright fixtures easily combine, providing the possibility of complex behavior. The framework also allows you to combine them in any necessary way, letting you tailor precise environment for a specific test without affecting other tests.
- Simplified Structuring of Tests: Fixtures simplify grouping tests based on their significance, so there is no longer a need to wrap tests in describe files.
If you have any questions regarding Playwright fixtures or any other aspects of test automation, contact the experts at testomat.io and we will help optimize your QA processes.