Collaboration of all team members on the project, including the Product Owner (PO), Project Manager(PM), and Testers QAs), is one of the critical tasks of modern companies that successfully implement Agile workflow. This one allows your QA team to work more productively and speed up the release of quality software to the market.
We at testomat.io are constantly working to ensure that our customers can fully meet their needs. We have implemented Project Dashboards in our test management, which will help techs and employees without specific knowledge to participate fully in the testing process.
Test management dashboard for every project role
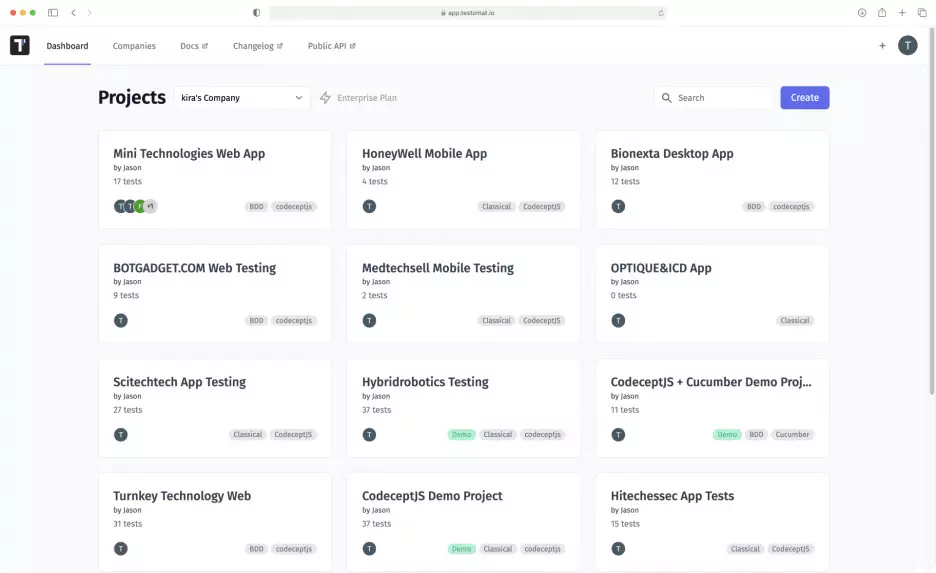
After logging into your TMS account, you will see the start page with a dashboard that displays all of the company’s projects available to the test management user. You can switch between projects and work on any of them.
Go to the desired project, and you will see a toolbar on the left where the functionality is grouped (it allows you to manage the test project). Each section is a dashboard with unique features for each participant in the testing process:
- Product Owner (PO) – needs detailed test results and in-depth analytics on the project. They are also responsible for managing tasks, including monitoring their progress and assigning roles.
- Testers (QAs) – can work with tests, test runs, test results, test plans, a database of steps, work with test branches.
- Project Managers (PM) – work with the Tests Dashboard in the context of user assignment, tracking reports, analytics, and full control of the workflow.
Let’s discuss in detail each of the Project Dashboards mentioned above.
Tests
Here, you have all the functionality related to tests open to you. You can import, create tests, delete and view them, as well as assign responsible users. In the upper right corner is a drop-down menu with the following options:
- Create More Suites;
- Import Automated Tests;
- Export as Spreadsheet;
- Living Docs;
- Run Manual Tests;
- Tags;
- Bulk Edit;
- Delete Detached Tests;
- Delete Empty Suites.
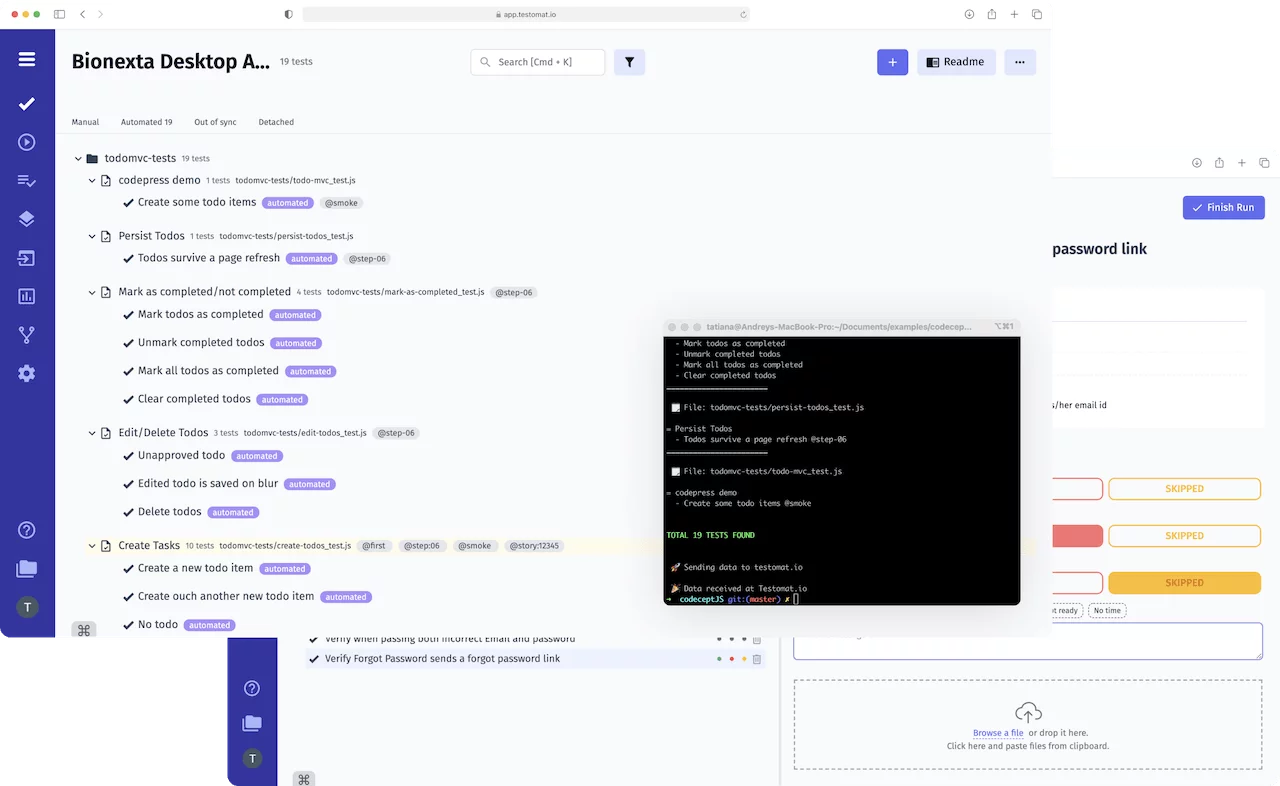
Runs
This is a dashboard where all test runs are stored. To visualize information about their results, there is a graph of tests with statuses, failed, passed, or skipped.
You can view the metrics associated with test runs, start new manual runs, or create a group and structure Runs however you like.
You can also use the Runs Archive and Groups Archive sections, which contain information about tests that you ran before:
- the date and time of their execution;
- the assigned specialist;
- the quantitative ratio of passed, failed, and skipped tests;
- the total number of tests in each run.
You can rerun tests from this window or create and run a copy of them.
Plans
This is a separate page where you can create manual, automated, and mixed test plans. You can also view an existing test plan, make changes, delete it, or run it. You will be automatically redirected to the New Manual Run page if you click Launch.
Steps
The page is a database of steps that you can reuse when writing new test cases. This dashboard offers testomat.io users the following options:
- Create new steps or snippets that you can reuse later, thereby speeding up the testing process.
- Update steps. TMS may need time to update the database if you are actively creating test cases. If you need access to reuse urgently, simply click the Refresh Steps button, and the database will be forced to be updated.
- Search for steps, sort steps, and fragments. For the BDD format, there is sorting by the type of steps: Given/When/Then.
Pulse
This is the menu where you can resume Suites and Tests that have been deleted over the past 90 days. View all changes that have occurred to tests or Suites, search by the tag you want, and filter content by:
- type of object (Test or Suite);
- date of the change;
- the user who made the changes.
Imports
This section stores information about when and which tests you imported. In the same window, you can import tests from CSV/XLS files for TestRail, Zephyr, Qtest and Qase, Import from the source code for automated tests, and export tests in .xlsx format.
Conveniently, you can track the dynamics of testing. Open the desired import and see the status of the tests it contains: Sync, Created (for newly added tests), or Deleted. You can also see the date and time of each import.
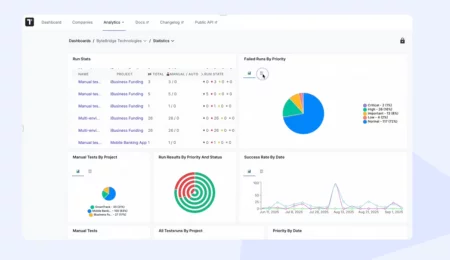
Analytics
This dashboard contains widgets that you can use to get detailed information about the project, such as:
- Automation Coverage: percentage and number of automated tests in each Suite.
- Failures: the project defects.
- Ever-Failing Tests: tests that have not been corrected for a long time (you can specify the desired period in weeks manually).
- Slowest Tests: slow tests on the project, which may indicate problems with app performance or automation infrastructure.
- Flaky Tests: the number of tests that can show a passed or failed result despite no changes in the code or test.
- Never Run Tests: imported but not run tests.
- Tags Statistics: automation coverage and Run status by used tags.
- Environments: automation coverage and Run status with a breakdown by test environment used on the project.
- Jira: data about tests that are related to the Jira Issue.
Branches
You can create different branches of test suites and merge them. This allows team members to work on different tasks simultaneously, which greatly increases the testing speed.
If the project already has branches, you can sort them, delete them, or use the search bar.
Settings
It contains many options that allow you to make testing as efficient as possible. Among them:
- View and change project settings.
- Access to the list of assigned users.
- Creating labels as tags alternative.
- Setting up test artifacts.
- Creating code templates and test descriptions.
- Setting up integration with Jira and CI/CD tools.
- Connecting the Issue Management system.
- Setting up a list of test environments used on a project.
- Adding rules for sending notifications of completed runs.
- Modification of test result message templates.
- Creation of a ReadMe file with information about project-specific test launches, requirements, and test management policies.
Help
In this section, you will find useful information to help you work with our TMS: documentation, chat, a link to Slack, and the testomat.io page on GitHub. You also can contact us by email.
This variety of Project Dashboards implemented in our test management system will make the quality control process transparent for each team member.