We use a lot of apps and services powered with APIs. To keep them running smoothly, every team needs to test these APIs. With API testing, you can make sure that they work correctly and perform well under load. In this article, we will overview API testing and its types, discover — “Why you need Cucumber for API testing?” 🤔 reveal how to test with Cucumber, and find out practical tips to follow.
What is API testing?
Typically, API (Application Programming Interface) testing focuses on analyzing the app’s business logic, security, and data responses and is generally performed by making requests to one or more API endpoints and comparing the responses with expected results.
Performed manually or with automated testing tools, application program interface or API testing is used to check the API’s functionality and security levels to prevent a negative impact on its performance and reliability.
Why do we need API testing?
When using various websites, apps, and other software products, users want them to be secure, reliable, and free of errors. While there are any issues at the application programming interface layer, it can result in user-facing errors, slow performance, and damage your reputation. Here is why API testing can be useful:
- With application programming interface tests, QA teams can define how different software components interact and check if they work correctly.
- With application programming interface testing, teams can identify potential problems and make sure that the software will handle diverse conditions effectively.
- When it comes to potential software vulnerabilities, APIs can become a potential entry point for attackers. With application programming interface testing, testers can detect weaknesses in software to protect security and privacy.
- If any changes have been made, API testing prevents disruption to existing applications that use this API and helps maintain backward compatibility.
Types of Bugs Detected with Application Programming Interface Testing
Generally, during application programming interface testing we check the following:
- Data accuracy to verify that the data returned from an application programming interface aligns with expected formats, data types, etc.
- Missing or duplicate functionality to make sure that there are no repeated or missed features.
- Authorization or permission checks to verify the identity of a user/application that is requesting access to an API.
- Response time to reveal the duration of time required to process a request and return a response to the client
- Error codes in application programming interface responses to reveal whether the API request was successful or not.
- Reliability, performance, and security issues (checking how well the software performs, finding security problems, or issues like crashes and memory leaks).
Types of API Testing
Here are some of the common API testing examples with different types of tests based on which test cases can be created:
- Functional testing. With functional testing for APIs, you send requests to an API and validate that the correct responses are returned.
- Performance testing. With this type, you can verify that the application programming interface can handle large volumes of data and high traffic.
- Unit testing. As APIs have lots of small moving components, it’s effective to test them during the development phase and validate that each software module performs as designed.
- Integration testing. With integration testing, you can check if your application programming interface works well with different parts of your software, including web services, databases, or third-party applications. But you need to remember that opting for this type is essential if your application programming interface is complicated and not isolated from other components.
- Regression Testing. With this type, you can make sure that your application programming interface is still functional after an update or bug fixing has been performed.
- Security testing. This type of testing protects your API from data breaches, unauthorized access, and other security issues by systematically assessing the application programming interface for potential vulnerabilities and implementing measures to prevent or mitigate them.
- Load Testing. This type of testing helps test an API’s performance under high-user traffic to prevent slow response times, increased server load, and poor user experience.
- Stress Testing. With this testing type, you need to test an application programming interface with large data or sudden spikes in user requests.
- API Documentation Testing. With API document testing, testers make sure that application programming interface documentation is always up-to-date and correct while the API is set up and functions as documented.
What is Cucumber?
Written in Ruby, Cucumber is a BDD framework that allows teams to use a human-readable Gherkin syntax for writing test cases. When test scenarios are written in plain language, teammates without technical backgrounds can better communicate and easily understand what is going on in the project. Cucumber tests are linked to step definitions written in a programming language, which are then executed to verify the app’s behavior.
When using the Cucumber framework for API test automation, you can efficiently test the APIs to uncover any bugs or vulnerabilities before they become problems as well as save time and money in the long run.
Why use Cucumber framework for API testing?
- With Cucumber, teams can write test cases in plain English and avoid misunderstandings about what the tests are verifying.
- Cucumber can be integrated with various tools for application programming interface testing.
- Supporting BDD, teams can focus on the behavior of the application rather than the implementation details.
- Teams can reuse step definitions across different scenarios and maintain tests more easily.
- Thanks to Cucumber, teams can see what has been tested and what the results are.
API Testing Cucumber Your Steps to Follow
With API testing, teams can validate the business logic, data responses, and performance of server-side endpoints. When using the Cucumber BDD framework, testing teams can create tests written in Gherkin and make them understandable for the whole team. However, teams should understand the application programming interface specifications before writing tests. They need to overview the API’s purpose, functionality, endpoints, request methods, expected request formats, and response structures at the very start.
How to set up Playwright & Cucumber?
Prerequisites
On the begining you need to make sure you have the following in place:
✅ A development environment with your preferred programming language (e.g., JavaScript, TypeScript, Python) installed.
node -v
npm -v
Step 1: Start a Project
From the very start, you need to initialize the Playwright project, which can be done by running the next command:
npm init playwright@latestAfter that choose the programming language as Javascript when asked in the command line.
Next, you need to add project dependencies and establish configurations for test runners. Install Cucumber and REST Assured dependencies for application programming test interface.
npm i @cucumber/cucumberAlso, add the Cucumber extension to your VSCode:
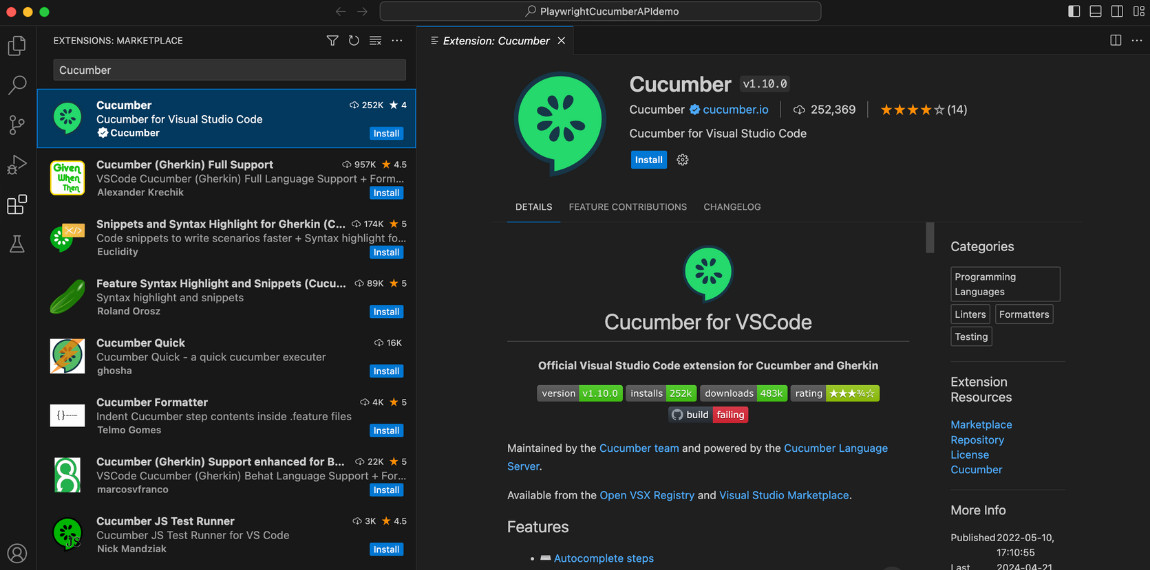
Finally, you need to install the node-fetch library to your project using:
npm install node-fetchAnyway, you can use any other HTTP library.
Step 2: Create Feature File
After you start the project and establish the appropriate configuration, it is imperative to create a structure so that your the feature files and step definitions will be well-organized for better clarity and understanding. Cucumber tests start with feature files, which describe the behavior of your application and when creating a feature file, you need to use Gherkin human-readable format with the following structure:
Feature:it gives explanation to the feature that is going being tested.Scenario:it provides information about test scenario.Given:it describes the starting condition.When:it defines conditions.Then:it determines the expected outcome.
Here’s a Cucumber API testing example of a Feature file for the JS project:
Feature: Login User

  Scenario: Successful user login
    Given I send a POST request to the user endpoint with the following payload:
      | email                | password          |
      | jolir86609@ikaid.com | pass              |
    When the response status code should be 201
    Then the response body should contain "John Doe"
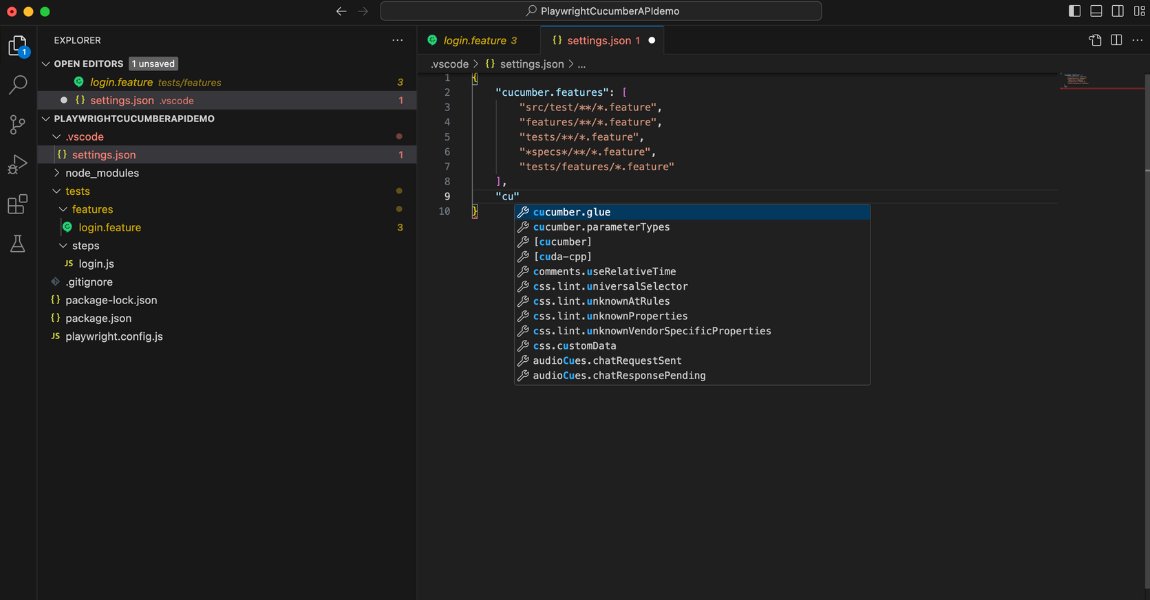
We have to create a feature folder and add our file to insert this code. After that add the path to this file and the steps file in vs.code =>settings.json Refer to the screenshot below for guidance:
Create a cucumber.json file and also add a path. It should look like this:
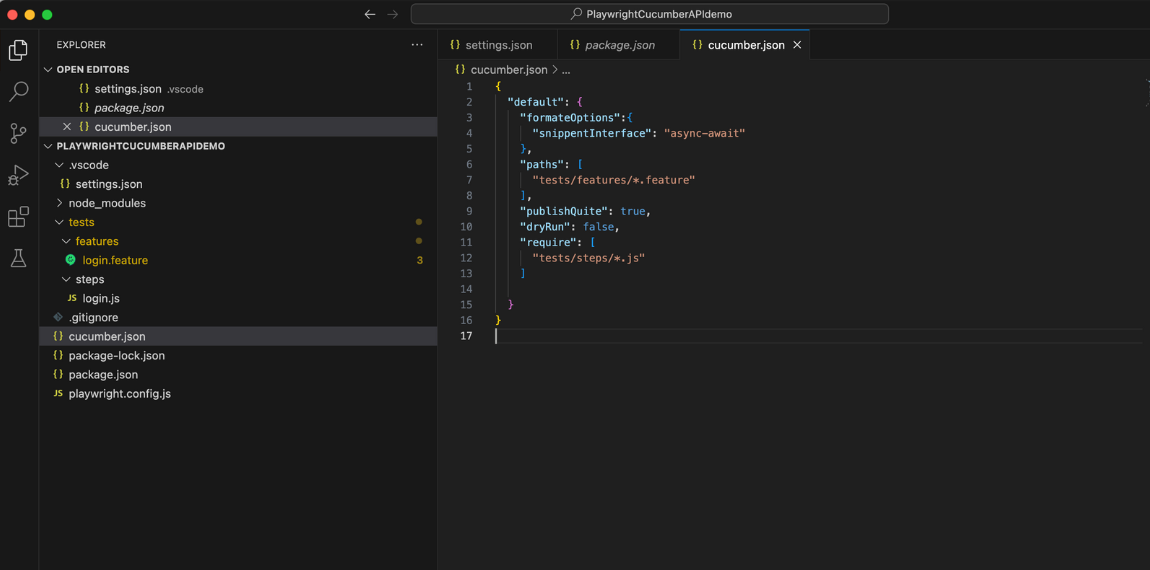
Step 3: Create Step Definition Directory
At this step, you can create a directory called step_definitions and add a JavaScript file (for example, login.js) Similarly, look at the structure of the file tree on top.
const { Given, When, Then } = require("@cucumber/cucumber");
const fetch = require("node-fetch");

Given("providing valid url", async function () {
    this.res = await fetch("https://app.testomat.io/api/login/", {
        method: "POST",
        headers: { "Content-Type": "application/json" },
        body: JSON.stringify({
            email: "jolir86609@ikaid.com",
            password: "pass",
        }),
    });
});

When("the response status code should be 201", async function () {
    const status = this.res.status; // fetch returns status as a property
    if (status !== 201) {
        throw new Error(`Expected status code 201 but got ${status}`);
    }
});

Then("the response body should contain John Doe", async function () {
    const body = await this.res.json(); // fetch returns JSON via res.json()
    console.log(body);
    if (!JSON.stringify(body).includes("John Doe")) {
        throw new Error(`Response body does not contain 'John Doe'`);
    }
});
In the created file, you can implement the logic for each step defined in your feature file. Generally, step definitions are used to interpret Gherkin’s steps, execute actions like making API requests, and use assertions to validate API responses.
Step 4: Execute Tests
At this step, you can run your tests using the following command:
npx cucumber-js featuresWith this command, you can execute the tests defined in your Cucumber feature file and step definitions.
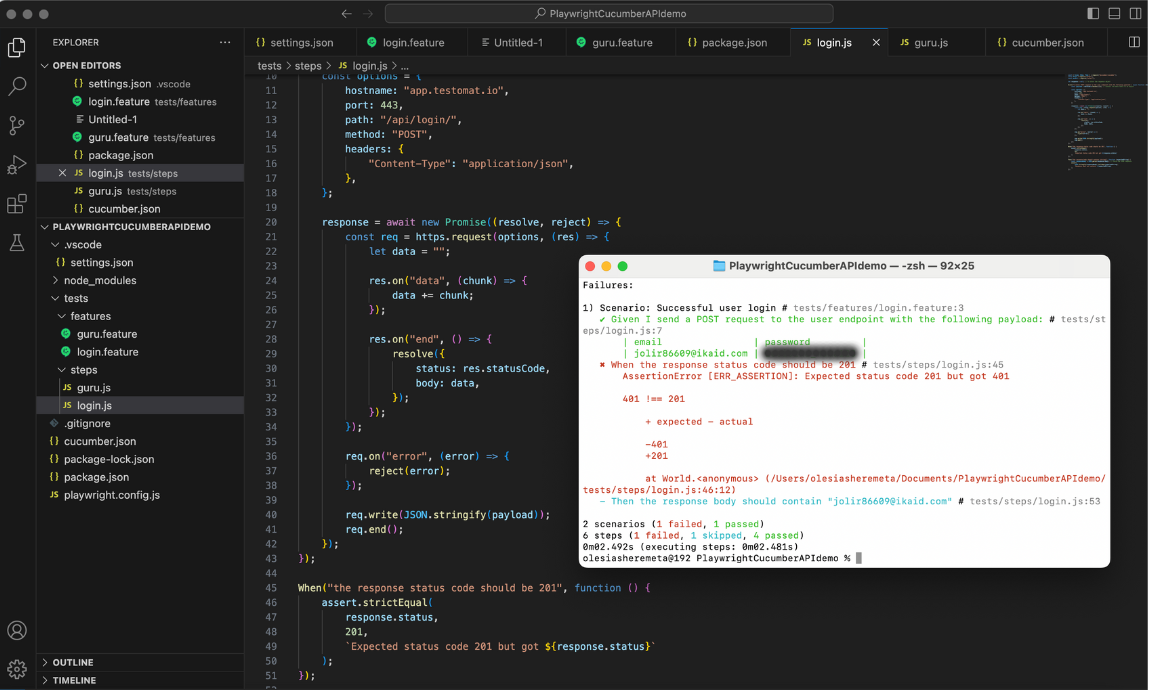
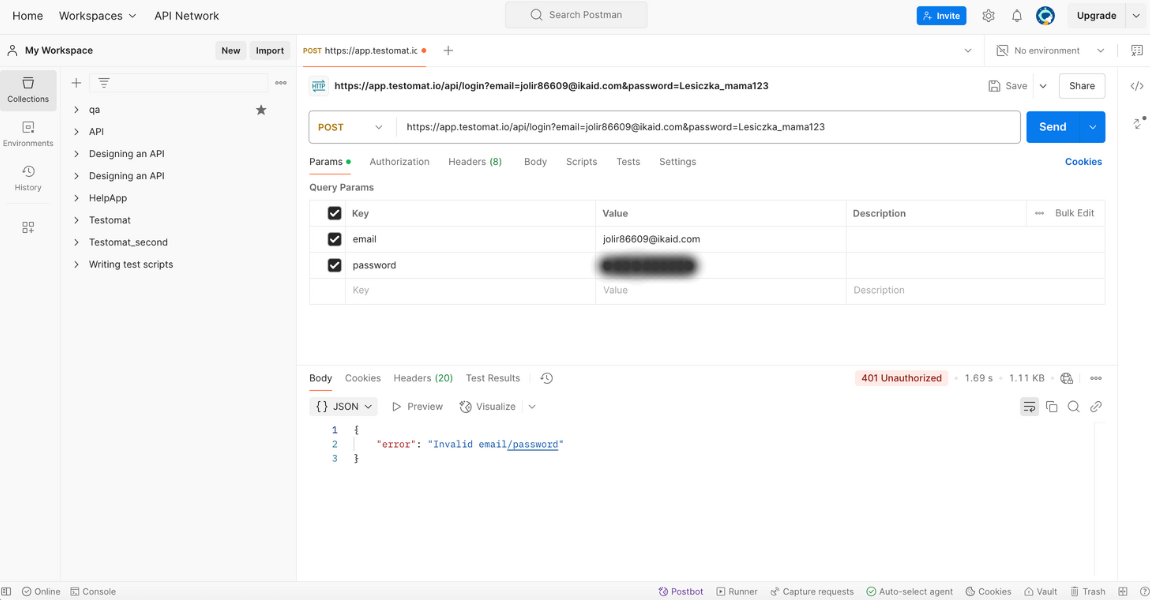
My test failed as the email is wrong, I know it. In addition, I checked this POST request with Postman also, you can see it better now.
Step 5: View Test Reports
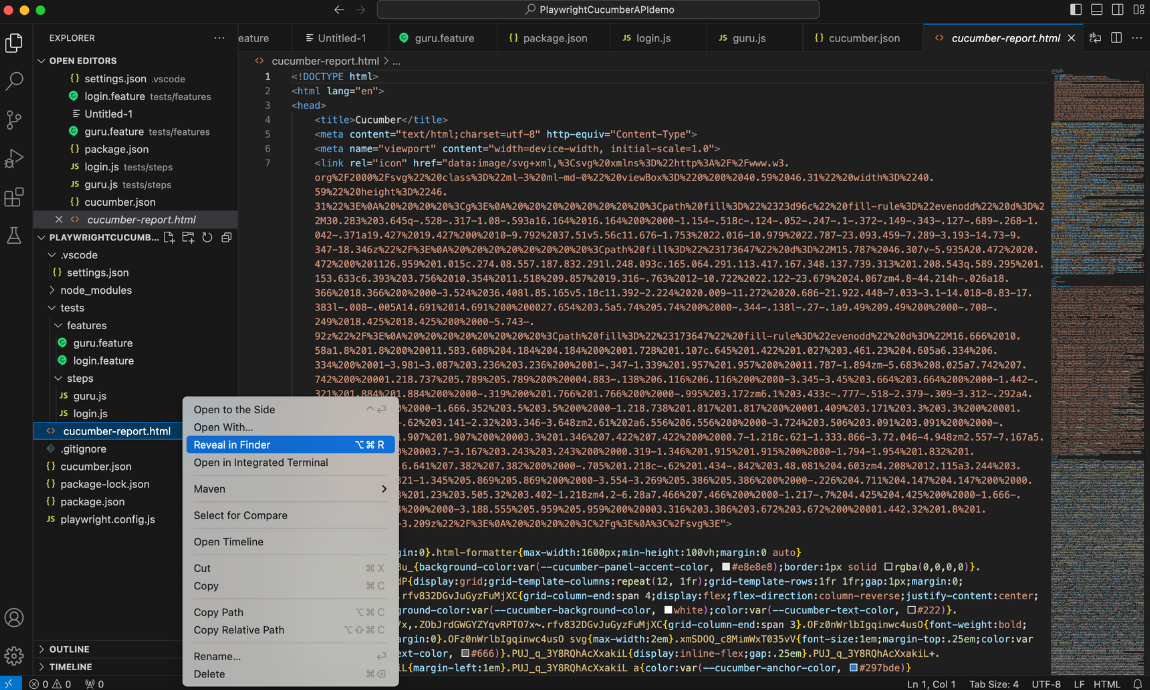
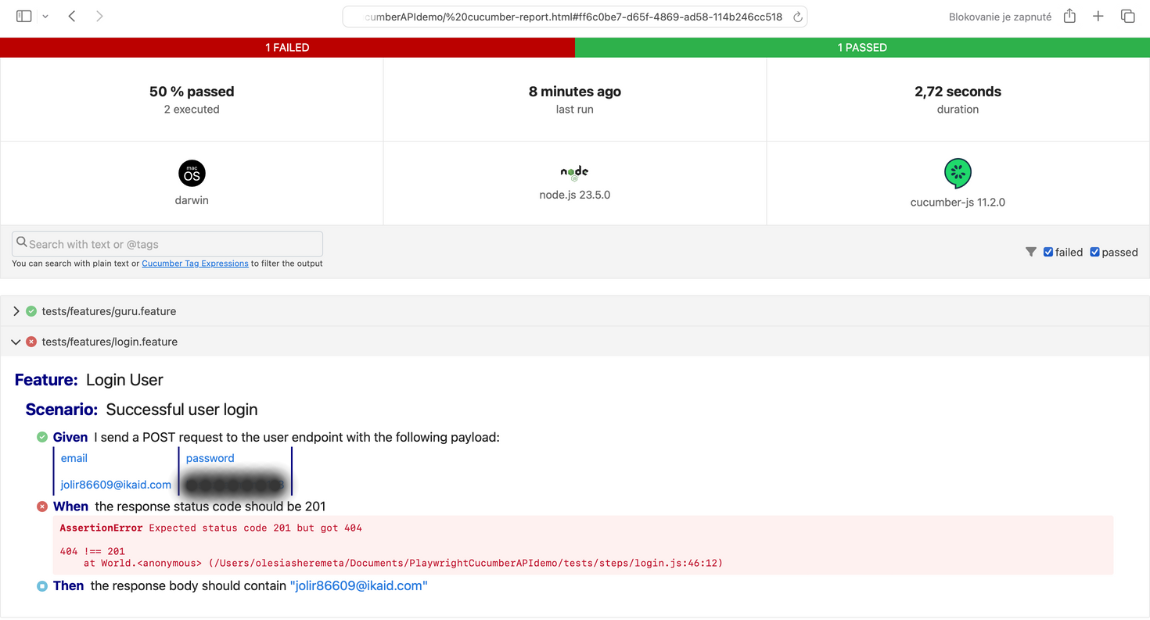
To generate reports, you can integrate Cucumber’s built-in reporting features or use third-party tools like cucumber-html-reporter Based on test reports, you can get information about test coverage, success/failure rates, and potential areas of improvement.
👀 Pay attention to the “format” settings in your cucumber.json file.
{
  "default": {
    "formateOptions":{
      "snippentInterface": "async-await"
    },
    "paths": [
      "tests/features/*.feature"
    ],
    "publishQuite": true,
    "dryRun": false,
    "require": [
      "tests/steps/*.js"
    ],
    "format": [
      "progress-bar",
      "html: cucumber-report.html"
    ]

  }
}
Cucumber Playwright Reporting with modern test management
Also, you can integrate test case management systems like testomat.io to get access to test results, metrics, and trends and quickly address any issues that arise during testing.
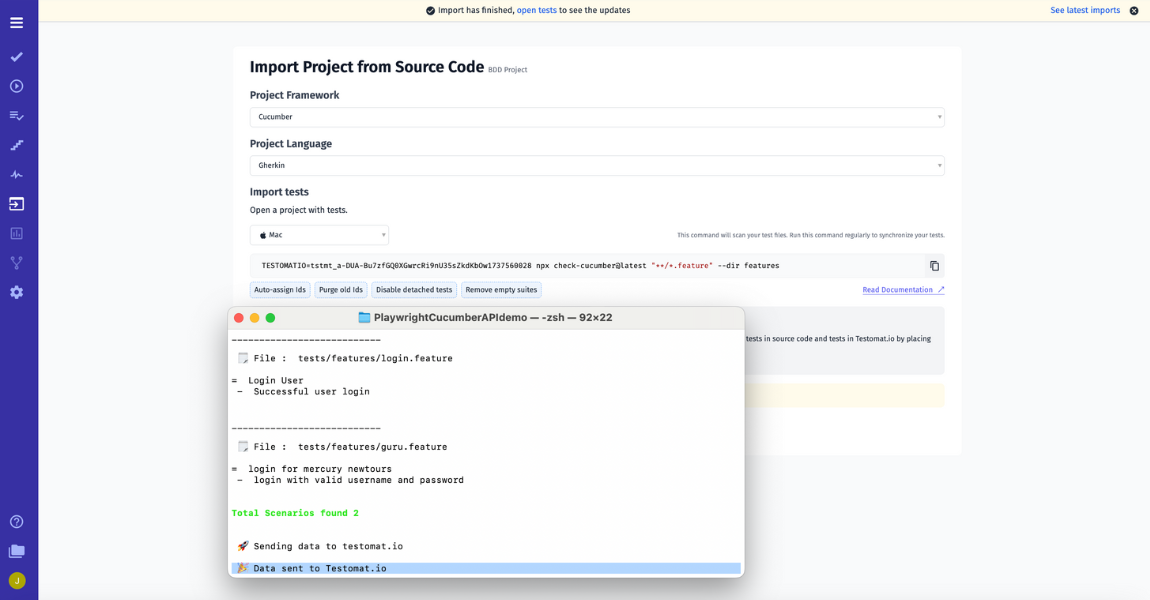
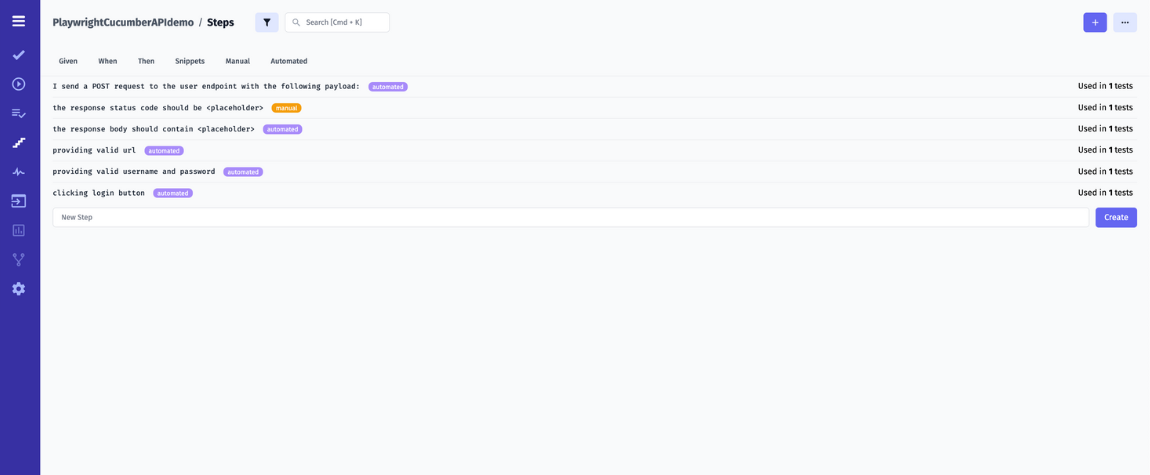
Push the Import button and just copy and paste the command in your CMD offered by TCMS to download your automated tests. By the way, it is a perfect option to sync your manual and automated tests in one place, consolidate Steps:
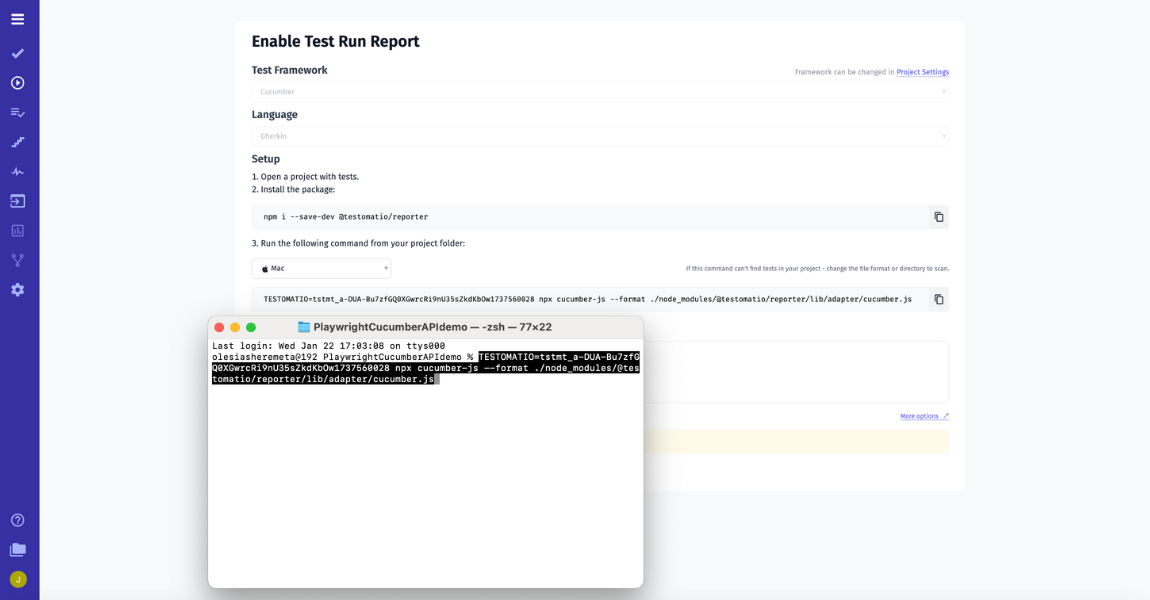
Similarly, with UI tips our test management suggests – launch a test execution of your Cucumber API Playwright framework.
🔴 Do not forget the recommendation to add a Playwright code runner plugin code to playwright.config.js file:
reporter: [
  ['list'],
  [
    '@Testomat.io/reporter/lib/adapter/playwright.js',
    {
      apiKey: process.env.TESTOMATIO,
    },
  ],
];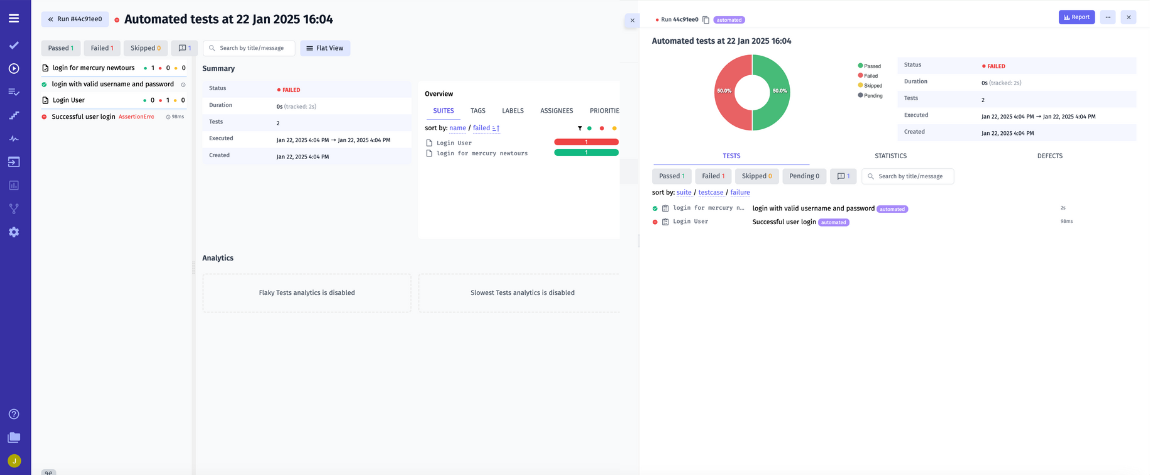
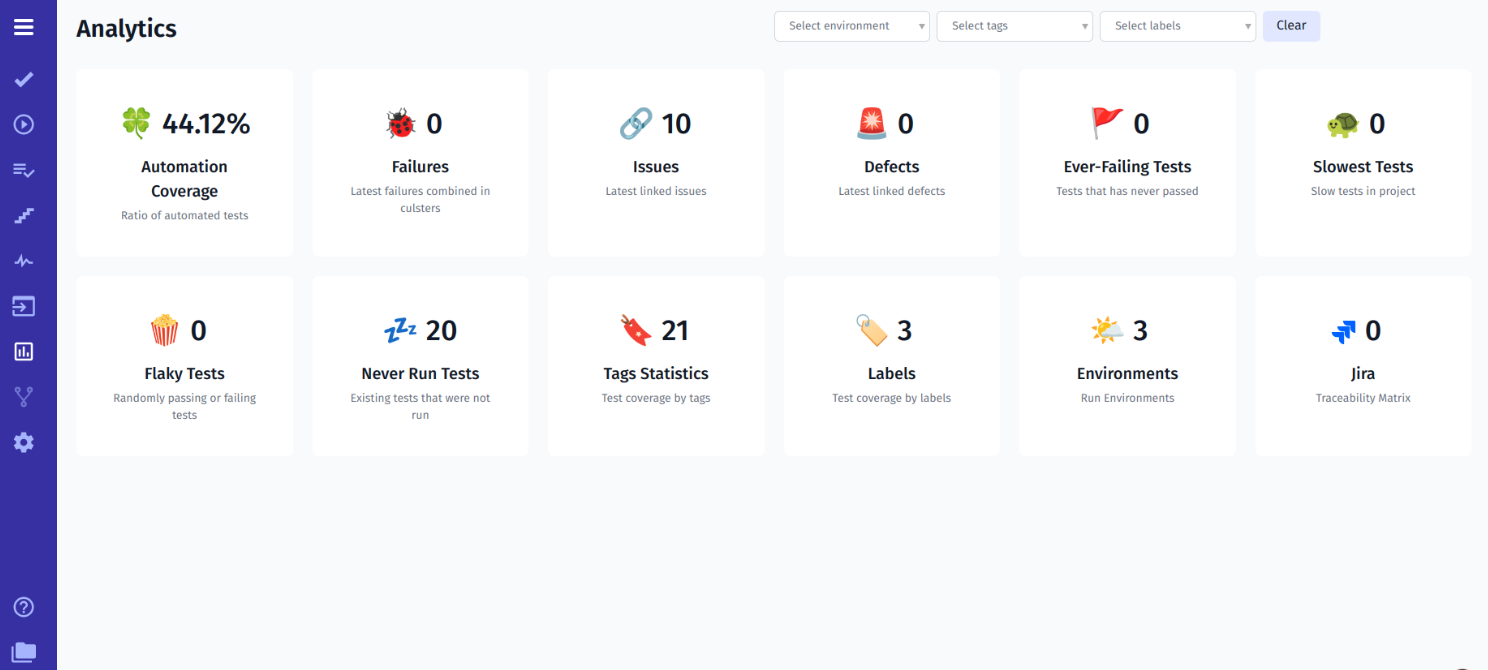
As a result, you can see such rich test result Report. It provides detailed insights into your test execution and comprehensive test run summaries, it ensures you have a clear view of your testing progress and quality metrics.
Best Practices for API Testing with Cucumber
- You need to remember that grouping your test cases by functionality is important. It will give you a better overview of the app status and improve maintainability.
- You can use mocking and stubbing techniques to simulate interactions with the application programming interface to isolate the application code from external dependencies and make the API testing process more efficient.
- You can apply hooks in Cucumber to set up preconditions and clean up post-conditions for test scenarios.
- You need to automate only what is not possible to be tested via unit or integration tests to avoid additional costs.
Bottom Line: What about using Cucumber test automation framework for Application Programming Interface (API)?
When you develop API-driven applications, you can use Cucumber for API testing. It offers a structured approach for writing human-readable feature files and linking them to step definitions. It helps teams create tests that are easy to understand and maintain.
There is no doubt that API testing is a critical part of the software development process. With Cucumber, you can make it more efficient and effective. By opting for Cucumber, you can deliver high-quality APIs and make sure that different app components function correctly.
👉 If you have any questions, do not hesitate to contact our specialists for consultation!
