

Thanks to the fast digital transformation, massively created software products require testing. With their growing complexity, they must be kept under strict control. With the help of TestNG automated testing framework, development and testing teams can automate and perform the testing process of legacy code quickly and hassle-free.
It is a powerful framework offering a variety of features, such as annotations, that enable running test suites in an accurate, organized, and efficient manner. Let’s find out more information about TestNG’s annotations, their types, lifecycle and hierarchy, reveal their advantages, and disadvantages in the article below:
What is the TestNG Framework?
Developed on the same lines as JUnit and NUnit, TestNG is an open-source test automation framework for Java, which is suitable for unit testing, integration testing, and end-to-end testing. The ‘NG’ combination of letters means Next Generation.
However, in 2025, JUnit 5 is generally regarded as the more modern and future-ready tool compared to TestNG, especially for starting new projects. JUnit 5 continues active development with regular updates and improvements.
TestNG framework was created to make automated testing simpler and more effective thanks to diverse features and capabilities, which include grouping, assertions, simultaneous test execution, parameterized testing, test dependencies, annotations, and reporting.
Applying its useful functionality, especially annotations, during QA testing enables testers to easily organize, schedule, and execute tests. Thanks to its stability, it remains in demand for complex enterprise testing scenarios.
To start, let’s first clarify some essential terminology which relates to TestNG’s annotations.
→ Suite. A suite consists of one or more tests.
→ Test. A test consists of one or more classes.
→ Class. A class consists of one or more methods.
What are TestNG Annotations?
In TestNG, you can use annotations to identify tests, set priorities, and configure other aspects of how the tests should be run. Aimed to serve different purposes, annotations are lines of source code, which have been included in the program or business logic to control the flow of methods in the test script. They are preceded by a @ symbol, which allows performing some Java logic before and after a certain point.
TestNG Annotations Hierarchy and Lifecycle
In this framework, there is a lifecycle of annotations that helps teams organize and execute test methods in a logical order. These lifecycle annotations are mainly the before and after annotations that are used to execute a certain set of code before and after the execution of actual tests.
These lifecycle methods are used to basically set up test infrastructure before the start of test execution and then to cleanup any of these things after the test execution completes. In the picture below, you can see that the method annotated with @BeforeSuite will be executed first, whereas the method annotated with @AfterSuite will be executed last. Below, you can see the lifecycle and hierarchy of TestNG annotations
Different Types of TestNG Annotations
Here you can find the TestNG annotations list along with TestNG annotations with examples:
@TestTestNG is told to execute methods as standalone and separate test cases. Using this method, extra characteristics can be detailed, and tests can be turned on/off.@BeforeSuiteThis method will execute before the entire suite of tests. For example, it can be useful for one-time setup tasks, such as initializing a database connection or setting up a global test environment.@AfterSuiteThis method will execute after the entire suite of tests. It makes it ideal for global cleanup operations, like closing database connections, tearing down test environments, or generating final reports.@BeforeTestThis method will run before the execution of all the@testannotated methods inside a TestNG Suite. It is suitable for setting up configurations, which are specific to a particular test run. For example, initializing a browser instance.@AfterTestThis method will run after the execution of all the@testannotated methods inside a TestNG Suite. It is a good fit for specific test cleanup tasks – closing the group’s browser instance or clearing test run data.@BeforeClassThis method will execute before each test class. It is a good fit for setup tasks common to all tests in that class. For example, loading configuration files or initializing a reusable class object.@AfterClassThis method will run after each test class. It is suitable for class-level cleanup tasks, such as releasing resources or shutting down objects created for the entire class.@BeforeMethodThis method will execute before each test method. It is suitable for initializing a fresh browser session, logging in a user, or resetting test data before each@Testmethod runs.AfterMethodThis method will execute after each test method. It can be used for logging out a user, closing a browser session, or cleaning up test data.@BeforeGroupsThis method will execute right before the first test method of a specific group or set of groups, which can be smoke, regression, begin. It is perfect when you need to perform setup tasks, which are common for a collection of related tests.@AfterGroupsThis method will execute once, after all test methods belonging to specific groups have finished running. It can be applied as an ideal option for performing shared cleanup tasks for a collection of related tests.
Test annotations in TestNG have multiple attributes, which can be used for the test method and help define tests and provide clarity in terms of TestNG annotations order of execution used in the TestNG class. These attributes are:
- alwaysRun: always executes, even if its dependencies or preceding methods fail.
- dataProvider: specifies the name of a method that provides data for the test method.
- dependsOnGroups: specifies group names whose methods must run and succeed before this test method (or class) executes.
- dependsOnMethods: makes certain the tests execute only if its specified dependent method successfully runs, otherwise it will be skipped.
- description: describes the test method briefly.
- enabled: the test method or class’s tests are skipped if false. The default is true.
- expectedExceptions: indicates that a test method is required to throw the specified exception.
- groups: groups test methods focusing on a single functionality.
- invocationCount: defines the number of times a test method should be executed.
- priority: defines the order of execution of test cases.
- successPercentage: sets the failure percentage for tests that run multiple times.
- timeOut: defines the time a particular test/tests should take to execute.
Why Teams Use Annotations in TestNG
- Thanks to TestNG annotations execution order, teams are in the know about a clear lifecycle of tests, having specific steps, which have been clearly defined, for everything that happens before, during, and after each test or group of tests is executed.
- Teams can categorize tests into logical groups in order to run only smoke or regression tests.
- With parameterization, teams can execute the same testing logic multiple times with different sets of data to improve test code reusability and eliminate the need to write separate test methods for each data variation.
- Strongly typed annotations allow teams to get immediate feedback on incorrect configurations and fix problems with their setup before the tests even have a chance to run.
- When marking methods with specific annotations, every team member has a clear understanding of what the purpose is and can maintain and upgrade tests over time.
- When teams use annotations, there is no need to extend any Test class like JUnit.
How To Work With TestNG Annotations: Key Steps
Before using TestNG’s annotations, you need to take into account the following prerequisites:
- You need to use an IDE like Eclipse or IntelliJ for easier development of tests. Anyway, our example TestNG project is implemented here with Visual Studio Code.
- JDK version should be compatible with TestNG and configured.
- You need to create or launch the Java project where you’ll be developing and running tests.
- You need to include a Maven/Gradle equivalent dependency or TestNG’s JAR file in your project’s build path to make the annotations available.
- You need to create and configure
testng.xmlto fully utilize features like suites, tests, groups, and parallel execution that interact with various annotations. - If necessary, you can get ready to include TestNG tests in your CI\CD workflow.
# 1 Step: Set up environment
Before starting a test framework, check the Java version which runs TestNG tests via Maven to ensure project stability and compatibility for proper execution and builds.
java -version
mvn -v
You may review them in the documentation by following the next links Java, Maven
So, my IDE is VS Code, and I have to install the official Microsoft Extension for Java:
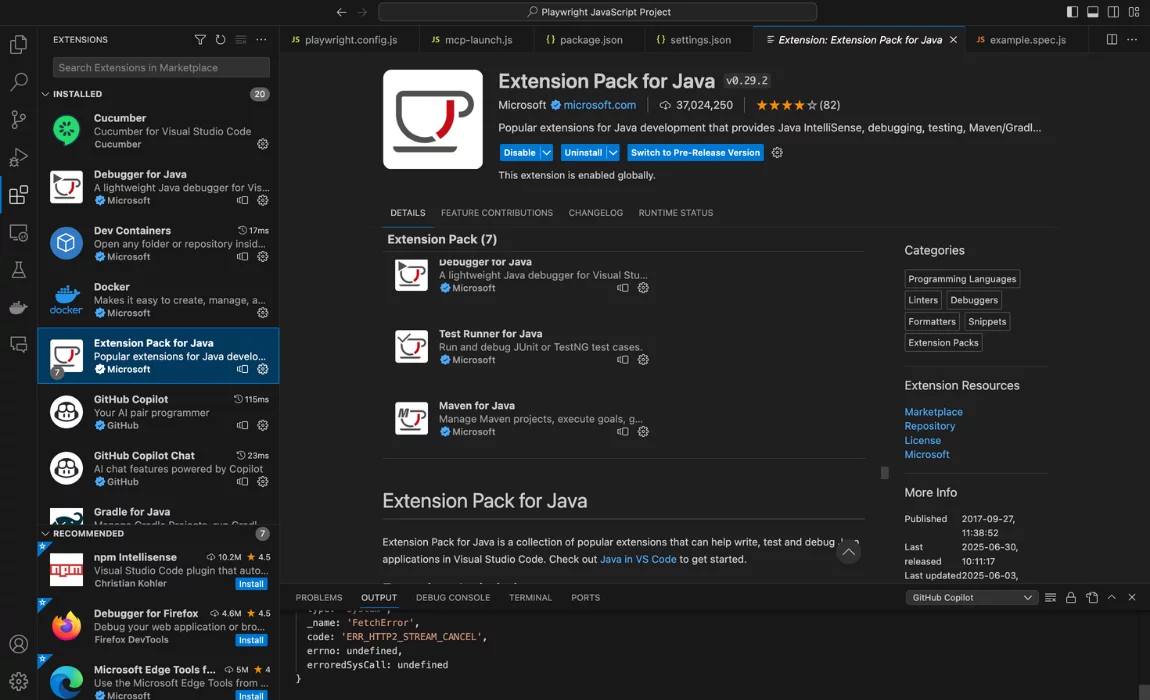
By clicking the button Install you download the set of plugins, allowing you to code in Java with the Visual Studio Code editor freely now.
#2 Step: Create & configure your TestNG framework project
There are two options to create a Maven project in VSCode: using the IDE UI by choosing Maven in the New Project wizard or, as in my case, through the CMD command:
mvn archetype:generate -DgroupId=com.example.demo \
-DartifactId=Demo-Java-TestNG-framework \
-DarchetypeArtifactId=maven-archetype-quickstart \
-DinteractiveMode=false
A brief parameter explanation:
-DgroupId: Package name base (like com.yourcompany)-DartifactId: Folder/project name-DarchetypeArtifactId: Type of project scaffold (quickstart)-DinteractiveMode=false: Prevents Maven from asking prompts
Once the project is created, in the editor, you will see an auto-generated basic pom.xml and project structure:
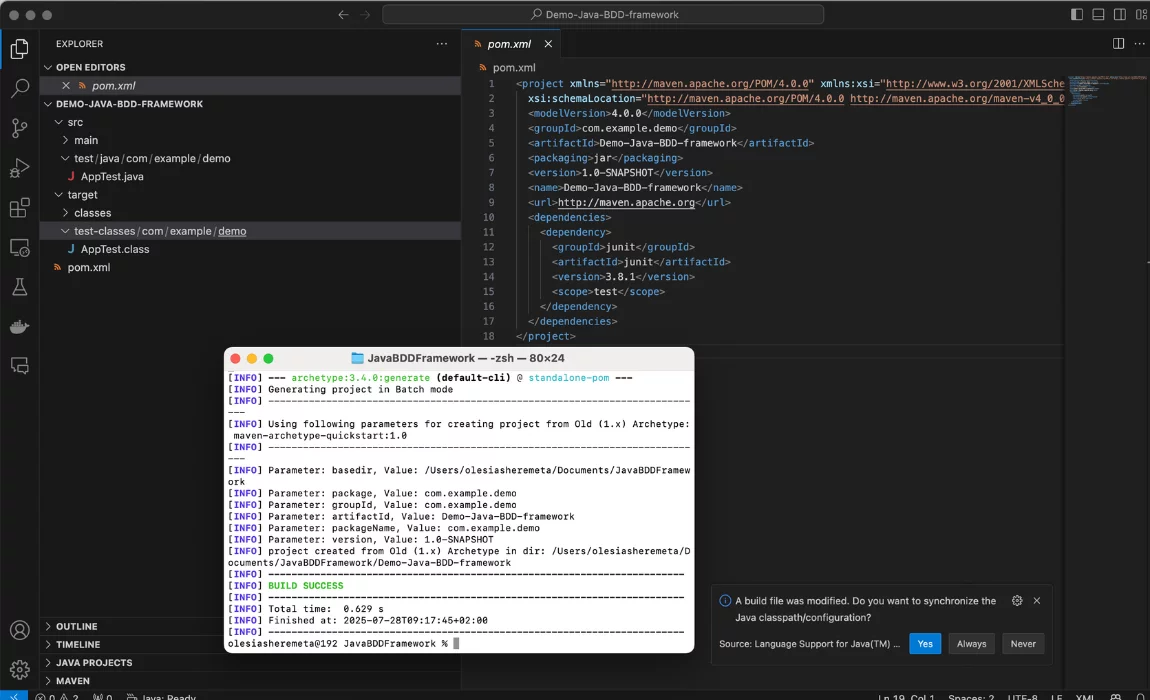
Pay attention to the Maven build notification in the bottom right-hand corner. You should agree every time after savings in the BDD framework project, anyway, to do it manually with the command:
mvn clean install#3 Step: Setting up Configuration
First, the test automation engineer is adding dependencies via Maven in the pom.xml file:
<dependencies>
  <!-- TestNG -->
  <dependency>
    <groupId>org.testng</groupId>
    <artifactId>testng</artifactId>
    <version>7.9.0</version>
    <scope>test</scope>
  </dependency>

  <!-- Selenium -->
  <dependency>
    <groupId>org.seleniumhq.selenium</groupId>
    <artifactId>selenium-java</artifactId>
    <version>4.20.0</version>
  </dependency>
</dependencies>
#Step 4: Organizing TestNG framework structure
At this step, teams need to organize test suites based on their testing needs, so it is suitable to define the tree structure of our project now.
Demo-TestNG-Login-Project/
├── pom.xml
├── testng.xml
└── src
    └── test
        └── java
            └── com
                └── example
                    └── tests
                        ├── BaseTest.java
                        └── LoginTest.java
The testng.xml file in TestNG serves as an entry point for executing TestNG tests in a controlled and flexible manner. Instead of running all tests in classes, configure it to include or exclude specific groups.
Sample testng.xml Suite File:
<!DOCTYPE suite SYSTEM "https://testng.org/testng-1.0.dtd" >

<suite name="Login Suite">
  <test name="Login Tests">
    <classes>
      <class name="com.example.demo.LoginTest" />
    </classes>
  </test>
</suite>
Explanation:
<suite>: Defines the whole suite of tests. You can give it a name.<test>: It is a logical container for a group of test classes.<classes>: Contains all the test classes to be executed.<class>: Specifies the fully qualified name of the test class
#3 Step: Writing Tests
At this step, teams can utilize the @Test annotation in TestNG to write tests for Java test classes with annotated methods.
File LoginTest.java showcases test automation logic, the example verify login in the system:
package com.example.demo;

import org.openqa.selenium.By;
import org.openqa.selenium.support.ui.WebDriverWait;
import org.openqa.selenium.support.ui.ExpectedConditions;
import org.testng.Assert;
import org.testng.annotations.Test;

import java.time.Duration;
import java.util.List;

public class LoginTest extends BaseTest {

    @Test
    public void loginWithValidCredentials() {
        driver.get("https://www.saucedemo.com/");

        // Wait for the username field to be visible
        WebDriverWait wait = new WebDriverWait(driver, Duration.ofSeconds(10));
        wait.until(ExpectedConditions.visibilityOfElementLocated(By.id("user-name")))
                .sendKeys("standard_user");
        driver.findElement(By.id("password")).sendKeys("secret_sauce");
        driver.findElement(By.id("login-button")).click();


        // Wait for product titles to be visible and verify
        wait.until(ExpectedConditions.visibilityOfElementLocated(By.cssSelector("[data-test='title']")));
        List<String> productTitles = driver.findElements(By.cssSelector("[data-test='title']"))
                .stream().map(element -> element.getText()).toList();
        Assert.assertFalse(productTitles.isEmpty(), "No product titles with data-test='title' are visible on the page.");

    }

    @Test
    public void loginWithInvalidCredentials() {
        driver.get("https://www.saucedemo.com/");

        // Wait for the username field to be visible
        WebDriverWait wait = new WebDriverWait(driver, Duration.ofSeconds(10));
        wait.until(ExpectedConditions.visibilityOfElementLocated(By.id("user-name")))
                .sendKeys("invalide_user"); // Using a likely invalid user for testing
        driver.findElement(By.id("password")).sendKeys("secret_sauce");
        driver.findElement(By.id("login-button")).click();

        // Wait for product titles to be visible and verify
        wait.until(ExpectedConditions.visibilityOfElementLocated(By.cssSelector("[data-test='title']")));
        List<String> productTitles = driver.findElements(By.cssSelector("[data-test='title']"))
                .stream().map(element -> element.getText()).toList();
        Assert.assertFalse(productTitles.isEmpty(), "No product titles with data-test='title' are visible on the page.");
    }
}
The BaseTest.java class serves as a foundational setup and teardown class for your Selenium TestNG tests. Particularly, it inherits common browser behavior from the LoginTest file.
package com.example.demo;

import org.openqa.selenium.WebDriver;
import org.openqa.selenium.chrome.ChromeDriver;
import org.testng.annotations.*;

public class BaseTest {
    protected WebDriver driver;

    @BeforeClass
    public void setUp() {
        driver = new ChromeDriver();
        driver.manage().window().maximize();
    }

    @AfterClass
    public void tearDown() {
        if (driver != null) {
            driver.quit();
        }
    }
}
#Step 5: Running TestNG framework tests
At this step, teams can execute the script directly from the IDE or build tool. It can be done by initiating the runner from the command line.
mvn test
# Step 6: Reporting
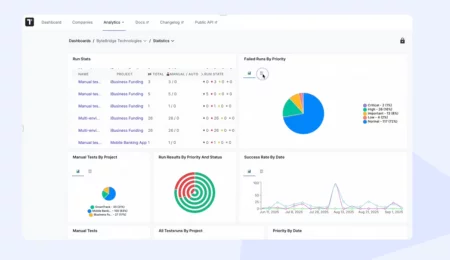
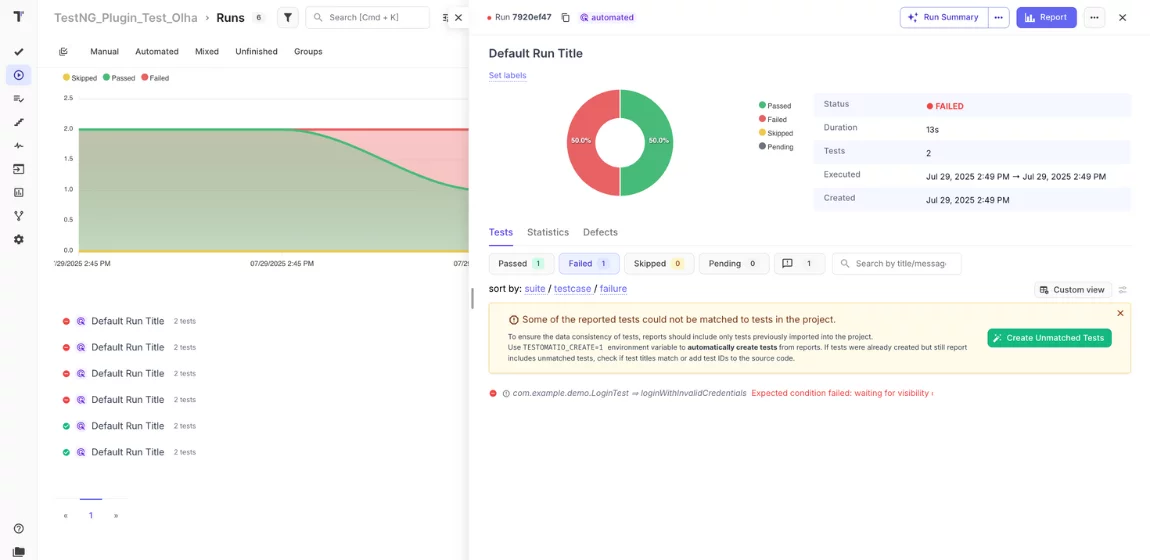
After being executed, the TestNG tests — would be okay to know their results 🤔 The test management system testomat.io generates comprehensive reports (HTML and XML) which provide details on results, including passes, failures, and skipped tests, and include execution time or runtime – how long the tests took to run. Based on that report, teams are in the know about bugs and ready to fix them. Find a Java report GitHub Link with the project details here Take only a few steps to get integrated reporting quickly:
- Add dependency to
pom.xmlwith a classifier to align your test framework:<dependency> <groupId>io.testomat</groupId> <artifactId>java-reporter-distribution</artifactId> <version>0.6.1</version> <classifier>junit</classifier> </dependency> - Get your API key from Testomat.io (starts with
tstmt_) - Set your API key as environment variable:
export testomatio.api.key=tstmt_your_key_here - Run your tests – that’s it! 🎉
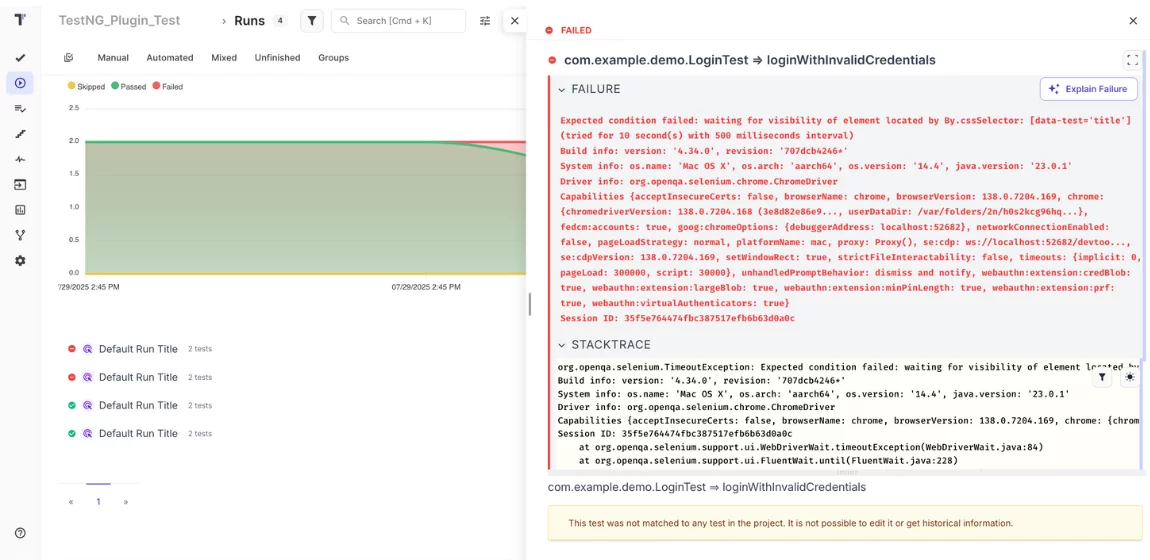
We can see the error details to find out the reason the test failed.
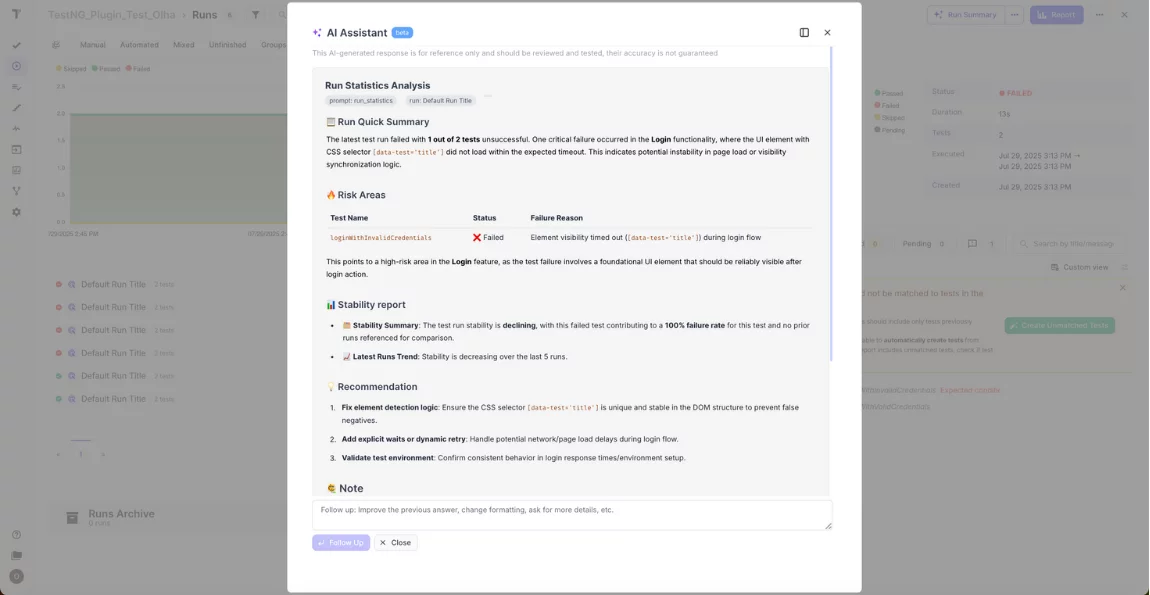
Smart AI-generated Summary Report that appears after each test run — giving you an instant overview without digging into details to save testers, developers, and managers time. Also, provide some value insights and suggestions.
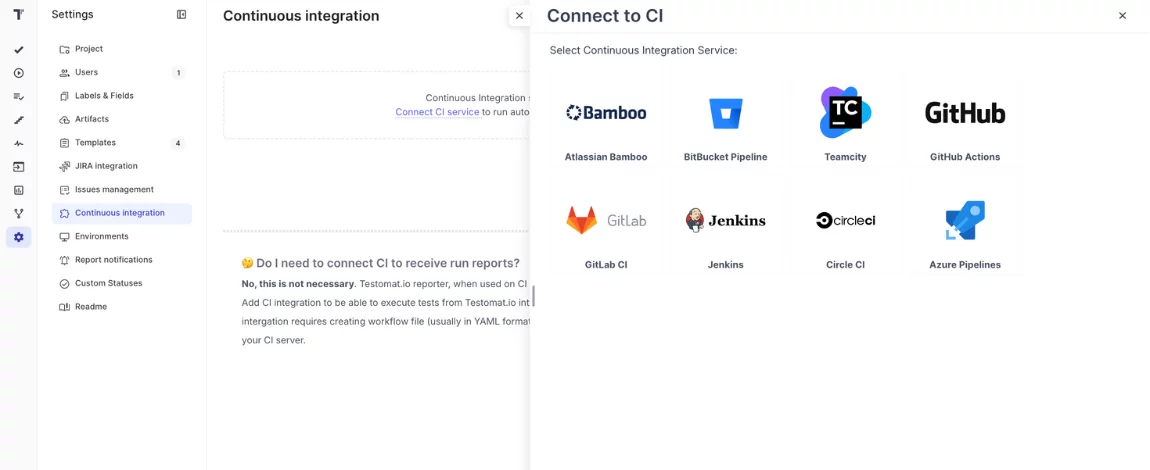
# Step 7: Integrating CI\CD
At this step, teams can configure their CI\CD pipeline to automate TestNG execution on code commits. The pipeline uses these generated TestNG reports to see if the build succeeded. Then it provides immediate feedback on code quality and blocks faulty code from deployment.
Integration into a CI\CD pipeline with testomat.io adds another powerful layer of test orchestration and traceability. @Tags and Labels allow smart running, subsets (e.g., smoke, regression, feature-specific tests) via the CI. When TestNG tests fail in CI, test management software sends notifications to Slack, Jira, email and Microsoft Teams.
Advantages and Disadvantages of TestNG
Focusing specifically on annotations, TestNG is more flexible than the JUnit framework, this is a comparison of pros and cons:
| ✅ Advantages of TestNG | ❌ Disadvantages of TestNG |
| Annotations are easy to understand. | It takes time to set up this framework. |
| Easy to group test cases and set timeouts. | Without the need to prioritize test cases on the project, it is not a good fit. |
| Parallel testing and cross-browser testing are possible with TestNG. | Compared to JUnit, its limited adoption resulted in a smaller pool of experienced specialists. |
| It supports parameterized and dependency tests. | Requires additional effort to manage complex test dependencies. |
| Generating HTML Reports by default. | Need some effort to customize for specific project needs. |
| Organizing tests into suites, groups, and dependents through a hierarchical test structure. | Hierarchical structure can become hard to maintain with large test sets. |
| TestNG’s listener interface enables the addition of customized setup, takedown, reporting, and cleanup procedures. | Listener implementation can introduce performance overhead. |
TestNG Annotations Best Practices
Here are some tips to follow to effectively use TestNG Annotations:
- You should know the specific TestNG annotations sequence for running tests –
@BeforeSuite–>@BeforeTest–>@BeforeClass–>@BeforeMethod–>@Test–>@AfterMethod–>@AfterClass–>@AfterTest - You should correctly choose
@Beforeand@Afterannotations, which define how often your setup/cleanup processes are going to be performed. - You should give your
@Testmethods relevant group names (for example, sanity, regression, integration) to quickly run select tests without altering your code. - You should keep your
@Beforeand@Aftermethods free of complex app logic to maintain the speed and reliability of tests.
Interesting to read:
Bottom Line: What about using TestNG annotations?
With TestNG, teams can make automated tests more organized, readable, and maintainable. Its annotations allow them to organize and control the flow of test cases. When it comes to scaling and executing cross-browser testing across varied web environments, using TestNG annotation in Selenium is a perfect option.
– If you have any questions about annotations? 👉 Do not hesitate to contact our specialists.