Hi everyone, my name is Ira, and I work as a QA Engineer at MEV. I have been in the testing industry for about seven years, working on a variety of interesting projects – testing web, desktop, and mobile applications. Every day I use AI tools. In my opinion, they are a very convenient assistant at work, but they still cannot replace manual testing.
I decided to do research on how AI and MCP can improve QA workflows. In this article, I will share my experience implementing these tools: what worked, what did not, and why I can no longer imagine my work without them.
What Is This and Why Do I Need It?
Let us start with the basics. When I first heard about using AI for testing, I imagined something like a chatbot that answers questions. In reality, it is far more interesting.
What Is an LLM?
LLM (Large Language Model) = a large language model.
- Artificial intelligence trained on a massive amount of text.
- Understands and generates text.
- Examples: ChatGPT, Claude, Gemini.
The Difference Between LLM, Agent, and MCP
LLM = a smart text generator.
- Only responds with text.
- Does not perform actions.
Agent = LLM + hands.
- Can perform actions (create tests, open a browser, work with APIs).
- Plans and acts independently toward a result.
- Works with local tools (files, code, calculations).
MCP = Agent + access to your work environment.
- Connects to your tools (Jira, Confluence, GitHub).
- Reads and updates data without copy-pasting.
- Automates workflows end-to-end.
Analogy:
- LLM = Consultant (gives advice).
- Agent = Assistant (does things for you).
- MCP = Assistant with access to your office (does things for you AND has keys to all doors).
AI Agent – Not Just a Chatbot
An agent is a system that can work independently. I give it a task like “analyze these criteria,” and it does not just read the text. It looks for ambiguities, identifies gaps, and suggests which tests are needed – without me spelling out every step.
The best part is that you can run multiple agents in parallel. One analyzes requirements, another generates test cases, a third hunts for edge cases. It is like having a mini-team of assistants who do not eat your lunch from the fridge.
MCP – Why It Matters
Model Context Protocol – sounds complicated, but the idea is simple. It is a way to give AI access to your work tools.
We keep all our documentation in Confluence and tasks in Jira. Without MCP, I had to copy-paste requirements into a chat with AI. With MCP, the agent can read the latest version of a document, see changes in tasks, and link tests to tickets by itself.
The difference is like sending emails versus sharing a Google Doc – technically you can do it by email, but why torture yourself?
What to Choose: Agent Alone or Agent + MCP?
Short answer: start with an agent, add MCP when you feel the pain of doing things manually.
Start with AI Agent if:
- You want to try quickly (can be set up in an hour).
- You have a small team or work solo.
- You need the basics: requirements analysis, test case generation, checklists.
Downside: you will have to manually update the context when requirements change. Copy new ACs, explain what changed. Not critical at first, but it gets annoying over time.
Add MCP when:
- You are tired of copy-pasting documentation (this happened to me after 2 months).
- You need traceability between tests and requirements.
- The team has grown and everyone needs access to up-to-date data.
- Requirements change frequently.
Setting up MCP will take 1-2 days including coordinating access, but the time savings pay off within a week of active use.
My experience: I started with an agent and added MCP after two months. I do not regret not doing it from the start – it is important to first understand whether you actually need AI in your process, and only then invest time in a deeper integration.
What the Agent Can Actually Do (with Examples)
Okay, less theory, more practice. What do I actually do with the agent every day?
Analyzing Acceptance Criteria – Catching Problems Before Development
Morning. A new feature arrives in Jira. I read the ACs and feel something is off, but I cannot put my finger on what. Now I just throw the ACs at the agent:
I have acceptance criteria for a password recovery feature.Check them for completeness and find any ambiguities.
Within a minute I get a list:
- “Send an email” – to which address? What if the user changed their email?
- There is no mention of a link expiration time for the recovery link.
- What happens if the user clicks the link twice?
- Should recovery attempts be logged (security)?
Three of those points I would have remembered myself. But the logging one – I would have forgotten it 100% of the time. The agent never forgets.
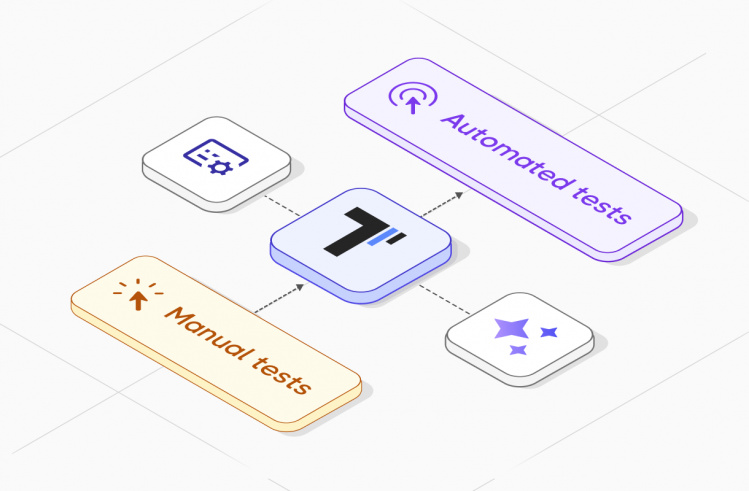
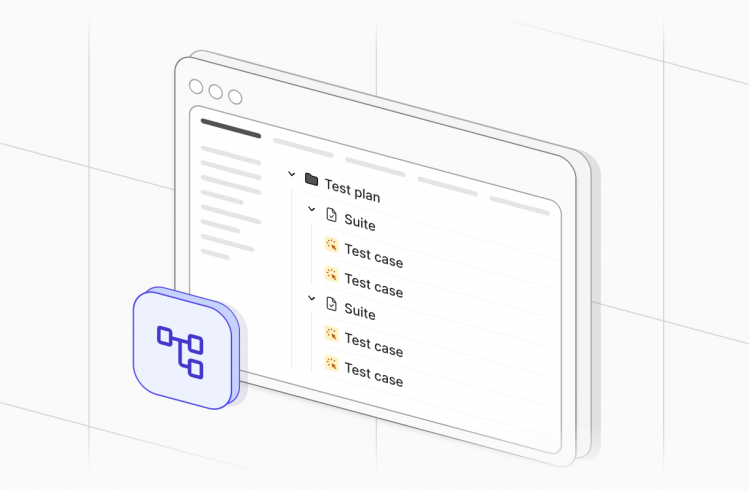
Generating Test Cases – From Idea to Ready-Made Tests
Once the ACs are agreed upon, test cases need to be written. This is the most tedious part of the job, honestly. Especially when you need to cover all edge cases.
I give the agent the ACs and say:
Create test cases for this feature.Do not forget about edge cases and negative scenarios.
The agent generates basic scenarios, alternative flows, edge cases, and negative tests. All I have to do is review and adjust them for our project’s specifics.
What is important – it writes in the format we use. I gave it a couple of examples of existing test cases at the beginning, and now it sticks to the same style.
Pre-Release Checklists – Fast and Focused
Need to quickly run through smoke tests. Normally I would look at old checklists and try to remember what else to check.
Now:
Create a smoke-test checklist for the authentication module.Note that we just fixed a bug with session timeout.
In 30 seconds I have an up-to-date checklist. I run through it, everything is fine, we release.
Bug Reports – Structure Without Effort
I find a bug. Previously I would spend 10 minutes writing the report: describing steps, writing the expected result, looking up environment details, thinking about priority.
Now I describe to the agent what happened, literally as I saw it:
User cannot log in after changing their email.Gets “Invalid credentials” even though the password is definitely correct. Checked in the database – the old email is still there, the new one is also present.
The agent produces a proper bug report with all fields filled in, reproduction steps, and suggests severity and priority. All I need to do is verify everything is correct and send it to Jira.
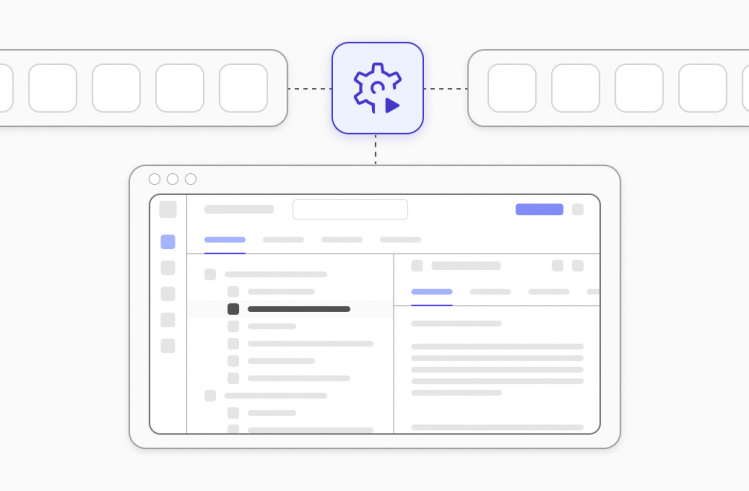
Jira Integration via MCP – Everything Connected
The coolest feature that appeared after adding MCP – automatic links.
A test fails → the agent sees this → creates a bug in Jira → links the bug to the test case → adds the tag ‘has_open_bug’ to the test.
I no longer forget to link a bug to a test. The agent never forgets.
Prompts I Use Every Day
In the first weeks, I was phrasing requests to the agent the way I would to a human. Long, complex, lots of words. Then I realized – the simpler, the better. Here are my working prompts.
For Working with Tests
Create a test:
New test for login in suite AUTH-001.Title "User logs in with valid credentials"
Find tests:
Show all tests with @smoke in the project

Find tests about checkout with high priority
Update a test:
Test TEST-123: change priority to critical, add @regression
For Search and Analysis
Complex search:
Find automated tests with @smoke assigned to the QA team
Coverage analysis:
How many automated vs manual tests do we have in suite PAYMENT-TESTS?
Find problems:
Which tests failed in the last run?

Show tests that have not been updated in 6 months
For Daily Tasks
Preparing for testing:
Take all @smoke tests, make a plan, show summary
After testing:
From suite CHECKOUT-TESTS, take the failed ones, make a list for bug reports
Quick analysis:
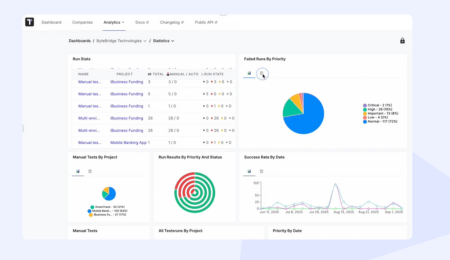
Look at the payment tests, show the results of the last runs
Look at the payment tests, show the results of the last runsThe most important thing I learned – the agent understands context. You do not need to explain from scratch every time; it remembers what we talked about earlier in the session.
How to Set It Up (Without the Pain)
For my agent I chose Claude Desktop because of how easy it is to connect other services to it. MCP can also be connected to the free version (which, for example, ChatGPT does not allow). Let me walk you through the setup. I went through all the pitfalls so you don’t have to.
Option 1: Agent as the Foundation
Step 1: Get a Token for Testomat.io
Go to Testomat.io, click on your avatar → Account → Access Tokens. There you will find your token (it starts with testomat_).
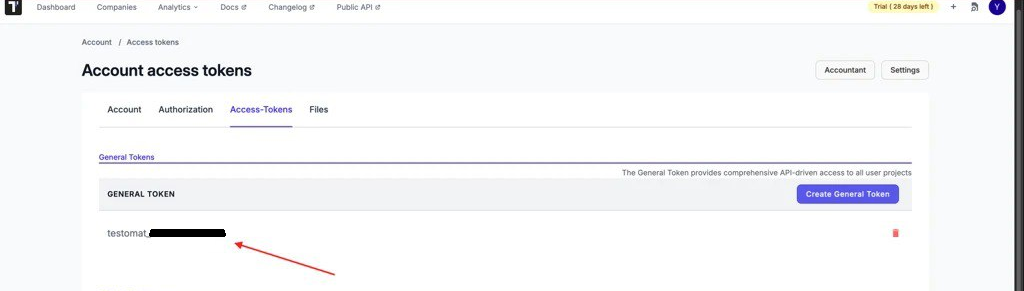
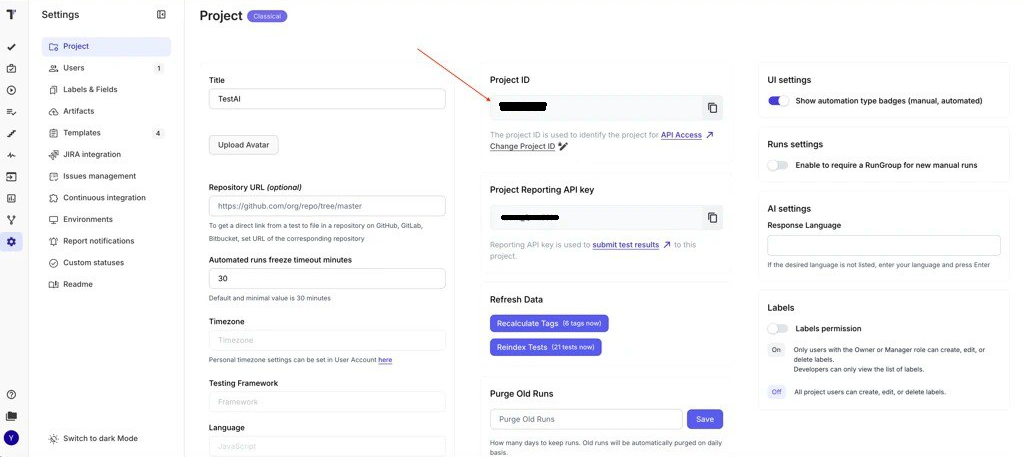
You also need to find the Project ID. Open the project → Settings – the ID is shown there.
Step 2: Configure Claude Desktop
Open Claude Desktop → Settings → Developer → Edit Config. Paste this (replacing with your own data):
{

  "mcpServers": {

    "testomatio": {

      "command": "npx",

      "args": [

        "-y",

        "@testomatio/mcp@latest",

        "--token",

        "testomat_YOUR_TOKEN",

        "--project",

        "YOUR_PROJECT_ID"

      ]

    }

  }

}
Save and restart Claude. It should work.
If npx does not work (for me, npx was not found at first) – you need to install Node.js. Go to nodejs.org, download the LTS version, and install it. Then npx will appear automatically.
Step 3: Add the Atlassian Connector
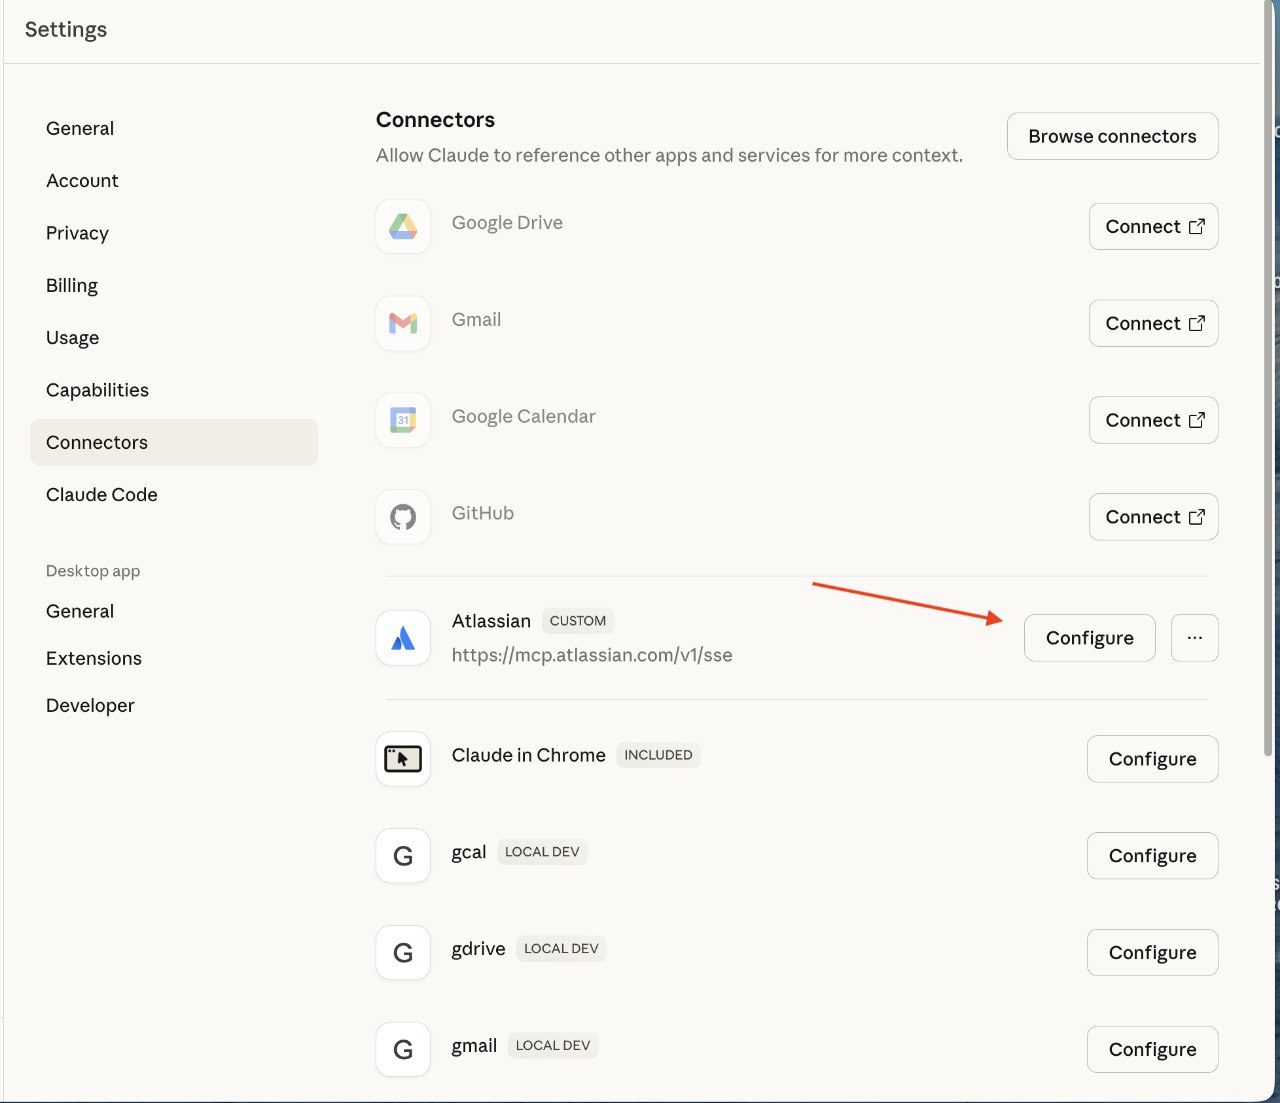
Claude Desktop → Settings → Connectors → Browse connectors → search for “Atlassian Rovo” → Add → authorize.
That is it. Seriously, it is just OAuth, done in a minute.
Important: you can configure permissions. Settings → Connectors → Atlassian Rovo → Configure → Custom. There you choose what exactly the agent can do. I started with read-only, and once I was satisfied everything was working, I added the ability to create tasks.
Option 2: Two Agents Are Better Than One
After some time using the basic agent setup, we wanted more quality control. You can use two LLMs, where one essentially monitors and validates the work of the other. Unlike the previous scenario where we used MCP and an agent, in this case we work directly through the API.
For this I used a combination of OpenAI API (ChatGPT) + Anthropic API (Claude) + n8n for orchestration.
n8n – What It Is and Why You Need It
n8n is an open-source workflow automation tool. It is a platform that allows you to connect different applications and services without needing to write code (or with minimal coding).
Key capabilities of n8n:
- Automate repetitive tasks between different services (e.g., automatically save Gmail attachments to Google Drive).
- Integrate CRM systems, databases, messengers, and marketing tools.
- Create complex business processes through a visual editor.
This tool is especially useful for automating business processes, DevOps tasks, and integrating different systems without building your own API integrations from scratch.
In n8n you see the workflow visually – blocks connected to each other. To add any action or element, just click “+” in the right corner. To change the parameters of an action or element, double-click on it.
Docker – for Running n8n
Docker is a platform for developing, delivering, and running applications in containers.
In simple terms: Docker lets you “package” your application together with everything it needs (libraries, dependencies, configurations) into a single container that runs the same way on any computer.
Why you need it:
- “Works on my machine” – the classic developer problem. With Docker, the application works identically on your laptop, a colleague’s server, and a production server.
- Isolation – each application runs in its own container without conflicts with others.
- Fast deployment – you can run a database, web server, or any other service in seconds.
- Easy scaling – just run more containers.
Install Docker Desktop (available for Mac and Windows), then run two commands:
docker volume create n8n_data

docker run -it --rm \

--name n8n \

-p 5678:5678 \

-e GENERIC_TIMEZONE="Europe/Kyiv" \

-e TZ="Europe/Kyiv" \

-v n8n_data:/home/node/.n8n \

docker.n8n.io/n8nio/n8n
In some cases the second command may not work – try without the backslashes as a single line.
Open localhost:5678 – it works. All data is stored in n8n_data, so everything persists after restarting the container.
Creating the Workflow in n8n
I will describe in detail how I set up this process. It seemed complicated at first, but once I figured it out it turned out to be quite logical.
Important note: in this approach we do NOT use MCP. This is pure API-based work. So we need API keys from all services.
Testomat.io Token
I described how to get the Testomat.io token above. Testomat.io has a REST API with endpoints for everything: reading tests, creating, updating. Documentation is at docs.testomat.io/test-reporting/api – it is all quite clearly explained there.
OpenAI API Token (for ChatGPT)
- Go to platform.openai.com.
- Sign up / log in.
- API Keys → Create new secret key.
- Copy it (it is only shown once!).
- Add $5-10 to your account to start.
Anthropic API Token (for Claude)
- console.anthropic.com.
- Sign up.
- Settings → API Keys → Create Key.
- Copy the key.
- Also add money to the account (it already starts with $5).
Gmail Token
- Create a project:
- Go to Google Cloud Console.
- Click “New Project” → enter a name → “Create”.
- Enable the Gmail API:
- “APIs & Services” → “Library”.
- Find “Gmail API” → “Enable”.
- OAuth Consent Screen:
- “OAuth consent screen” → choose “External” → “Create”.
- Fill in: Application name, User support email, Developer contact email.
- “Save and Continue” → “Save and Continue” → “Back to Dashboard”.
- Create Client ID and Secret:
- “Credentials” → “+ Create Credentials” → “OAuth client ID”.
- Application type: “Web application”.
- Add Redirect URI: localhost:5678/…/auth2-credential/callback (for local n8n).
- “Create”. Copy Client ID and Client Secret – use them in n8n.
Important: these API tokens are not the same as MCP access. Here we pay per request. But you get full control and can orchestrate complex processes.
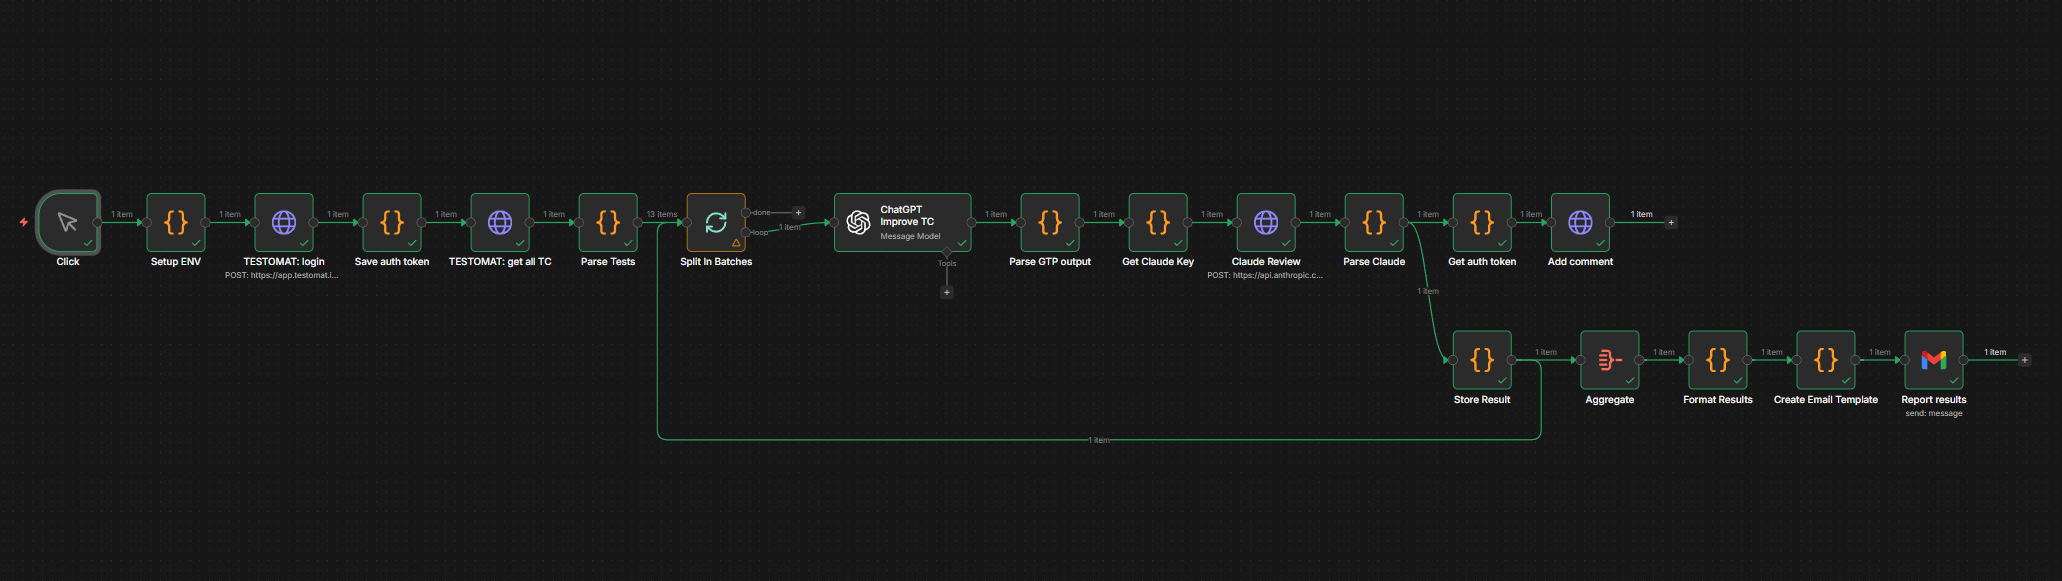
Workflow: Test Case Improvement with Validation
This workflow implements a dual-check AI system that evaluates test cases using both ChatGPT and Claude to ensure the highest quality standards.
The ready-made workflow can be found on GitHub: github.com/…/n8n-workflow-testing
There you will find:
- A workflow JSON file for import into n8n.
- A detailed setup guide (where to put which tokens).
- A list of required API keys.
To import the workflow into n8n:
Start from scratch → Menu (…) → Import from URL…
How It Works
- We trigger the workflow manually (Manual Trigger).
- n8n pulls test cases via the Testomat.io API and sends them to ChatGPT.
- ChatGPT analyzes each test case and returns improvements for the title, description, tags, and priority.
- The ChatGPT results are passed to Claude, which is asked to validate their quality using a detailed scoring system.
- n8n creates comments on each test case in Testomat.io with the proposed changes and their scores.
- After all checks are complete, a summary email is sent containing: overview statistics (total reviewed, approved, rejected), direct links to each test case grouped by review status, scores and recommendations for easy decision-making.
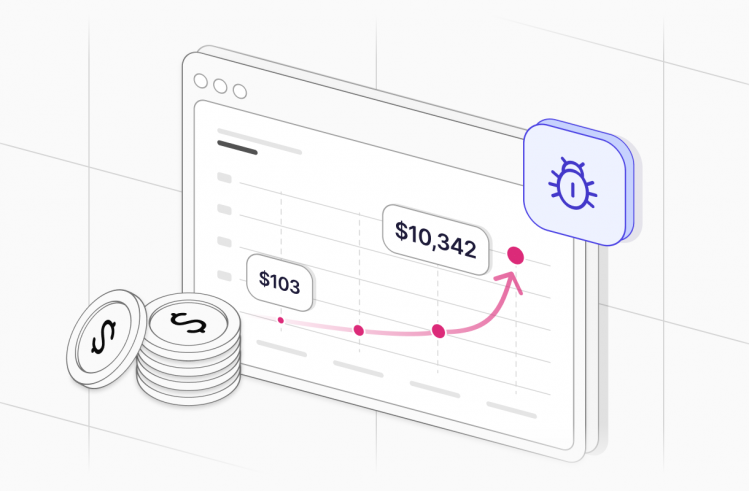
A Note on Costs
API requests are charged per number of tokens for input and output.
- GPT-4: ~$0.03/1K input tokens, ~$0.06/1K output tokens.
- Claude Sonnet: ~$0.003/1K input tokens, ~$0.015/1K output tokens.
- One test case is approximately 500 input tokens and 300 output tokens for both LLMs.
- That comes to about $0.05 per test case.
- Processing 20 tests per day = $1/day = ~$30/month.
Quite acceptable.
Testing the Workflow
Before running it on all your tests, I recommend:
- Create a test project in Testomat.io with 2-3 tests.
- In n8n, use only Manual Trigger.
- Verify that everything works.
- Check how much it costs.
- Only then run it on real data.
MCP vs API Approach – A Comparison
Now that I have described both approaches, here is how they compare:
MCP (via Claude Desktop):
- Easier to set up.
- No need to pay for API calls.
- Works within the Claude interface.
- Less control.
- Cannot automate complex workflows.
API via n8n:
- Full control over the process.
- Can build complex automations.
- Two LLMs cross-check each other.
- Logging and analytics.
- Requires payment for API usage.
- More complex to set up.
- Needs maintenance (Docker, n8n).
You can use both approaches: MCP for daily manual work, API for automated processes.
Common Mistakes When Implementing
Typical scenario: you want requirements analysis, test generation, integration with everything, automation, AND predictive analytics. All in the first week.
Result: nothing works properly. You spend a ton of time on configuration and finish nothing.
What to do instead: start with one problem. For example, only AC analysis. Get it working. Get results. Show the team. Then add the next thing.
Mistake 2: Not Providing Enough Context
“Create a login test” – too vague. AI does not know your product’s specifics.
“Create a login test for a mobile banking app. Note that we have two-factor authentication via SMS, and we need to verify that after 3 failed attempts the account is locked for 15 minutes” – now that is proper context.
Solution: create a document describing your product’s specifics. Every tester gives this context to the agent first, and then gets to work.
Mistake 3: Blind Trust
If you just copy-paste the agent’s results without checking, you might end up with a test case that verifies a non-existent feature. The agent can “hallucinate.”
Solution: always review the AI’s output. For basic things (like formatting a bug report) this may not be critical. For complex logic – it is absolutely necessary.
Mistake 4: Ignoring Security
If you simply give the agent access to everything in Confluence, it can read confidential documents. The security team will not be happy.
Solution: agree with the security team on what AI is allowed to read. Use a test environment for experiments. Do not grant access to production data without good reason.
Summary: Is It Worth It?
It depends on your expectations.
AI will not make you a superhero overnight. The first two weeks you will be slower because you are learning a new tool. That is normal.
AI does not replace experience. It does not know your project’s specifics. It does not understand the business context. It does not have an intuition for when something feels “off.” That is still your job.
But AI genuinely saves a ton of time on routine work. Requirements analysis, generating basic test cases, writing documentation, syncing with Jira – all of this is faster now.
And it frees your mind for what matters. When you do not have to spend two hours writing 10 similar test cases, you can focus on complex scenarios, edge cases, and security issues.
My Checklist: Should You Implement This?
Worth trying if:
- You have lots of routine tasks (documentation, repetitive test cases).
- Requirements change frequently and tests need to be constantly updated.
- The team is growing and you need to standardize processes.
- You want more time for complex work instead of routine tasks.
Can wait if:
- You have a small project with 20 test cases.
- Processes are unstable and change every week.
- Security is very strict and will block access for months.
- The team has no enthusiasm for trying something new.
Where to Start Right Now
- Take Claude (free) and try generating a test case for any feature.
- If you like it – connect it to Testomat.io.
- Spend a week using it only for AC analysis and basic test generation.
- Evaluate the results – how much time did you save, is the quality acceptable?
- Decide whether to go further – add MCP, scale to the team.
Do not try to implement everything at once. Small steps, quick wins, gradual scaling.
Pricing as of January 2026
Main options for working with an agent (standard subscriptions):
| Model | Subscription Price | Test Cases / Month | Cost per Test Case |
| ChatGPT Plus | $20/mo | ~12,000–15,000 | $0.0013 – $0.0017 |
| Gemini Advanced | $20/mo | ~3,000 | $0.0067 |
| Claude Pro | $20/mo | ~6,480 | $0.0031 |
Main options for working with n8n:
| Model | Input $/1M tokens | Output $/1M tokens | Cost per Test Case |
| GPT-4o | $2.50 | $10.00 | $0.0050 |
| GPT-4o-mini | $0.15 | $0.60 | $0.00030 ✅ Cheapest |
| GPT-4.5 | $5.00 | $20.00 | $0.0100 |
| Gemini 2.5 Pro | $1.25 | $5.00 | $0.0025 |
| Gemini 2.5 Flash | $0.10 | $0.40 | $0.00020 ✅ Cheapest |
| Gemini 2.5 Flash-Lite | $0.05 | $0.20 | $0.00010 ✅ Absolute minimum |
| Claude Sonnet 4.5 | $3.00 | $15.00 | $0.0072 |
| Claude Haiku 4 | $0.25 | $1.25 | $0.00068 |
| Claude Opus 4.5 | $5.00 | $25.00 | $0.0120 💰 Most expensive |
Important: when using MCP agent mode, actual message consumption will be higher due to system prompts and multi-step processes!
Instead of a Conclusion
A year ago I was a skeptic. “AI does not understand context,” “you have to redo the results anyway,” “it is faster to write it myself than to explain to AI what I need.”
Today I use AI every day at work. Not because it is trendy. But because it genuinely saves my time and makes work more enjoyable.
If you are still thinking “should I try it or not” – try it. The worst that can happen is you spend an hour and realize it is not for you. The best – you find a tool that changes your approach to testing.
Good luck! And remember – AI is a tool, not a magic button. It will help, but the thinking is still up to you 🙂