
Bug tracking is an integral part of software development. Team members monitor technical defects found in the program and the process of fixing them. Jira software is most often used for this purpose. It is a powerful bug-tracking tool that is also suitable for project and task management. We will discuss the nuances of working with it in this article. This article will discuss the essence of bug-tracking and the nuances of working with this system.
What is bug tracking?
A bug is an error that occurs during the code-writing phase or while working with a software product. Strictly speaking, it is not a bug but rather an unexpected behavior of the product, or the result of such behavior.
Bugs often happen because of unpredictable user actions, such as incorrect data entry. These defects can have serious consequences for the project. That is why the team must constantly monitor them and fix them promptly.
Various tools are used to systematically register and manage bugs. They let you create tickets with bug descriptions, set priorities, assign tickets to performers, generate reports, and visualize the stages of work.
Tools in this space include Trello, Axosoft, Backlog, ReQtest, MantisBT, Bugzilla, and BugHerd. But the most well-known bug tracking tool, Jira, remains the default choice for most teams. Teams prefer the Jira issue tracker because of its complete features for tracking, prioritizing, and resolving bugs.
What Is Jira Tool?
This is the famous bug tracking system, Jira, from Atlassian. It launched back in 2002. At first, it focused only on software development. Later, Jira became an important tool for managing projects, tasks, and bugs. This is what modern IT teams use it for.
The main component of the bug tracking tool Jira is a database of all bugs found:
- a user who reported the error;
- date and time when the error was detected;
- error severity;
- description of the program behavior;
- a user responsible for fixing the error;
- the current state of the error.
Members of the development team can view and edit errors. A Jira admin (for example, the project manager) sets permissions based on the current error state, moves bugs to other states, and deletes them if necessary.
Jira software lets users report bugs, examine detailed information, and raise the right issues. This creates a solid environment for solving problems that come up during development and for monitoring the team’s overall progress.
How does Jira work?
To understand the details, let’s look at the main points of work related to projects and issues of one type or another. Jira issue can be called the key element of the whole system.
To begin with, the system has different project templates:
- Kanban. Kanban boards place issues according to their status. The limit-setting tool helps to prevent multiple projects from running simultaneously.
- Scrum. Scrum board allows you to plan your workflow by sprints. You can study the project roadmap, put issues in the backlog, and monitor progress within each sprint.
Note:
The Scrum and Kanban board templates have a similar workflow (Done, In Progress, To Do) and issue types (epic, story, bug, task, sub-task). A whole team or company (administrators) can manage such projects.
Bug tracking. If there is a need to quickly find and fix errors, it is worth creating a new project using this template. The template is designed to effectively utilize the Jira issue tracker for managing and resolving bugs. It has a broader structure: an additional column In progress and issues improvement, and a new function.
The interface workspace displays boards with columns and issues that can move between columns depending on status.
As we mentioned above, the system has several types of Jira issues. Here are the main ones:
- Epic: the Jira project’s major issue, divided into sprints.
- Story: part of an epic that is solved in one sprint.
- Task: part of the work of one or more team members.
- Sub-task: part of a task.
- Bug: any defect found in a program.
Thus, an epic is divided into a story and a tusk. User stories and tasks can include sub-tasks. There is also an enhancement request to describe changes in functionality or a new feature. The test case type becomes available after integrating the system with plugins. The question type deals with end-user questions, e.g., regarding functionality.
A bug is a special Jira issue, thanks to which you can perform bug fixing promptly. In the following, we will go into more detail about the features in the area of tracking bugs.
Key Features of Jira Bug Tracking Tool
We have highlighted some of the most important features that underlie the bug-tracking tool.
Creating issues
You can add an issue to a project in minutes. To do this, just click the Create issue button in the top menu of the Jira page, select the appropriate Project, and set Bug as the type.
Bug reports
To make a detailed bug report in Jira software, you should fill in the following fields:
- Summary: a concise description of the essence of the bug.
- Description: all the relevant details in a convenient format.
- Priority: the severity of the bug.
- Assignee: the user who will work on the issue.
- Labels: character traits.
- Reporter: the issue creator and the one doing the work.
- Attachment: documents, illustrations, and other materials.
- Linked Issues: work that depends on this issue being done.
The fields Project*, Type*, and Summary* are required. The rest of the information is added to reveal the essence of the Jira bugs and to plan the team’s workflow.
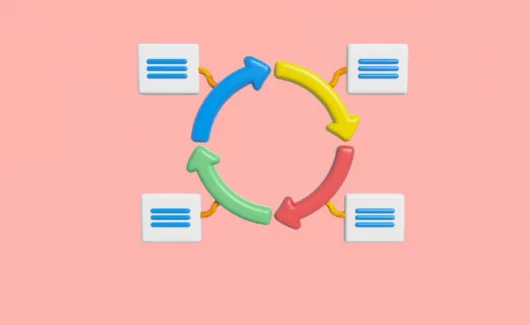
Bug Life Cycle
A bug goes through several stages from the beginning of its existence until it is completely fixed. Among the main statuses: Open, In progress, Reopened, Resolved, Closed.
Let’s look at an example of what a bug-tracking project might look like:
- Suppose you found a bug, registered it in the system, and specified the performer (developer). The bug gets open status.
- When the performer fixed the bug, they mark you for verification through Assign to, and the issue remains open.
- You check for the fix, and if it’s correct, you close it. If not, you pass it back to the developer, meaning the issue remains open.
All this is repeated as often as necessary to close a particular issue. The process can be even simpler: you find a bug, assign a developer who immediately fixes it, and closes it. But here, you lose such an important step as verification.
New people are added to the process as needed. For example, test manager, analyst, senior and junior software engineers participate in bug tracking.
Collaboration with the devs
Everything that happens during Jira bug tracking is recorded in the activity log. This includes Jira issues and their updates, assignment, and comments from development team members. This gives you a reliable and convenient space to gather feedback and exchange relevant details about a bug directly.
Linking the defect
You can select this option during the creation phase of a Jira issue. The point is to define the relationship between the tasks. For example, relates to, is blocked by, is cloned by, is duplicated by, is caused by. Using simple and clear words makes issue tracking easier.
Import and export defects
If you want to create issues in bulk in a Jira project, use the CSV import function. To share data with other users (especially non-Jira users), save the document in XML, Word, or Printable format.
Different types of reports
Jira software offers visual bug reports for more efficient analysis. These are Average Age Report, Created vs. Resolved Issues Report, Recently Created Issues Report, Time Since Issues Report, and many others. You can see newly created issues and completed work.
Next, let’s look at the features of bug tracking at different stages of the Jira workflow.
Five Main Stages of Jira Workflow to Handle Bugs
#1: Reporting bugs
The first step is to create a Jira bug report. You should create an issue and go through all the steps described above. Select a bug from the list of issue types, describe the issue details, and add additional material. Remember that the report should be structured and understandable for all members of the QA team, including non-technical experts.
#2: Prioritizing Bugs
Now assess the priority to perform the assigning correctly. It makes sense that urgent problems should be put first and minor ones when there are enough resources.
Set your priorities right:
- Does it take little effort to fix the bug? Put it in the front rows to execute as soon as possible.
- Is the bug critical or blockers? Add it to the actual sprint and evaluate it with story points.
- Is it a major or minor issue? Group them by component and add them to feature development.
- What if it’s a trivial issue? Solving it during work or making it part of the technical debt is better.
The team must devote maximum time and attention to issues with high and the highest priority. In the first case, these bugs negatively affect the main functions and users. In the second, they are bugs that barely affect users but create serious problems.
#3: Identifying the cause of a bug
Now you can assign the ticket and start working on the bug. The main thing is to understand the root cause of a Jira bug. Correct identification allows you to resolve bugs faster and reduce the risk of them recurring. The TDD approach is optimal. Its essence: write a test and prove it doesn’t work, then make changes and prove otherwise.
#4: Test coverage
Code changes can seriously affect the software product. Using feature requests to improve the product or support a specific use case makes sense. After fixing the Jira bug, think about how to prevent similar problems. It may be necessary to revise the process and adapt support and documentation.
#5: Closing the issue
To close the issue, make sure that the bug is completely fixed and will not happen again in the future. Also, search for similar problems in the product and fix them beforehand. The support processes and documentation should be modified accordingly.
If you correctly identify the cause of the problem, the fix will be successful. Otherwise, the bug can appear again. This means that it will be necessary to reopen the issue and start the resolving bugs process again.
Do you want to save time and track bugs as efficiently as possible? Then it makes sense to make a custom workflow in Jira.
Personalization Jira Workflows for Efficiency
Set bug tracking project
To begin, log in to your company’s workspace and follow the following chain of actions:
- Projects → Create Project.
- Project Templates → Software Development → Bug Tracking → Use Template → Name → Key.
- Create Project. Done!
Prepare custom workflows
Click on Project settings → Workflows → Actions. Create the statuses you need for this particular project. Examples of simple steps: To do, Assigned, In progress, Done. Now you can set your status for all issues.
Create Kanban board
To simplify issue tracking, use Kanban’s handy visual format. To do this:
Click on Boards → Create board.
Choose Kanban → Board from an existing project.
Consider a name for your new board and choose the project you want to link it to.
This will allow you to prioritize bugs, edit issues and add use cases in two clicks.
Add custom issue types
Consider how to do this in 10 steps:
- Got to Global Settings → Issues → Add Issue Type.
- Create a new issue type to suit your purposes.
- Select your project in the Issue Type Scheme and then Edit.
- Move the created issue type into your schema.
- Go to Screen settings → Add Screen.
- Select specific fields (the main ones are Summary and Description).
- Click on Screen Schemes → Add Screen Schemes.
- Create a new scheme and link it to your Screen.
- Go to Issue Type Screen Scheme → the corresponding project → Associate an issue type with a screen scheme.
- Select the created issue type and Screen Scheme and add them.
Create system to prioritize bugs
To determine the severity of new issues, use your priorities. The simplest option, which the whole team can understand: Highest, High, Medium, Low, Lowest. If necessary, you can add custom fields to expand the list of options.
To ensure the effectiveness of highly customizable Jira bug tracking, you need to maintain continuous communication in the system.
Team Communication and Notification Clients
At the heart of communication is a well-written report. It should be both concise and informative. Fill out all the fields: from the title and descriptor to the console logs and environment. Attach a screenshot and visual proof. Comment chains are provided for team discussion and adding other details.
What about communication with the client? After closing the issue, you must notify them about it. Use the agreed channels of communication. As a rule, these are emails. Be sure to include the issue number, title, and screenshot taken before the bug was resolved. This is especially important if your client does not use Jira software.
Jira software is a valuable tool for achieving bug-tracking goals. There are many reasons for that. It is easy to use, even for non-technical people, and has everything you need for teamwork.
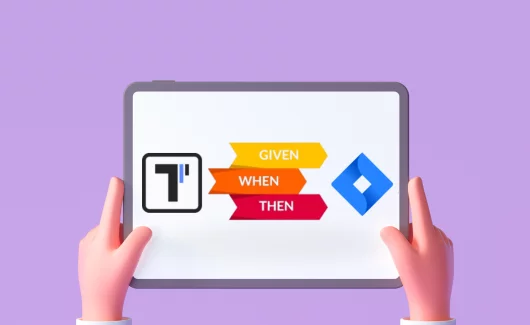
Moreover, you can customize it to your needs and integrate it with TMS Testomat.io in a few clicks for productive test management.
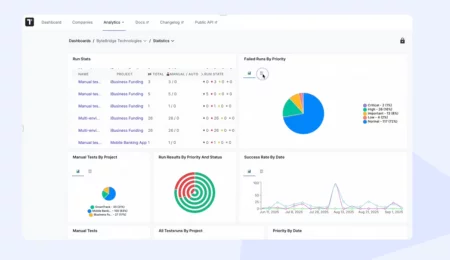
Going Beyond Jira: Test Management That Closes the Loop
Jira is excellent at tracking defects. It is less suited for managing the test cases that catch those defects in the first place. That’s where a dedicated test management system fills the gap.
Testomat.io connects to Jira bidirectionally, so a bug created in Testomat.io appears in Jira, and an update in Jira flows back. Your QA team works in a tool designed for test cases and automated suites. Your developers and PMs keep working in Jira. Nothing has to be copied by hand.
For teams running Cypress, Playwright, CodeceptJS, WebdriverIO, or any other major framework, Testomat.io syncs automated tests directly from source code, links failures to Jira bugs, and surfaces flaky tests before they slow down a release.