With the Model Context Protocol (MCP) you can communicate with Attlasian’s Jira or Confluence tool through natural language interactions. It delivers a strong ability to eliminate the need to leave the current AI application to complete Jira-related tasks and enhance project management through automated and smart processes.
In the following article, we provide a detailed explanation of MCP functionality and complete instructions for establishing a Jira MCP Server and implementing its capabilities within the AI Test Management System (TMS) workflows to synchronize requirements, issues, and test cases.
What is Atlassian MCP?
The Model Context Protocol (MCP) is an open standard that enables AI tools to access external data sources and perform actions through a standardized interface. Atlassian’s remote MCP server connects the tracking tool with AI development tools and allows the following:
- It enables AI models to retrieve data from the tracking tool through structured access points, which maintain security standards.
- It maintains all current permission schemes that exist in the tracking tool. The AI system will access Jira and modify data only through content that the requesting user has permission to view or edit.
- It enables AI assistants (LLMs) to execute intricate multi-step operations through simple natural language commands or instructions.
The Architecture of the Jira MCP Server
The Jira-MCP-Server functions in the environment of large language models (LLMs), clients like a Claude) and Atlassian Products. It provides task execution through simple text commands.
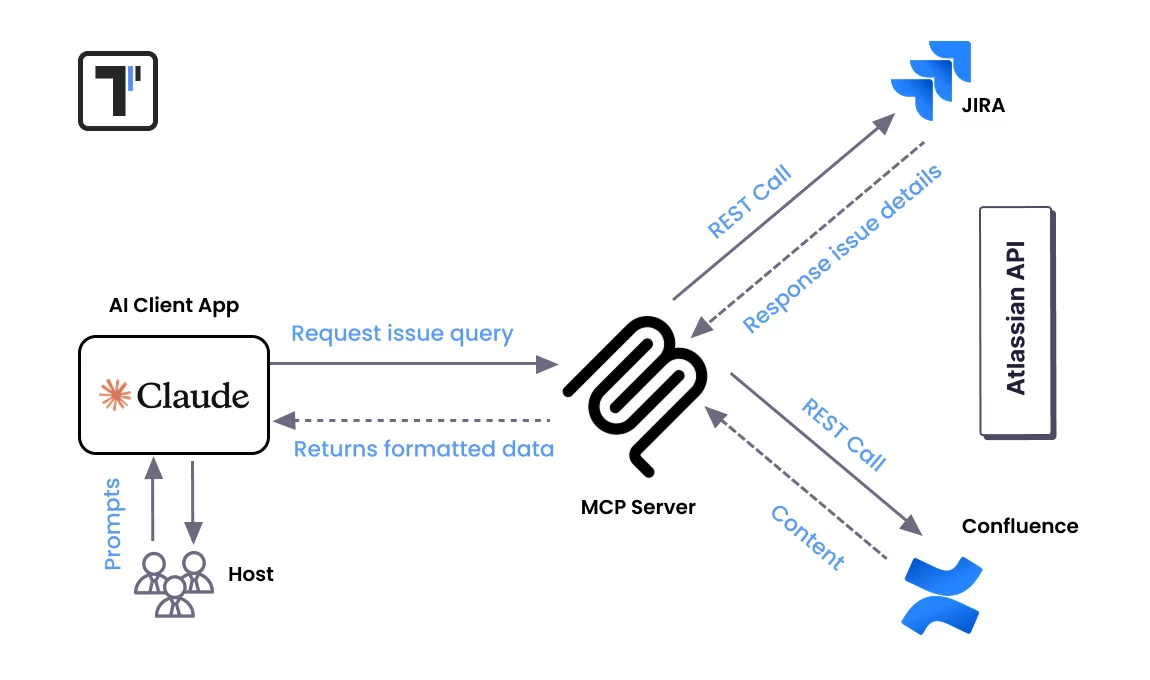
As you can see, Jira MCP architecture follows a modular design with scalability features and security measures to enable AI agents to execute Jira operations through API-independent operations.
The architecture is structured around a classic Client-Host-Server model where:
- Hosts. They manage the AI environment.
- Clients. These are instances, which connect to exactly one MCP server.
- Servers. They provide access to specific tools or services.
The system design establishes essential security restrictions because servers lack access to complete conversations and cannot establish direct communication with other servers. Each server operates in isolation and handles requests coming directly from its connected client.
Let’s explore the process ahead and what happens for module connection, so
How Does MCP Server Jira Work?
The Jira MCP server connects AI models to the Jira API. Let’s break down the process:
- The MCP server connects to your Jira instance using the authentication credentials you provide.
- When you send a natural language query to an AI model, it interprets your request and determines which workflow management tasks are needed.
- The MCP server converts these interpreted commands into API calls, which are appropriate issue-tracking system.
- The MCP server processes and formats the response for the LLM and provides structured and readable output.
Jira MCP: Key Features and Capabilities
When we talk about features and capabilities, you can find three main functions:
- JQL Search. Jira’s issue search function allows users to find up to 50 matching results for each data queries.
- Epic Retrieval. This function allows users to access up to 100 child issues per epic while showing their complete comment history.
- Detailed Issue Data. With this function, users can get complete access to individual issue details, which include all comments and related links.>
Additional features vary across implementations but commonly include:
- Project Workflow and Reporting. You can create new issues in the project board, search issues using JQL, retrieve sprint status information, analyze team workload, and get daily project reports.
- Jira MCP Server Integration. With the integration server for Model Context Protocol (MCP), you can let AI models talk directly to JIRA, so they can manage tasks and run workflows.
- Comment Support.< You can add comments to Jira issues by using plain text and convert it to the Atlassian Document Format (ADF) internally.
- Full Project Lifecycle Management. You can link issues, create projects, manage sprints, update existing issues, and search for users by email, display name, or username.
When to use MCP Jira Server
- When you aim to perform natural language queries about projects and receive immediate responses based on the ticket data.
- When you need to automatically elicit information from different issues and turn it into clear summaries for your reports or project updates.
- When you need to perform bulk updates or make complex field changes across existing Jira issue or issues automatically.
- When developers look for secure and real-time access to Jira’s tickets directly from their IDE without leaving their coding environment.
- When you require verified access control and want the AI to check every user’s permission before accessing/updating any data on the project board.
How Teams Benefit From Using Jira MCP Server
Development teams can save time by executing complex actions on the project board:
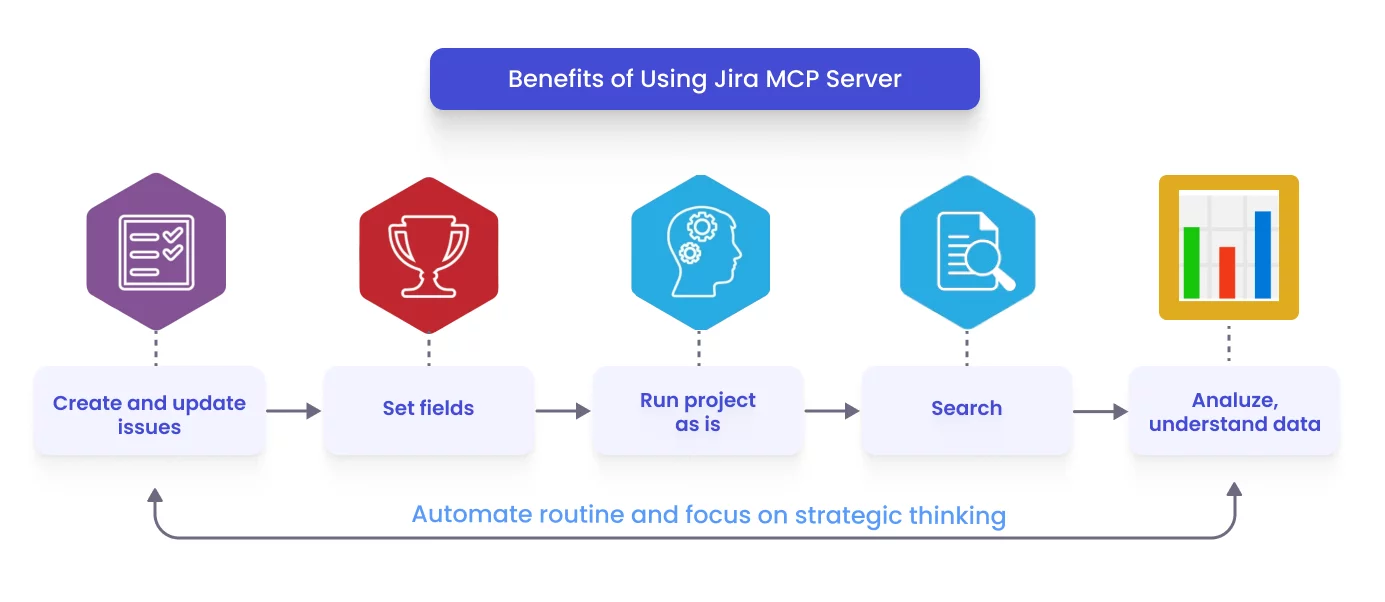
- Jira-MCP allows AI tools to get structured data that fits AI context windows.
- Create and update issues, set fields (including custom fields your instance defines), and fetch detailed issue information.
- Searches or updates directly from their external tools (like an IDE or a chatbot).
- Apply MCP capabilities like getting sprint status, analyzing team workload, and searching for specific users.
- With MCP, teams get a framework for AI systems to understand and operate within a Jira environment without the need for custom code and traditional API integrations.
How To Set Up Your Jira MCP and Integrate It
🔴 It is important to know! There are several options for integrating AI Jira into your testing workflow. Recommended is the Docker Desktop solution. It is because each MCP server operates within its own isolated container, ensuring that multiple servers can run simultaneously. This containerization prevents dependencies from conflicting versions. As a result, Docker provides a cleaner system environment for your workflow.
The popular alternative is using Node.js directly. And for some needs, you can use a Python server. Select the installation method that matches your current system environment. However, we will follow the simple Jira Cloud Node integration with the Claude AI tool to get started. The implementation is surprisingly straightforward and requires only basic knowledge.
So, we should verify Node version 20.x or higher and a Jira Atlassian account with permission to access the system (admin access is preferred but not necessary for basic operations). Access to the Claude AI tool that supports our MCP. You need to have basic knowledge of command-line operations.
Step 1: Access Setup
The initial essential requirement involves establishing authentication for your tracking platform. The authentication process for Jira Cloud differs from Jira Server/Data Center, although both follow similar procedures:
For Jira Cloud:
- Access the API token management page through https://id.atlassian.com/manage-profile/security/api-tokens
- Click “Create API token”
- Name your API token with a clear description, such as “Jira-MCP-Integration.”
- The token will display only once, so you must copy it right away. Security issue, we recommend changing it every 2-3 weeks.
Step 2: Installation
Verify all the necessary prerequisites:
node --version
Create a Jira MCP project folder and initialize:
# Create a new directory
mkdir mcp-jira-server
cd mcp-jira-server

# Create a new directory
npm init -y
The Jira MCP server model context protocol installation process needs to :
npm install @modelcontextprotocol/sdk jira.js dotenv🔴 Once again, be careful in this place! This library is officially Atlassian and actively community-maintained. It supports the latest REST API v3 and fully supports Jira Cloud — instead of the legacy jira-client library.
Claude MCP communicates with your MCP-Jira server via text commands and structured JSON. The bridge is your
index.jsfile, which must use the new Jira REST API v3 endpoints.
Check these dependencies in package.json file:
"dependencies": {
  "@modelcontextprotocol/sdk": "^1.21.0",
  "jira.js": "^3.x.x",
  "dotenv": "^17.x.x"
}
Step 3: Initialization
Create a file called index.js in your project folder, with this basic Jira MCP server code:
import 'dotenv/config';
import { McpServer } from '@modelcontextprotocol/sdk/server/mcp.js';
import { StdioServerTransport } from '@modelcontextprotocol/sdk/server/stdio.js';
import { Version3Client } from 'jira.js';

// Initialize Jira API client (v3)
const jira = new Version3Client({
  host: process.env.JIRA_HOST,
  authentication: {
    basic: {
      email: process.env.JIRA_EMAIL,
      apiToken: process.env.JIRA_API_TOKEN,
    },
  },
});

// Initialize MCP server
const server = new McpServer({
  name: 'jira-mcp',
  version: '1.0.0',
});

// ============================
// 🧩 Tool: Get issues by JQL
// ============================
server.tool(
  'getIssuesByJQL',
  'Fetch Jira issues using a JQL query (v3 API)',
  {
    jql: {
      type: 'string',
      description:
        'JQL query string (e.g., "project = HON" or "assignee = currentUser()")',
    },
    maxResults: {
      type: 'number',
      description: 'Maximum number of results to return (default: 50)',
    },
  },
  async ({ jql, maxResults = 50 }) => {
    console.error(`🔍 Running JQL: ${jql}`);

    const response = await jira.issueSearch.searchForIssuesUsingJql({
      jql,
      maxResults,
      fields: [
        'summary',
        'status',
        'assignee',
        'created',
        'updated',
        'priority',
        'issuetype',
        'description',
      ],
    });

    console.error(`✅ Found ${response.issues?.length || 0} issues`);

    const results = (response.issues || []).map((issue) => ({
      key: issue.key,
      summary: issue.fields.summary,
      status: issue.fields.status?.name,
      assignee: issue.fields.assignee?.displayName || 'Unassigned',
      priority: issue.fields.priority?.name || 'None',
      issueType: issue.fields.issuetype?.name,
      created: issue.fields.created,
      updated: issue.fields.updated,
      description: issue.fields.description || 'No description',
    }));

    return {
      content: [
        {
          type: 'text',
          text: JSON.stringify(results, null, 2),
        },
      ],
    };
  }
);

// ============================
// 🧩 Tool: Create Jira issue
// ============================
server.tool(
  'createIssue',
  'Create a new Jira issue (v3 API)',
  {
    projectKey: {
      type: 'string',
      description: 'Project key (e.g., "HON")',
    },
    summary: {
      type: 'string',
      description: 'Issue summary/title',
    },
    description: {
      type: 'string',
      description: 'Issue description (plain text)',
    },
    issueType: {
      type: 'string',
      description: 'Issue type (e.g., Task, Bug, Story)',
    },
  },
  async ({ projectKey, summary, description, issueType = 'Task' }) => {
    console.error(`🪄 Creating issue in project ${projectKey}`);

    const issue = await jira.issues.createIssue({
      fields: {
        project: { key: projectKey },
        summary,
        description: {
          type: 'doc',
          version: 1,
          content: [
            {
              type: 'paragraph',
              content: [{ type: 'text', text: description }],
            },
          ],
        },
        issuetype: { name: issueType },
      },
    });

    const result = {
      key: issue.key,
      url: `${process.env.JIRA_HOST}/browse/${issue.key}`,
    };

    console.error(`✅ Created issue: ${issue.key}`);

    return {
      content: [
        {
          type: 'text',
          text: JSON.stringify(result, null, 2),
        },
      ],
    };
  }
);

// ============================
// 🚀 Run MCP server via stdio
// ============================
async function main() {
  const transport = new StdioServerTransport();
  await server.connect(transport);
  console.error('🚀 Jira MCP server (API v3) running via stdio');
}

main().catch((err) => {
  console.error('❌ Fatal error starting server:', err);
  process.exit(1);
});
Create a .env file in the same root directory with your Jira credentials. It is not necessary, but it is better for security:
JIRA_HOST="your-domain.atlassian.net"
JIRA_EMAIL="your-email@example.com"
JIRA_API_TOKEN="your-api-token-here"
Now again is the time to update package.json — add "type": "module" and the run command to it. Please have a look:
{
  "name": "jira-mcp-server",
  "version": "1.0.0",
  "main": "index.js",
  "scripts": {
    "test": "node index.js"
  },
  "keywords": [],
  "author": "",
  "license": "ISC",
  "type": "module",
  "description": "",
  "dependencies": {
    "@modelcontextprotocol/sdk": "^1.21.1",
    "dotenv": "^17.2.3",
    "jira.js": "^5.2.2"
  }
}
Step 4: Run Jira MCP Server
# Test run
node index.js
#or
npm test
Hooray 🎉 It works!
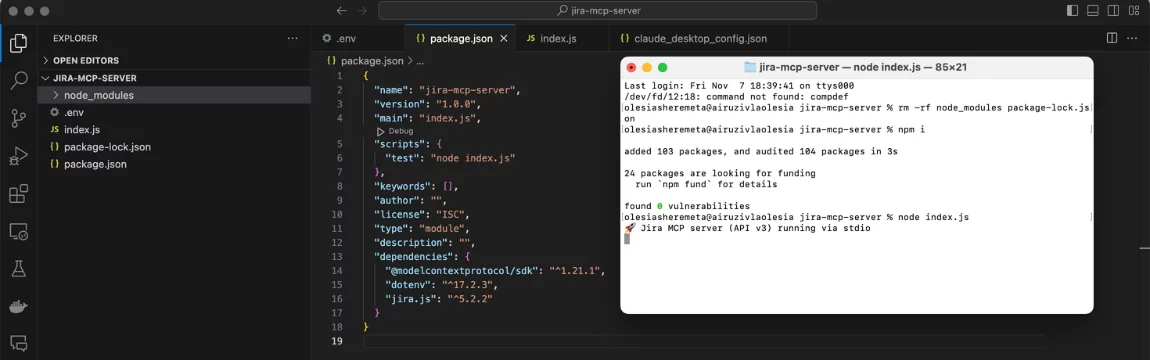
Also, the tree structure of our project is visible in this screenshot.
Step 5: Configure Claude Desktop to Use the Jira MCP Server
The Jira-MCP-Server requires configuration after its deployment to enable your AI client to locate and utilize the integration with the tracking tool.
You should access the MCP Configuration within your preferred AI tool. The AI client will establish Jira interaction after reading the JSON configuration file.
To use Jira Cloud + Claude, you need to enter your instance URL along with your email address and your API token, which you created before in the claude_desktop.config.json file. The configuration file for Claude Desktop Integration appears as follows:
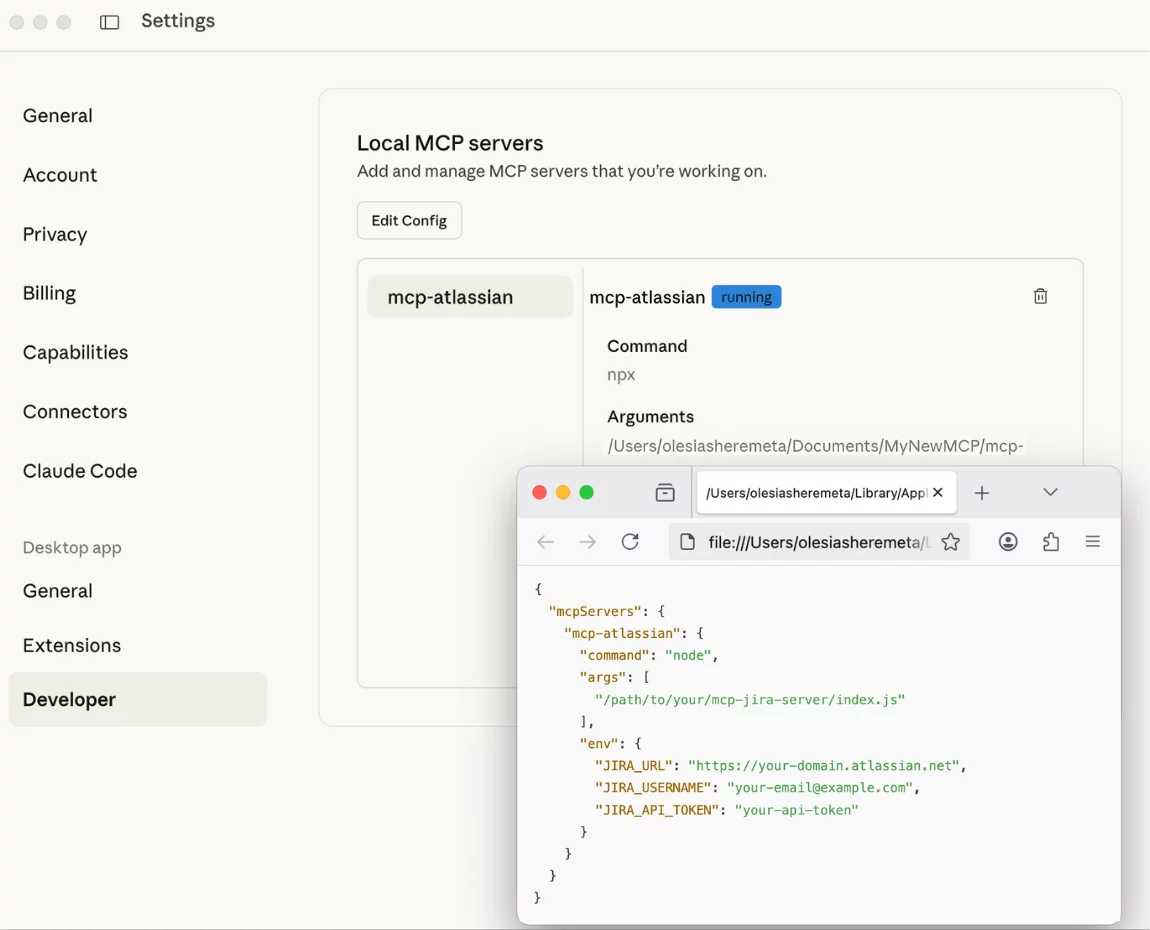
Location of config file:
- macOS:
~/Library/Application Support/Claude/claude_desktop_config.json - Windows:
%APPDATA%\Claude\claude_desktop_config.json
Enter your authentication by replacing the company with your instance host, your email address and your actual API token. If you forgot to create a .env file, place credentials here.
{
  "mcpServers": {
    "mcp-atlassian": {
      "command": "node",
      "args": ["/path/to/your/mcp-jira-server/index.js"],
      "env": {
        "JIRA_HOST": "your-domain.atlassian.net",
        "JIRA_EMAIL": "your-email@example.com",
        "JIRA_API_TOKEN": "your-api-token"
      }
    }
  }
}
After software configuration, you need to restart Claude AI. client so that its interface will display confirmation about the successful discovery and connection of the “Atlassian Jira” toolset.
Step 6: Try how Jira integration with AI Tools works
Let’s test a few scenarious.
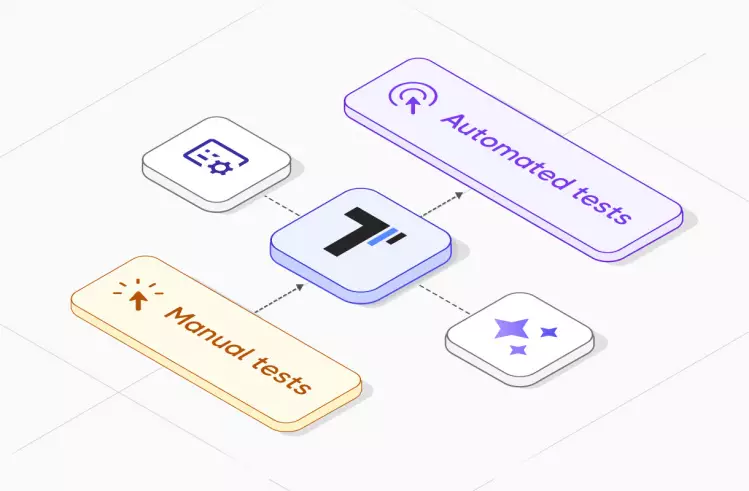
Integrating AI Test Management System with Jira MCP
Testomat.io AI Test Management System (TMS) offers direct integration with Jira’s tracking tool, but it does not support Jira-Model-Context-Protocol server connections. The workflow needs to operate independently, while you need to specify all integration touchpoints between the mentioned systems.
The proposed solution depends on the Jira-Model-Context-Protocol (MCP) to improve content development and testing operations. The parallel workflow would operate as follows:
- The model context protocol enables users to create new requirements and issues directly inside the tracking system after meeting sessions or meetups.
- Once these issues or requirements are added to the tracking system, Testomat.io uses its internal MCP to scan new issues/requirements in the tracking system and then produces tests through AI analysis of requirement content.
Here, we need to clarify the distinct responsibilities within this setup:
| Jira | Handles project content (requirements, epics, stories). |
| Testomat.io | Manages tests and operates independently from the project content of the tracking system. |
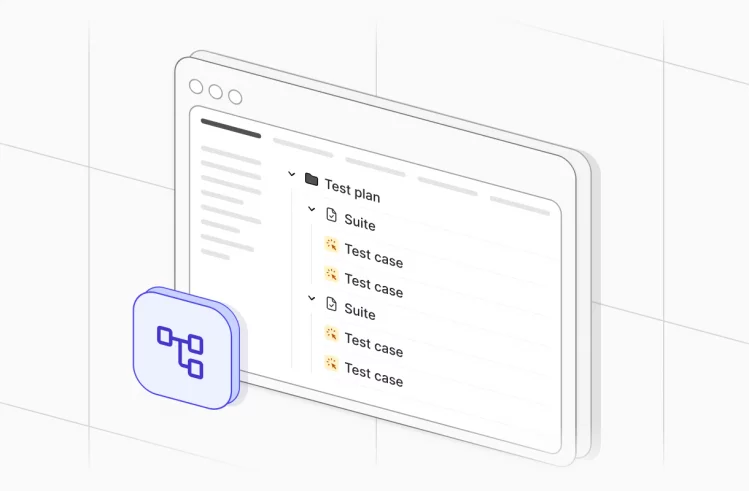
This integration allows testers and QA engineers to link test cases with Jira issues through tracing without showing them the full Jira board content.
The connection between requirements and test coverage stays visible to project managers and business analysts who require this information for monitoring purposes.
Compared to a standard Jira’s plugin, the integration with Testomat.io provides distinct access and operational capabilities:
- It restricts access to project board content by showing only testing-related issues.
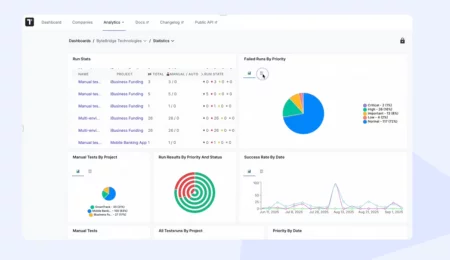
- It generates test-specific analytics, which differ from the project statistics found in the tracking system.
- It enables users to establish issue connections i the tracking system and create new issues for each test or requirement.
- The AI system in Testomat.io can not generate Jira issues in bulk. Instead of this, each issue is generated and linked separately for clarity and traceability.
Btw, the test management system also supports MCP. The settings you can add to Claude settings are:
{
  "mcpServers": {
    "testomatio": {
      "command": "npx",
      "args": ["-y", "@testomatio/mcp@latest", "--token", "testomat_YOUR_TOKEN_HERE", "--project", "YOUR_PROJECT_ID"]
    }
  }
}
Please find out more information on our official Repositoty
Bottom Line
— Want To Install Your Jira-MCP-Server And Experience The Power Of AI-Jira integration?
The Jira-MCP-Server improves how AI integrates with project and test management workflows. With its help, teams can streamline everyday operations while providing complete visibility between development and testing workflow activities.
The integration of MCP between the tracking system and Testomat.io enables them to work more efficiently because it maintains automatic alignment between requirements, issues, and test cases.
👉 Contact our team if you need to achieve smarter results with Jira MCP Server.