




Selenium WebDriver lets your tests control a real browser, so you can check login and checkout flows on every commit. The results often stay in CI logs. Meanwhile, 89% of organizations pilot or deploy Gen AI in quality engineering, according to the World Quality Report, and AI agents need structured test results. This guide to Selenium WebDriver testing shows how to build a Selenium suite, with examples in Java, and how Testomat.io turns its runs into reports for the team.
What Is Selenium WebDriver?
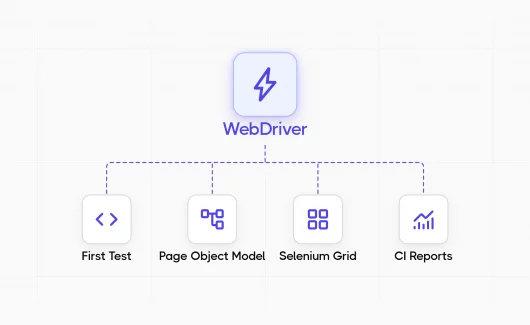
Selenium WebDriver is an open-source browser automation API that drives a real browser through the W3C WebDriver protocol. WebDriver, also written as web driver, is the core of the Selenium project. Teams use it to check that a web application behaves as users expect. This practice is called Selenium WebDriver testing. WebDriver is the core of the Selenium project. Selenium Grid runs WebDriver sessions on remote machines, and Selenium IDE records browser actions for quick prototypes. The current stable release is Selenium 4.50.0, published on September 30, 2026. It has official bindings for Java, Python, C#, Ruby, JavaScript, and Kotlin, and it runs on Windows, macOS, and Linux.
How Selenium WebDriver Works
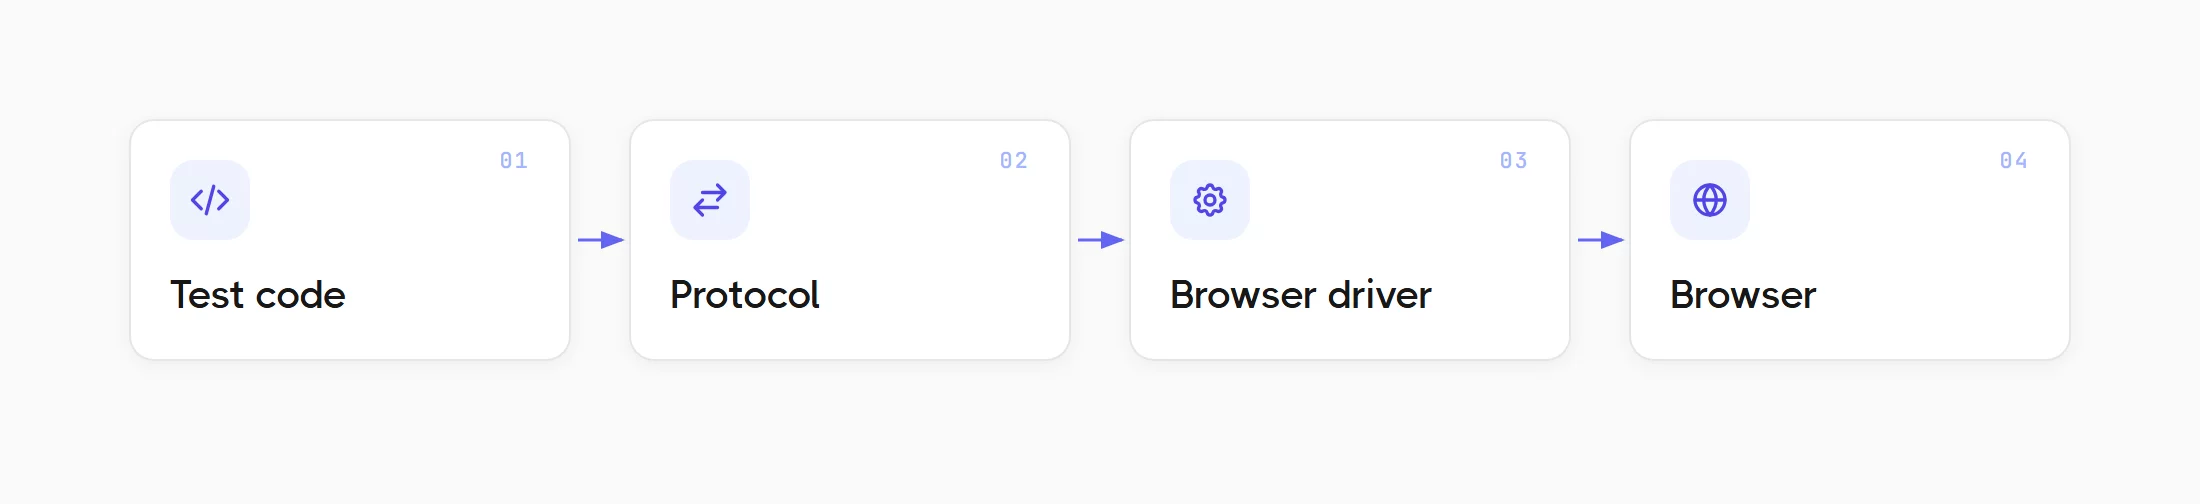
A command in the Selenium WebDriver architecture moves through these parts in order:
- Test code. Your test calls a method such as
driver.findElement()in the language binding. - Protocol. The binding turns the call into an HTTP request defined by the W3C WebDriver specification.
- Browser driver. ChromeDriver or GeckoDriver receives the request and translates it for the browser.
- Browser. The browser executes the action and returns the result through the driver.
Since version 4.6, Selenium Manager downloads the matching driver for you. If your project has a script that downloads ChromeDriver manually, you can delete it.
Why Use Selenium WebDriver With Testomat.io?
Selenium WebDriver checks your web app in real browsers. Testomat.io collects the results with test IDs and run history, so the team sees what works before each release. Selenium WebDriver and Testomat.io cover different parts of the work. Selenium executes the tests, and Testomat.io turns each run into a report that QA engineers and managers can read.
| Benefit For The Team | Selenium WebDriver | Testomat.io |
|---|---|---|
| Checks in real browsers | Clicks and types like a user in Chrome, Firefox, Edge and Safari | Shows the status of each test case in a shared project |
| Faster feedback | Runs the suite in parallel on Selenium Grid | Collects parallel CI jobs in a single run |
| Faster failure analysis | Takes screenshots of the page | Keeps screenshots and run history next to each test result |
| Fewer false alarms | Reports a status for each run | Detects flaky tests from run history |
The rest of this guide follows that order. You build the Selenium suite first, and then you connect it to Testomat.io.
When Should You Use Selenium WebDriver?
Selenium WebDriver testing fits stable, user-facing browser flows that need cross-browser checks. Unit and API tests cover business logic faster. Selenium testing costs more per test than lower-level checks, because every test starts a browser. The table below shows where that cost makes sense.
| Scenario | Selenium WebDriver | Recommended approach |
|---|---|---|
| Checkout or login flow in a real browser | Good fit | Browser suite |
| The same flow on several desktop browsers | Good fit | Browser suite on Selenium Grid |
| Price calculation rules | Poor fit | Unit or API tests |
| A screen that changes every sprint | Poor fit for now | Manual checks until the layout is stable |
| Native desktop application | Outside the scope | A desktop automation tool |
If your team compares browser tools before it chooses a framework, our Playwright vs Selenium vs Cypress comparison covers speed and language support.
Types of Selenium Testing
Selenium is a browser automation tool, so the test type comes from what your test checks. The table shows the types that cover most cases in Selenium WebDriver testing.
| Type | What It Checks | Example |
|---|---|---|
| Functional | A feature works as specified | A coupon reduces the cart total |
| Regression | Existing features work after a code change | Login works after a refactoring |
| Cross-browser | The same flow on different browsers | Checkout on Chrome and Firefox |
| End-to-end | A full user journey through several pages | A purchase from search to payment |
| Data-driven | A single flow with several input sets | Login with different user roles |
How To Create Your First Selenium WebDriver Test In Java
This section works as a short Selenium WebDriver tutorial. You need Java 17 with Maven and a local Chrome browser.
Step 1: Add Selenium And TestNG To The Project
TestNG is a Java test framework that runs the tests and records their status. You can add these dependencies to pom.xml:
org.seleniumhq.selenium:selenium-java, version 4.50.0org.testng:testng, version 7.12.0, with test scope
Maven downloads the libraries on the first build.
Step 2: Write The First Test
The test below submits the login form on a public practice site and checks the confirmation message.
public class LoginTest {
    private WebDriver driver;
    private WebDriverWait wait;

    @BeforeMethod
    public void startBrowser() {
        ChromeOptions options = new ChromeOptions();
        options.addArguments("--headless=new");
        driver = new ChromeDriver(options);
        wait = new WebDriverWait(driver, Duration.ofSeconds(10));
    }

    @Test
    public void userSeesSecureAreaAfterLogin() {
        driver.get("https://the-internet.herokuapp.com/login");
        driver.findElement(By.id("username")).sendKeys("tomsmith");
        driver.findElement(By.id("password")).sendKeys("SuperSecretPassword!");
        driver.findElement(By.cssSelector("button[type='submit']")).click();

        WebElement message = wait.until(
            ExpectedConditions.visibilityOfElementLocated(By.id("flash")));
        Assert.assertTrue(message.getText().contains("You logged into a secure area!"));
    }

    @AfterMethod(alwaysRun = true)
    public void closeBrowser() {
        driver.quit();
    }
}
The imports are left out, and your IDE adds them. Some details in this code matter in CI:
- Headless mode. The browser starts without a window, so the test runs on a build server.
@AfterMethod(alwaysRun = true). This method closes the browser even when an assertion fails.
You can run the suite with mvn test.
Step 3: Choose Locators And Explicit Waits
Locators tell WebDriver which element to use:
idand CSS selectors. Anidis the most stable choice, and a CSS selector comes second.- XPath. You need it for elements that lack stable attributes, and our XPath in Selenium guide shows the patterns.
Waits handle timing. An explicit wait pauses until a condition is true, with a time limit you choose. The Selenium documentation on waits warns that mixed implicit and explicit waits cause unpredictable wait times: an implicit wait of 10 seconds plus an explicit wait of 15 seconds could cause a timeout after 20 seconds. The rules below follow from this:
- Keep the implicit wait at its default of zero.
- Use
WebDriverWaitwith a condition in every test.
How To Structure a Maintainable Suite
A first test is easy to read. A large suite needs structure, because a single changed button can break dozens of them. The patterns below solve most of this problem.
Apply The Selenium Page Object Model
The Page Object Model (POM) moves locators and page actions into a class per page. For the login form, a LoginPage class keeps the locators of the form as By fields and offers a loginAs(user, secret) method that fills the fields and clicks the submit button. Tests then call new LoginPage(driver).loginAs(user, secret), and each locator exists in a single class.
When the login button changes, you edit LoginPage and the tests stay as they are.
Run The Same Test With Several Data Sets
Data-driven tests reuse a flow with different inputs. In TestNG, a method with @DataProvider returns the data sets as rows, and a test with dataProvider = "invalidLogins" runs once per row. For the login form, a row holds the credentials and the expected error message, and the test body stays the same as in the first test.
Each row produces a separate test result, and a new row adds a result with zero new test code.
Keep Tests Independent With TestNG Groups
Each test needs to create its data and start from a clean browser session. Tests that need a fixed order of execution fail in parallel runs, so this rule also prepares the suite for Selenium Grid.
TestNG groups let you choose which tests run at which moment. You can mark a test with @Test(groups = "smoke") and run that group with mvn test -Dgroups=smoke. A common schedule looks like this:
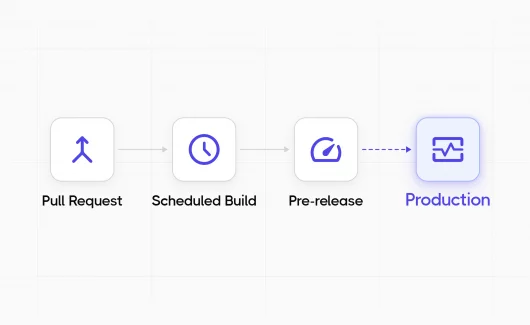
- Every pull request: the smoke group.
- Scheduled runs: the full regression suite.
Our TestNG annotations tutorial explains the other annotations.
Running Selenium Tests in CI And on Selenium Grid
Selenium automation testing is most useful when the suite runs on every change. A CI job needs Java with a browser and a single Maven command.
Add A GitHub Actions Workflow
GitHub-hosted Ubuntu runners include Chrome, and Selenium Manager resolves the driver. The workflow stays short and runs on every push:
- The
actions/checkoutandactions/setup-javasteps get the code and install Java 17. - The
mvn -B teststep runs the suite.
Scale With Selenium Grid
Selenium Grid routes WebDriver sessions to browsers on other machines, so tests run in parallel. You can set it up in these steps:
- Start a local Grid with Chrome from the
selenium/standalone-chromeDocker image on port 4444. - Create a
RemoteWebDriverwith the Grid addresshttp://localhost:4444in place of a localChromeDriver. - Set
parallel="methods"andthread-count="4"on the suite element intestng.xml. - Keep the driver in a
ThreadLocal<WebDriver>field, so each thread gets a separate driver. The@AfterMethodmethod quits that driver and removes it from the field.
With parallel threads, the suite finishes in a fraction of the sequential time, if the tests are independent.
Limitations of Selenium WebDriver
Selenium WebDriver automates browsers, and its scope ends there. The Selenium documentation on reporting states that reporting on test case status is outside the design of the tool, and it recommends the reporting features of test frameworks. A Selenium test automation suite produces raw results. The table shows what the team needs to use them.
| Need | What Selenium With TestNG Gives | What The Team Adds |
|---|---|---|
| Readable reports | XML files and console output | A report that managers can read |
| Run history | Results of the latest CI job | Trends over weeks |
| Flaky test detection | A red or green status per run | Tests that change status on the same code |
| Traceability | Method names | Links to test cases and Jira issues |
Other limits affect planning:
- WebDriver works with browsers only.
- Every test requires programming skills.
Is Selenium Enough For Test Management?
Selenium automates browsers. Run history and requirement links come from a test management platform that receives the Selenium results. Selenium test management means that each automated test maps to a test case with an ID and a run history. The next section shows this workflow with Testomat.io.
How To Report Selenium Results To Testomat.io AI Test Management System
Testomat.io is a test management and quality intelligence platform that keeps manual and automated results in a single project. It works with your Selenium tests through the test runner you already use. Selenium executes the tests in the browser, and Testomat.io collects and analyzes the results.
Step 1: Choose The Connection For Your Stack
WebDriver is a library, so the connection happens at the framework that runs your Selenium code. The table shows the path for common stacks.
| Selenium Stack | Connection | What Reaches The Report |
|---|---|---|
| Java with JUnit 5, TestNG or Cucumber | Java reporter: a Maven dependency and an API key | Test IDs, steps, artifacts, metadata |
| Python with pytest | pytestomatio plugin |
Synced tests, steps, artifacts, environments |
| C# with NUnit | JUnit XML upload with npx report-xml |
Results and attachments |
| Ruby with Minitest | JUnit XML upload with npx report-xml |
Results and attachments |
| JavaScript with WebdriverIO | JavaScript reporter 2.2.2 | Results and artifacts |
For Python and C#, the connection fits into a few commands. Each command reads the project API key from the TESTOMATIO environment variable.
- Python:
pytest --testomatio syncimports the tests, andpytest --testomatio reportreports a run. - C#:
npx report-xml report.xml --lang="c#"uploads the XML file that NUnit produces.
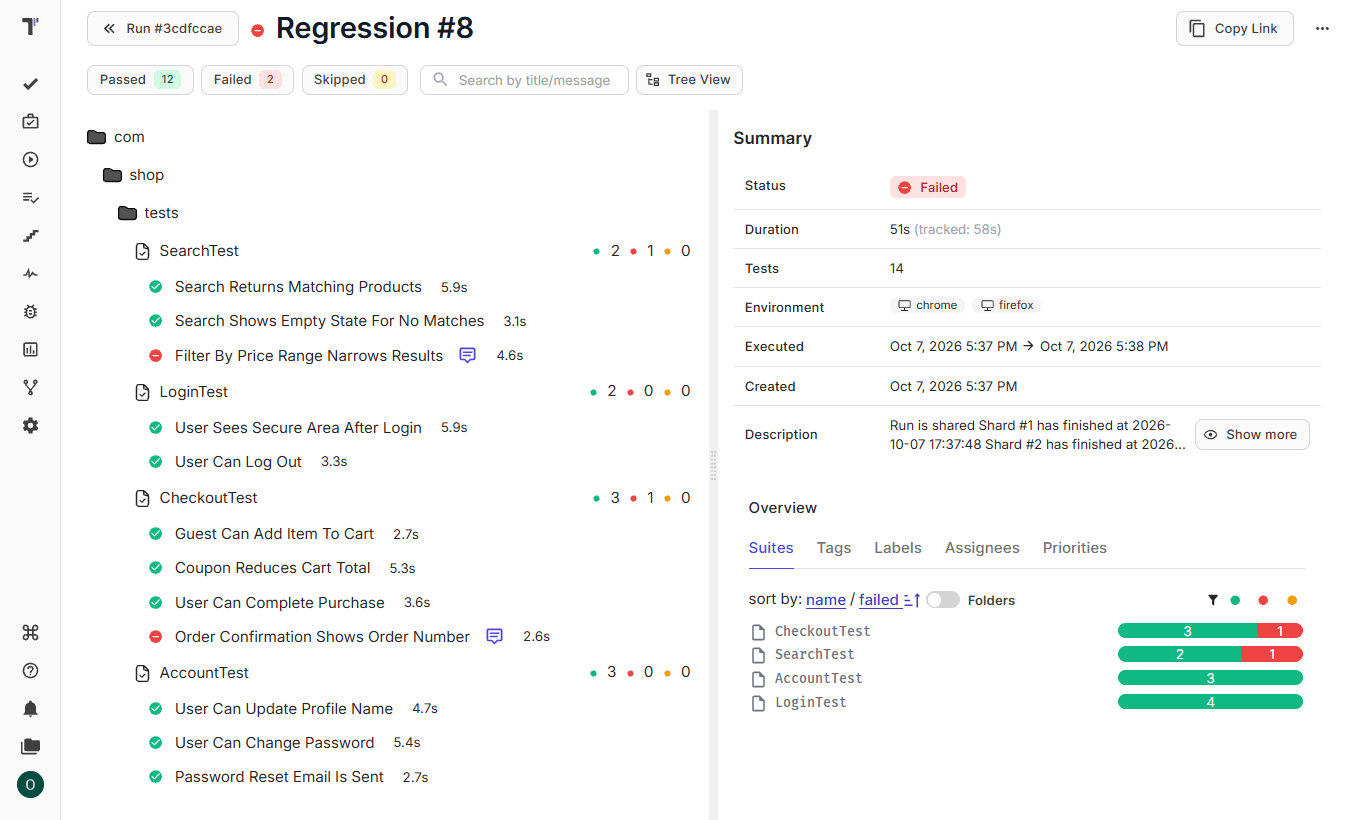
The XML path carries results and attachments, and it also collects the test source code when the files are available to the reporter. Step reports belong to the Java and Python paths. The steps below use the Java path with the TestNG project from this guide.
Step 2: Add The Java Reporter
The Java reporter supports JUnit 5 and TestNG 7, plus Cucumber 7 and Karate. You need a dependency and an API key. Version 0.19.0 is the current release on Maven Central:
<dependency>
  <groupId>io.testomat</groupId>
  <artifactId>java-reporter-testng</artifactId>
  <version>0.19.0</version>
</dependency>
TestNG needs zero extra configuration. After you add the dependency:
- Export the project API key as the
testomatioenvironment variable. The reporter starts automatically when the key is present. - Run
mvn test -Dtestomatio.run.title="Scheduled Regression" -Dtestomatio.create=true. Withtestomatio.create, the reporter creates the test cases that are missing in the project.
In GitHub Actions, you can store the key as a repository secret and expose it as the testomatio environment variable.
Step 3: Collect Grid And Parallel Jobs In A Single Run
A Selenium Grid suite often runs as several CI jobs, and each job would create a separate report. You can add these options to every job:
-Dtestomatio.shared.run="regression-suite"sends the results of the jobs into a single run.-Dtestomatio.env="staging"labels the environment.
The Python plugin has the same option under the name TESTOMATIO_SHARED_RUN.
Step 4: Link Tests With @TestId And Import Them From Source Code
Method names change, and a stable ID keeps the history of a test in a single record. The java-check-tests CLI imports your TestNG or JUnit tests from source code and writes the IDs into the code:
- Download
testomatio.jarfrom the latest release on GitHub. - Run
java -jar testomatio.jar syncwith theTESTOMATIOkey set.
After the sync, each test carries a @TestId annotation. You can add @Title yourself for a readable name:
@Test(groups = "smoke")
@TestId("d32625e6")
@Title("User sees the secure area after login")
public void userSeesSecureAreaAfterLogin() {
    // test body
}
Your repository stays the source of truth, and the Testomat.io project follows it. You can read more about importing automated tests from source code on the feature page.
Step 5: Attach Screenshots To Test Results
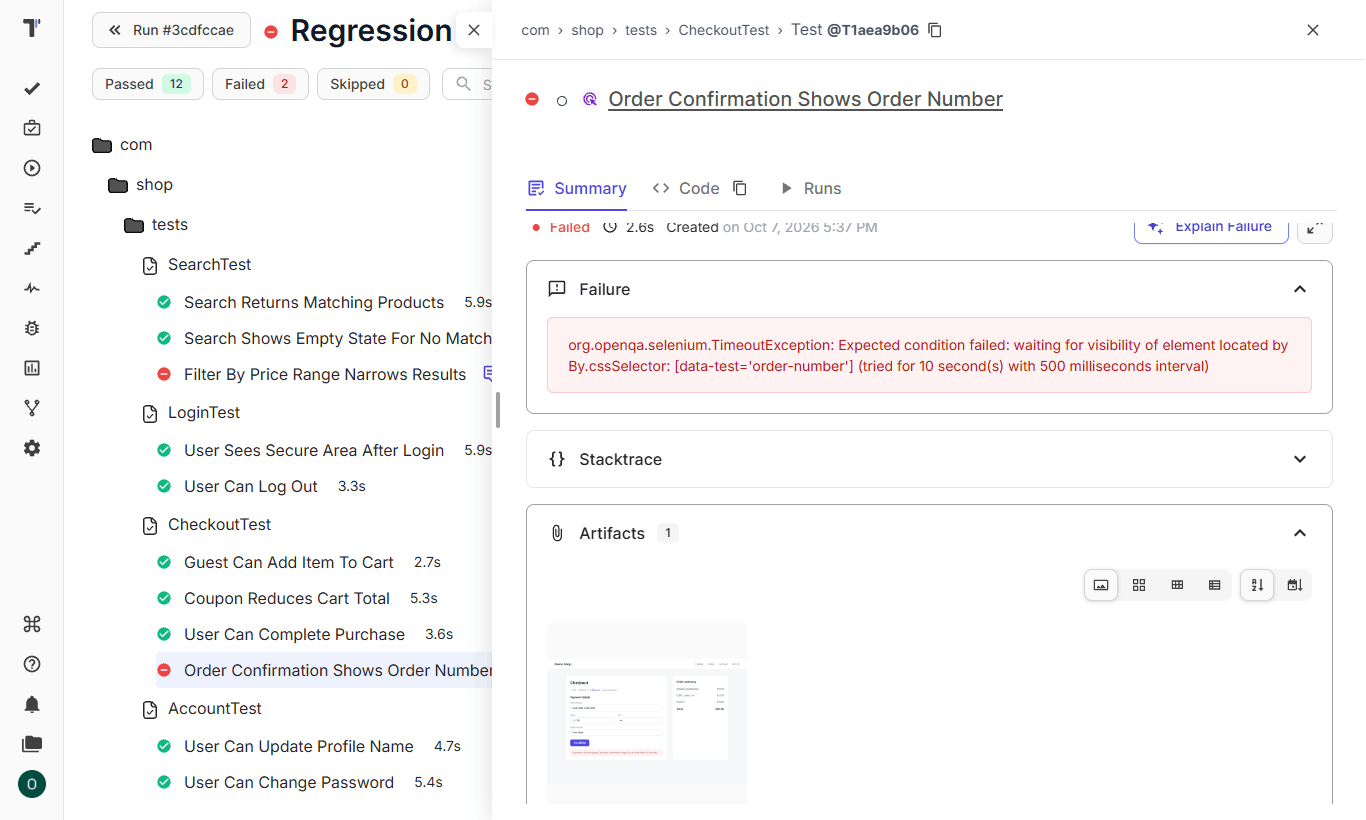
A screenshot shortens failure analysis. The Testomatio.artifact() method attaches files to the current test:
- Connect an S3-compatible bucket that belongs to your team in the project settings, under Artifacts.
- Before a critical assertion, save a screenshot from
TakesScreenshotundertargetand send its path toTestomatio.artifact().
The reporter uploads the file, and Testomat.io links it to the test result. The files stay in your storage.
Find Flaky Tests From Run History
Each reported run adds to the history of a test. Testomat.io analytics uses that history to detect flaky tests, which change status while the code is the same. The AI agents on the Enterprise plan then label the tests:
- Mark Flaky Tests adds a Flaky label to tests that change status on the same code. You can tune the rules in Analytics Settings.
- Mark Failed Tests adds a Failed label to tests that failed every run in the past month.
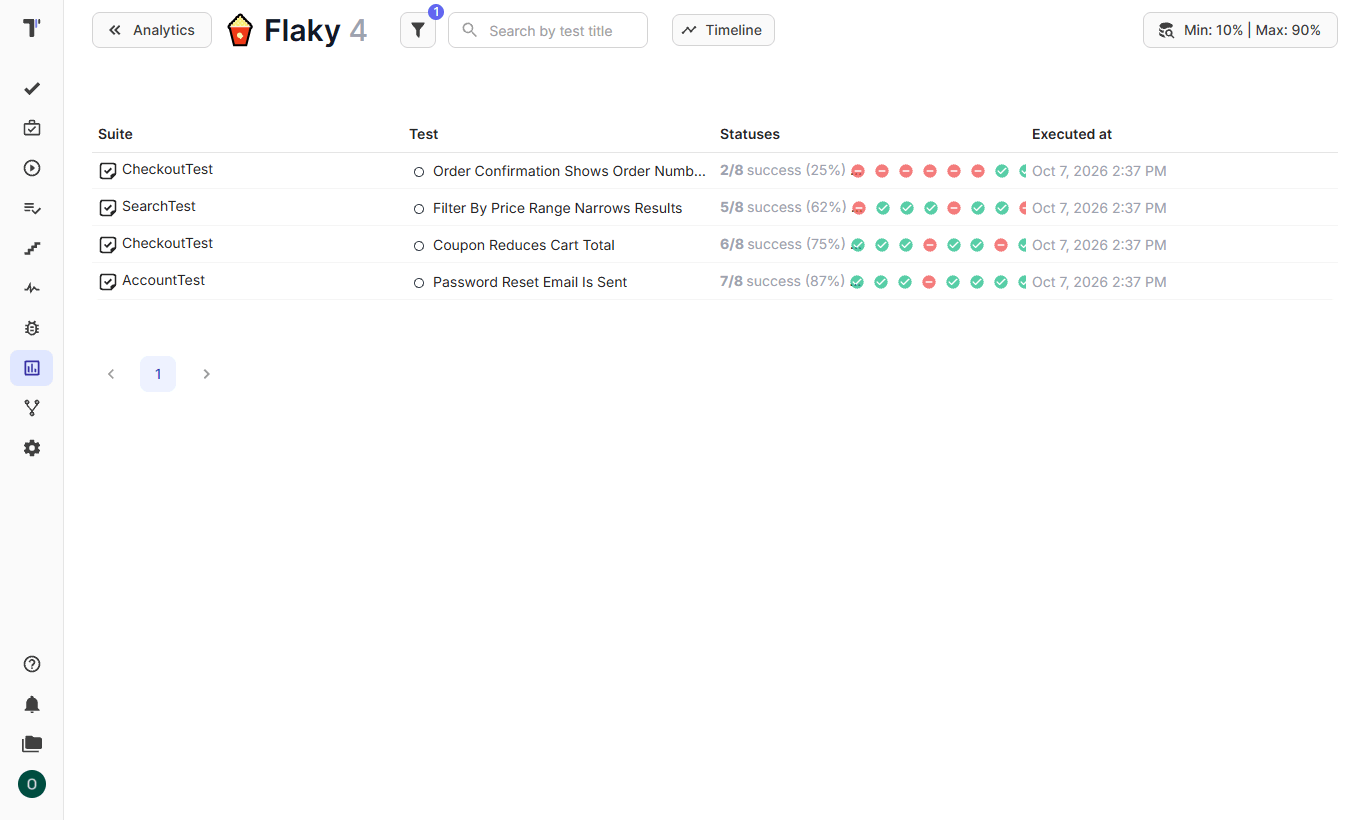
Flaky tests in the Analytics dashboard
Share Results In Jira
Developers read Jira, so test results need to reach it. The Testomat.io Jira plugin shows runs and test results inside Jira. It also supports mixed runs, where manual and automated tests report into the same run. A release report then covers both kinds of tests.
Moving From TestRail? Testomat.io imports TestRail test cases, and our guide on how to migrate from TestRail lists the steps.
Where AI Agents Fit Next To A Selenium Suite
The Selenium AI topic often means AI that writes locators. A bigger gain comes after the suite reports into a structured project, because agents can then read tests and their history. The World Quality Report found that 15% of organizations have scaled Gen AI in QA enterprise-wide, so most teams are at an early stage. Testomat.io uses that data in its AI features:
- Write Descriptions From Code. This agent on the Enterprise plan reads automated tests that lack descriptions and generates them from the code.
- Testomat.io MCP Server. It connects AI assistants such as Claude and Cursor to the project through the Public API v2. To connect it, you need the project token and the project ID from Settings, API Key.
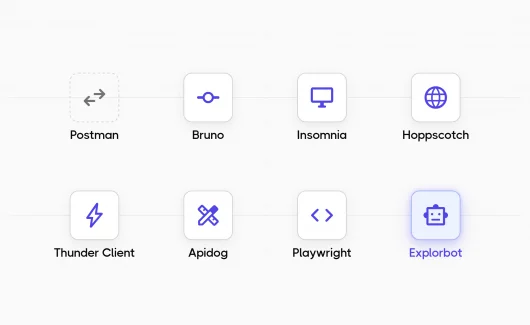
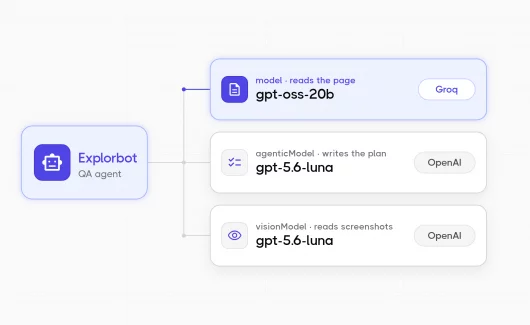
Explorbot solves a different problem. It is a free, source-available AI agent for exploratory testing by the Testomat.io team:
- It explores a running web app in a separate CI job, next to your Selenium regression suite.
- Its run reports appear in Testomat.io.
- It saves successful flows as Playwright or CodeceptJS code, so its output is separate from your Selenium code.
- It requires the Playwright library and access to an AI model. The project page estimates the cost at about $1 per hour in AI tokens with the suggested models.
Bottom Line
Selenium WebDriver testing lets your tests act like a user in a real browser, so you can check key flows before each release. A reliable suite needs explicit waits and page objects, and independent tests let you run it in parallel on Selenium Grid. Selenium leaves reporting to other tools, so your CI results need a place where the team can read them. With the Java reporter and test IDs, Testomat.io keeps the run history of each Selenium test, and its AI agents on the Enterprise plan mark flaky tests. Connect your Selenium suite to Testomat.io and read your next CI run as a report.